Table of Contents
Introduction
Soil moisture monitoring is essential for efficient irrigation, plant care, and agriculture. By integrating an Arduino with a soil moisture sensor, you can create an automated system that ensures plants receive the optimal amount of water. This guide walks through the process of setting up, coding, and troubleshooting an Arduino soil moisture sensor project, concluding with insights on its benefits and scalability.
Understanding Soil Moisture Sensors
Types of Soil Moisture Sensors
- Resistive Sensors – Measure resistance changes in the soil
- Capacitive Sensors – Detect soil moisture without direct exposure, increasing durability
Working Principle
Soil moisture sensors detect water content based on electrical conductivity. More moisture leads to lower resistance, while dry soil results in higher resistance.
Components Required
Hardware
- Arduino Uno
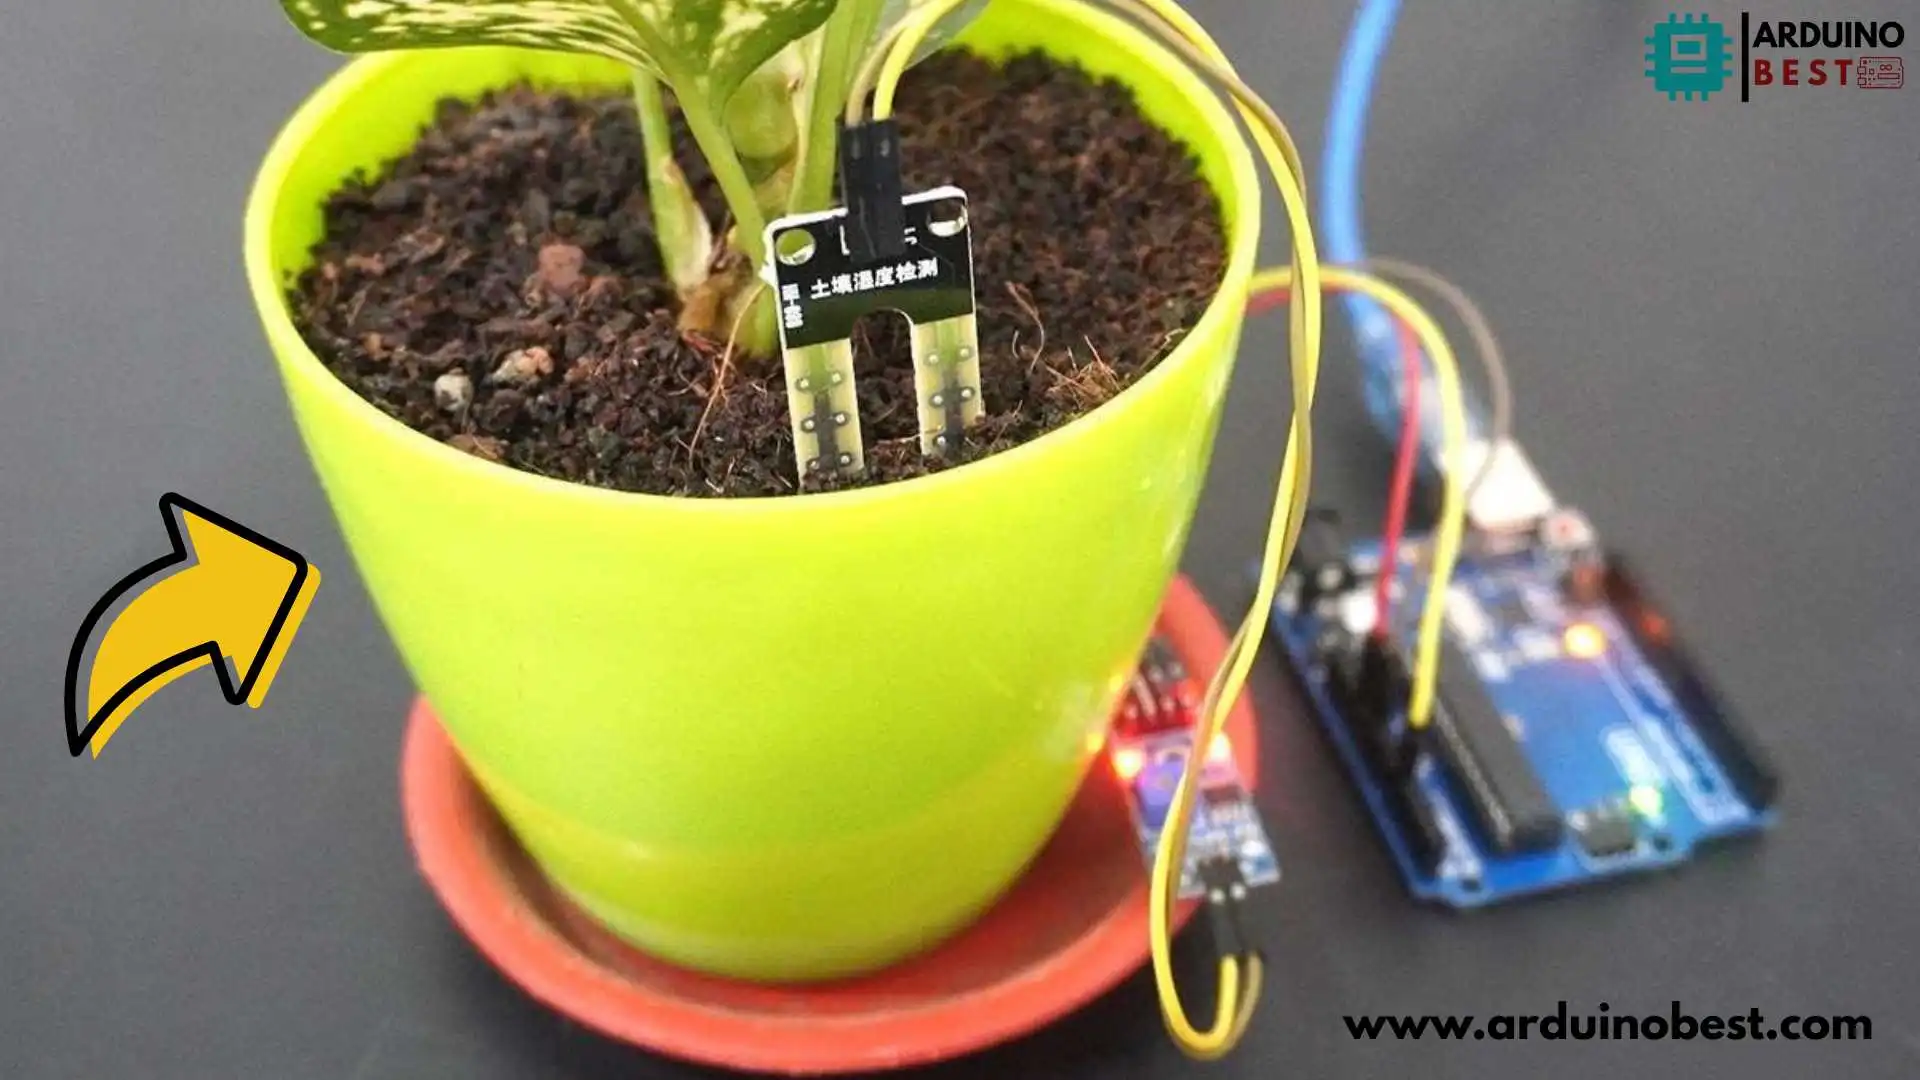
- Soil Moisture Sensor Module
- Connecting Wires
- Power Supply
- (Optional) LCD Display, Buzzer, Relay Module
Software
- Arduino IDE
- Libraries for LCD Display (if applicable)
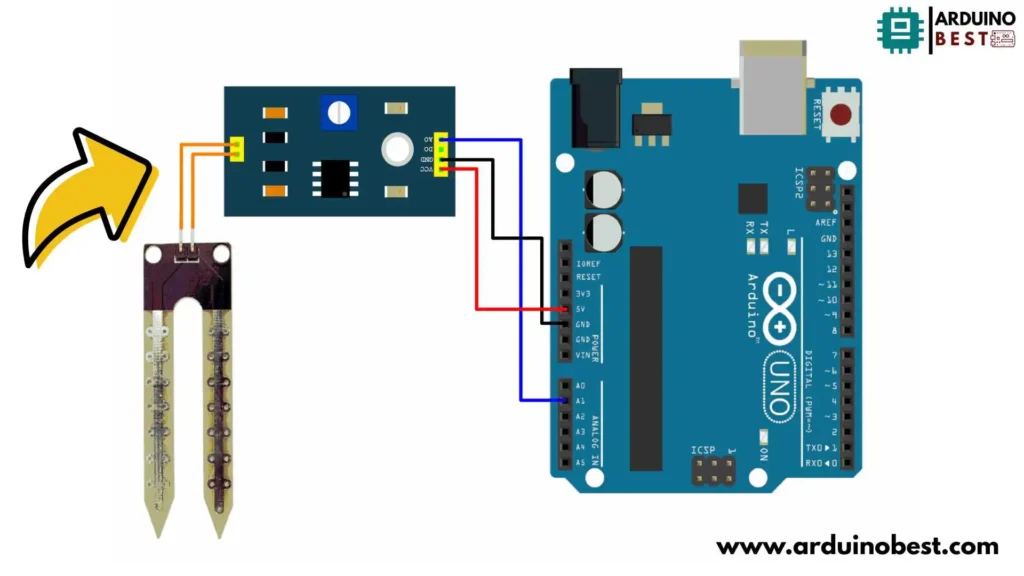
Circuit Design and Wiring

Connecting the Soil Moisture Sensor to Arduino
- Analog Output Wiring – Provides variable readings for moisture level
- Digital Output Wiring – Triggers ON/OFF based on a predefined threshold
Integrating Additional Components
- Adding an LCD for real-time display
- Connecting a relay to control irrigation systems
Programming the Arduino
Setting Up the Arduino IDE
- Download and install Arduino IDE
- Add necessary libraries (if required)
Writing the Code
const int sensor_pin = A1;	/* Soil moisture sensor O/P pin */

void setup() {
  Serial.begin(9600);	/* Define baud rate for serial communication */
}

void loop() {
  float moisture_percentage;
  int sensor_analog;
  sensor_analog = analogRead(sensor_pin);
  moisture_percentage = ( 100 - ( (sensor_analog/1023.00) * 100 ) );
  Serial.print("Moisture Percentage = ");
  Serial.print(moisture_percentage);
  Serial.print("%\n\n");
  delay(1000);
}
Uploading and Testing the Code
- Ensure correct COM port selection
- Monitor real-time readings via the Serial Monitor
Calibration and Accuracy
Calibrating the Sensor
- Record dry and wet soil readings
- Set threshold values for automation
Factors Affecting Accuracy
- Soil type and temperature influence readings
- Placement depth impacts consistency
Implementing an Automated Irrigation System
System Design
An automated watering system ensures plants receive optimal moisture without manual intervention.
Hardware Integration
- Connecting a relay module to switch water pumps
- Adding a solenoid valve for precision
Software Logic
- If soil moisture < threshold → Activate water pump
- If soil moisture > threshold → Turn off pump
Data Logging and Analysis
Storing Sensor Data
- Use an SD card module for long-term logging
- Record data in EEPROM for backup
Analyzing Data
- Identify trends for irrigation scheduling
- Adjust settings based on seasonal variations
Remote Monitoring
- Wi-Fi or Bluetooth modules for app-based tracking
Troubleshooting Common Issues
Sensor Malfunctions
- Dry readings despite wet soil? Check power connections.
- Sudden fluctuations? Reduce electrical interference.
Code Debugging
- Use
Serial.print()to diagnose errors - Ensure proper data type usage
Maintenance and Longevity
Sensor Care
- Regular cleaning to prevent corrosion
- Avoid prolonged direct water exposure for resistive sensors
System Upkeep
- Check wiring integrity periodically
- Protect electronic components from extreme weather
Upgrading Components
- Upgrade to capacitive sensors for durability
- Use solar panels for energy efficiency
FAQs
How does a soil moisture sensor work with Arduino?
It detects moisture levels using electrical conductivity and sends data to the Arduino, which processes and acts on it.
Can this system be used for large-scale farming?
Yes, by integrating multiple sensors and IoT capabilities.
How often should the sensor be calibrated?
Monthly calibration is recommended for accuracy.
Is it possible to receive alerts on my phone when soil moisture is low?
Yes, by using an ESP8266 module for IoT integration.
What are the power requirements for continuous operation?
Typically 5V; battery or solar-powered options are available for remote installations.
Conclusion
Implementing an Arduino soil moisture sensor enhances plant care and water efficiency. With automation, real-time monitoring, and data logging, this system optimizes irrigation for healthier crops and reduced water waste.
Arduino Projects:
1- Complete Guide for DHT11/DHT22 Humidity and Temperature Sensor With Arduino
2- DHT11 – Temperature and Humidity Sensor
3- DHT22 – Temperature and Humidity Sensor (more accurate than DHT11)
4- BMP180 – Barometric Pressure and Altitude Sensor
5- BMP280 – Barometric Pressure & Temperature Sensor
6- BME280 – Temperature, Humidity, and Pressure Sensor
7- Arduino Flex Sensor Controlled Robot Hand
8- Arduino ECG Heart Rate Monitor AD8232 Demo
9- Arduino NRF24L01 Wireless Joystick Robot Car
10- Arduino Force Sensor Anti-Theft Alarm System
11- Arduino NRF24L01 Transceiver Controlled Relay Light
12- Arduino Rotary Encoder Controlled LEDs: A Complete Guide

