
Table of Contents
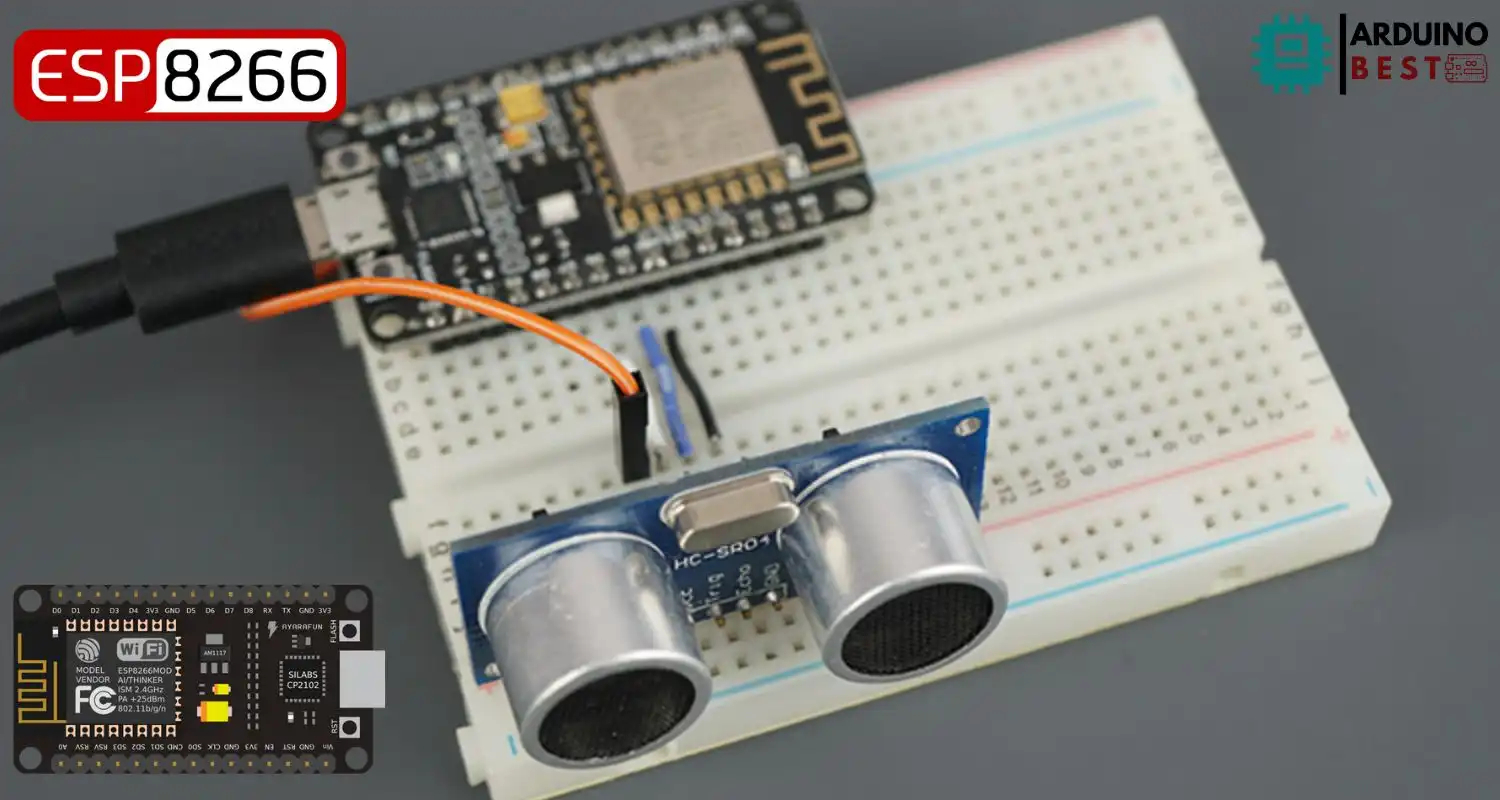
If you’re diving into IoT projects and need accurate distance measurement, combining the ESP8266 NodeMCU with the HC-SR04 Ultrasonic Sensor is a smart, budget-friendly solution. This setup allows you to create wireless distance sensors for use in automation, monitoring, or obstacle detection systems.
This guide will walk you through understanding the components, setting up the environment in Arduino IDE, writing the code, and getting live distance readings through the Serial Monitor or an optional OLED display.
Learn how to wire and program these components properly with this complete ESP8266 NodeMCU and HC-SR04 tutorial, which includes circuit diagrams and code explanations. If you’re new to ultrasonic sensors, here’s a detailed overview of the HC-SR04 sensor to understand its capabilities and limitations before you build.
Understanding the Components
ESP8266 NodeMCU Board
The NodeMCU is a low-cost microcontroller based on the ESP8266 Wi-Fi chip. It’s perfect for IoT projects due to:
- Built-in Wi-Fi support
- USB interface for easy programming
- GPIO pins for connecting sensors
- Low power consumption
HC-SR04 Ultrasonic Sensor
This sensor measures distances by sending out ultrasonic pulses and calculating the time it takes for the echo to return.
Key features:
- Range: 2 cm to 400 cm
- Accuracy: ±3 mm
- Operating voltage: 5V
- Pins: VCC, GND, TRIG, ECHO
Setting Up the Arduino IDE for ESP8266 NodeMCU
To begin programming the NodeMCU, you need to configure Arduino IDE:
Install the ESP8266 Board Package
- Open Arduino IDE
- Go to File > Preferences
- Add the URL to the Additional Boards Manager URLs:
http://arduino.esp8266.com/stable/package_esp8266com_index.json - Go to Tools > Board > Boards Manager
- Search and install esp8266
nstall Required Libraries
You’ll also need the following libraries:
NewPing(for ultrasonic sensor support)ESP8266WiFi(pre-installed with the board package)
Wiring the HC-SR04 Sensor to ESP8266 NodeMCU
Correct wiring is essential for reliable readings.
Connect the components as follows:
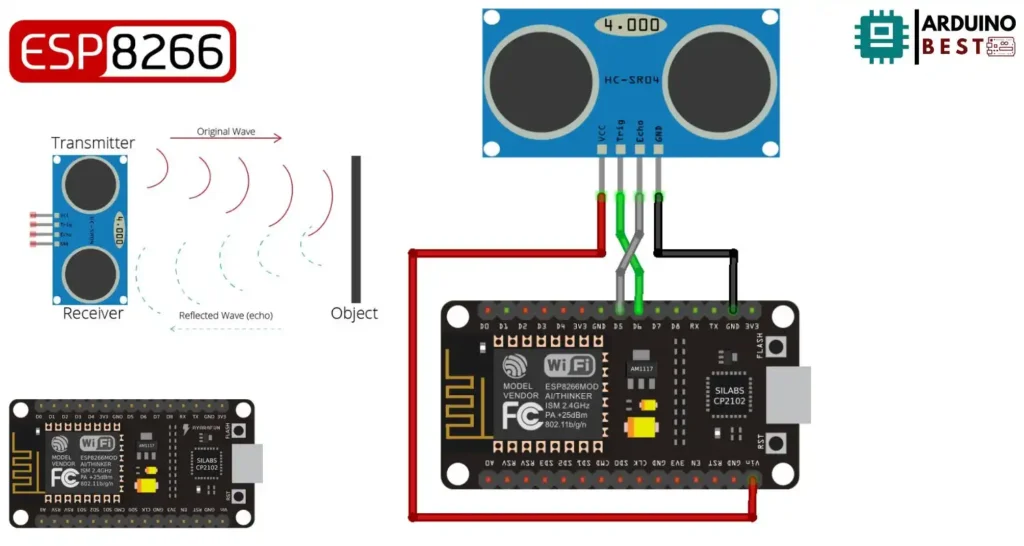
- VCC to 3.3V (Use a voltage divider or logic level converter, as HC-SR04 runs on 5V)
- GND to GND
- TRIG to D5 (GPIO14)
- ECHO to D6 (GPIO12) via a 1kΩ-2kΩ voltage divider
Here’s a step-by-step guide for wiring the ultrasonic sensor to ESP8266 for visual reference.
Programming the ESP8266 to Read Distance
Code Overview
const int trigPin = 12;
const int echoPin = 14;

//define sound velocity in cm/uS
#define SOUND_VELOCITY 0.034
#define CM_TO_INCH 0.393701

long duration;
float distanceCm;
float distanceInch;

void setup() {
  Serial.begin(115200); // Starts the serial communication
  pinMode(trigPin, OUTPUT); // Sets the trigPin as an Output
  pinMode(echoPin, INPUT); // Sets the echoPin as an Input
}

void loop() {
  // Clears the trigPin
  digitalWrite(trigPin, LOW);
  delayMicroseconds(2);
  // Sets the trigPin on HIGH state for 10 micro seconds
  digitalWrite(trigPin, HIGH);
  delayMicroseconds(10);
  digitalWrite(trigPin, LOW);

  // Reads the echoPin, returns the sound wave travel time in microseconds
  duration = pulseIn(echoPin, HIGH);

  // Calculate the distance
  distanceCm = duration * SOUND_VELOCITY/2;

  // Convert to inches
  distanceInch = distanceCm * CM_TO_INCH;

  // Prints the distance on the Serial Monitor
  Serial.print("Distance (cm): ");
  Serial.println(distanceCm);
  Serial.print("Distance (inch): ");
  Serial.println(distanceInch);

  delay(1000);
}
Explanation:
- TRIG sends the ultrasonic pulse
- ECHO receives the reflected signal
- Distance is calculated using the speed of sound (343 m/s)
Uploading the Code
- Select Board: NodeMCU 1.0 (ESP-12E Module)
- Choose the correct COM Port
- Click Upload
Viewing the OutputSerial Monitor
Once uploaded, open the Serial Monitor to see real-time distance data.
- Make sure baud rate is set to 9600
- Readings update every 500 milliseconds
Optional: Display on OLED
Want to visualize readings on an OLED screen?
- Connect an I2C OLED to SDA (D2) and SCL (D1)
- Install
Adafruit_SSD1306andAdafruit_GFXlibraries - Modify the code to include OLED display support
Real-World Applications
This sensor combo is ideal for many IoT distance sensing projects, such as:
- Smart parking assistants
- Water level monitoring in tanks
- Obstacle detection for robots or drones
- Proximity alarms or security systems
Explore more advanced integrations in this NodeMCU distance measurement project.
Troubleshooting Tips
If you’re getting inaccurate or zero readings:
- Ensure correct pin mappings in your code
- Check for loose connections or poor solder joints
- Avoid placing the sensor near reflective or absorbent materials
- Use shielded wiring to minimize interference
- Make sure the sensor is powered with adequate voltage
Frequently Asked Questions (FAQs)
Can I connect HC-SR04 directly to ESP8266?
No. The ESP8266 operates at 3.3V, while the HC-SR04 outputs 5V signals. Use a voltage divider on the ECHO pin or a level shifter.
What is the maximum range?
Up to 400 cm in ideal conditions, but accuracy drops beyond 250 cm.
How do I improve accuracy?
- Mount the sensor on a stable surface
- Keep it perpendicular to the measured surface
- Avoid obstacles in the beam path
Can I connect multiple ultrasonic sensors?
Yes, but you’ll need to manage pin assignments carefully. Consider using a multiplexer or shift register.
hy is my sensor returning 0?
Possible reasons:
- Incorrect wiring
- No object in range
- Power supply issues
- Faulty sensor
Conclusion
Using the ESP8266 NodeMCU with the HC-SR04 ultrasonic sensor in Arduino IDE is a fantastic way to build accurate, real-time distance measurement systems for your IoT projects. With just a few components and basic wiring, you can measure distances and display them through serial output or an OLED display. Now that you’ve learned the setup and code, go ahead and build your first smart sensor system.
Projects ESP8266 nodemcu
1- ESP8266 NodeMCU: A Comprehensive Guide to IoT Development
2- Control LED with ESP8266 NodeMCU: A Beginner’s Guide
3- Integrating a Joystick with ESP8266 NodeMCU: A Comprehensive Guide
4- esp8266 nodemcu with Flame Sensor
5- ESP8266 NodeMCU with Heartbeat Sensor
6- ESP8266 NodeMCU with KY-027 Magic Cup Light
7- ESP8266 NodeMCU with Hall Magnetic Sensor
8- ESP8266 NodeMCU with relay module 5v
9- ESP8266 NodeMCU with Linear Hall Sensor