Table of Contents
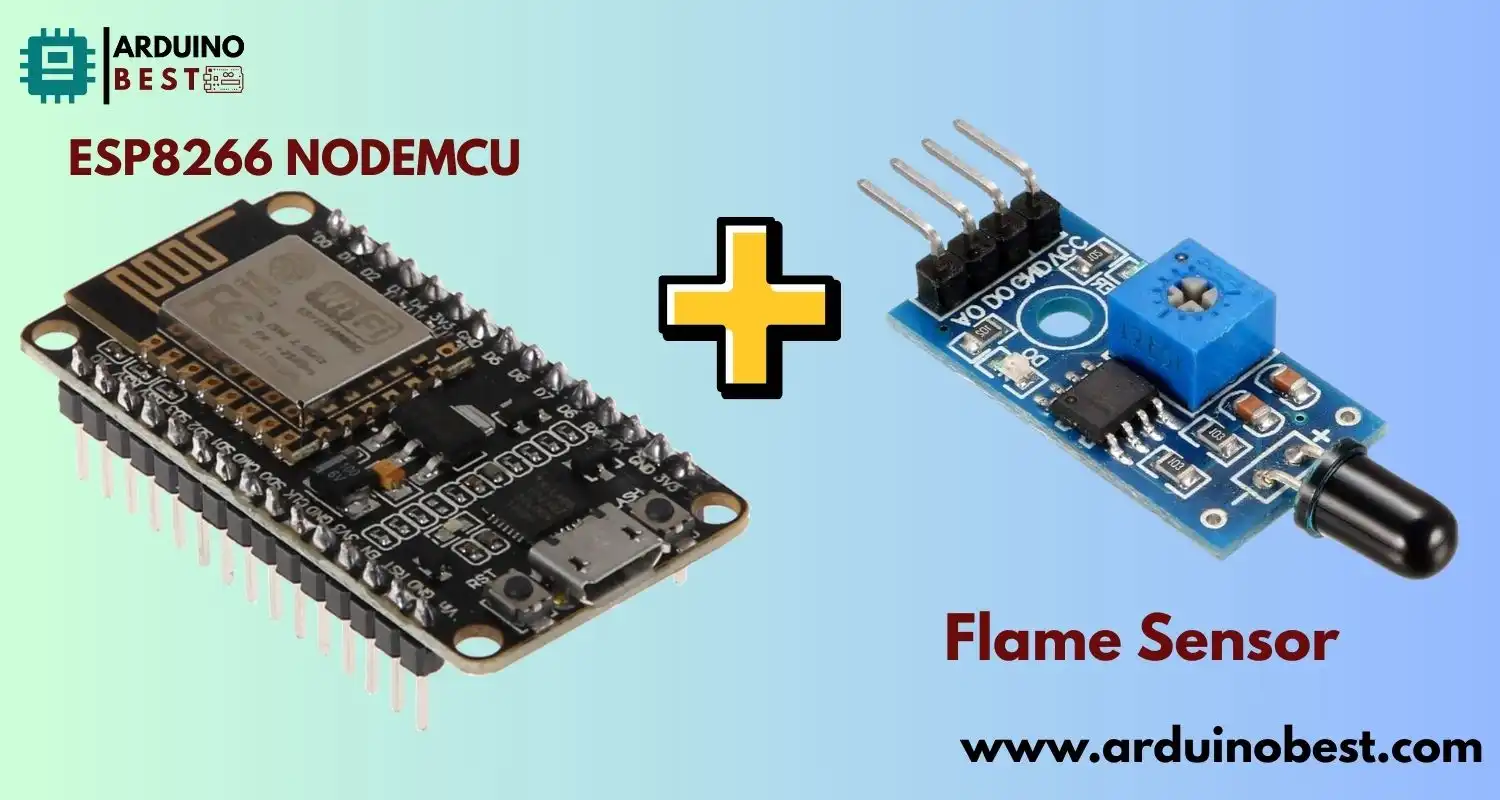
Fire safety is crucial in both residential and industrial settings, and technology can help improve how we detect and respond to flames. The esp8266 nodemcu with Flame Sensor combined with a flame sensor is a powerful solution to enhance fire detection and provide remote monitoring. In this guide, we will walk you through integrating the ESP8266 NodeMCU with a flame sensor, creating an IoT-enabled fire detection system for real-time alerts and monitoring.
Understanding the Flame Sensor and ESP8266 NodeMCU
The flame sensor is a device that detects the presence of flames based on infrared radiation. Flame sensors are widely used in fire alarm systems due to their reliability in detecting fire sources quickly. The sensor works by sensing infrared radiation emitted from flames, distinguishing it from other light sources.
The ESP8266 NodeMCU, on the other hand, is a popular IoT development board that supports Wi-Fi connectivity. Its versatility and ease of use make it an excellent choice for integrating with various sensors, including flame sensors. For more about building IoT applications using this platform, check out the Blynk IoT Platform.
When combined, the ESP8266 NodeMCU and the flame sensor offer the ability to detect fires and send alerts remotely, helping keep environments safe and monitored from a distance.
Components Needed for the Project
To set up a fire detection system using the ESP8266 NodeMCU and flame sensor, you will need a few essential components:
- ESP8266 NodeMCU: This microcontroller with built-in Wi-Fi support is used to read data from the sensor and send it to a cloud platform or trigger actions (like sending notifications).
- Flame Sensor Module: The flame sensor detects the infrared radiation emitted by flames. This module typically offers both digital output (DO) and analog output (AO) options.
- Jumper Wires: For connecting components.
- Breadboard: For prototyping and assembling the circuit.
- Optional Relay Module: To trigger an alarm when a flame is detected.
Additionally, you may want to use a cloud platform like ThingSpeak IoT Analytics Platform to monitor the data remotely and analyze the performance of your system.
Hardware Setup and Wiring
Connecting the Flame Sensor to the ESP8266 NodeMCU

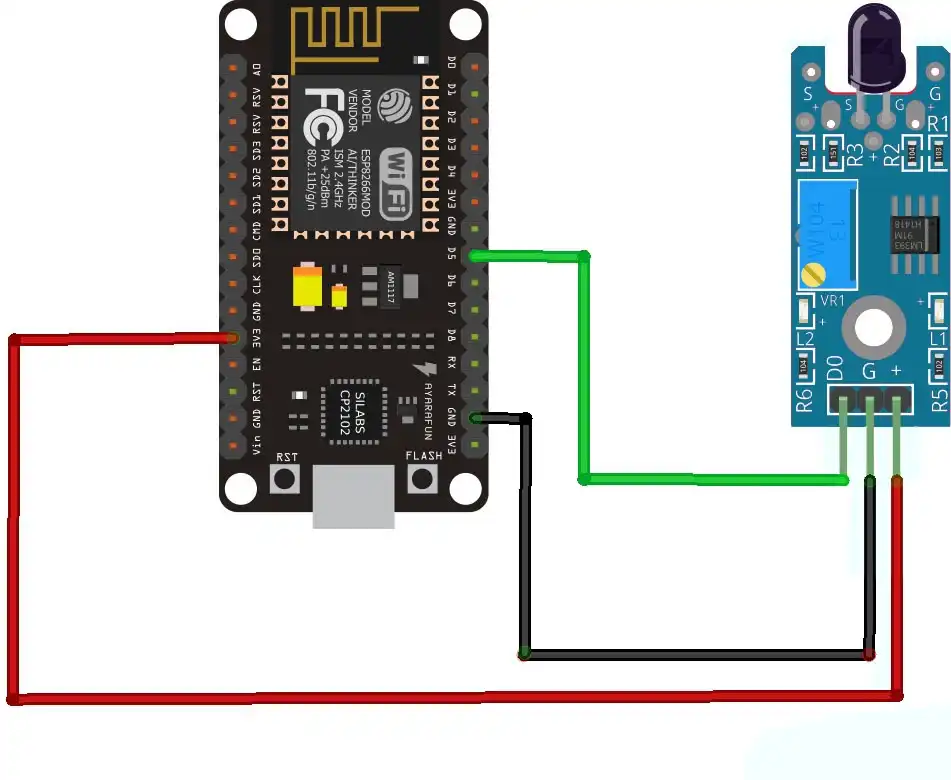
To get started, you need to connect the flame sensor to the ESP8266 NodeMCU. Here’s how you can wire it for both digital and analog signals:
- Digital Output (DO) Only:
- Connect the DO pin of the flame sensor to a GPIO pin on the ESP8266.
- The VCC pin connects to the 3.3V of the NodeMCU.
- The GND pin connects to ground.
- Analog Output (AO) Only:
- Connect the AO pin to an analog input pin on the ESP8266.
- The rest of the connections (VCC and GND) remain the same.
- Both Digital and Analog Output: You can also wire both DO and AO pins to the ESP8266 for more versatile detection and monitoring.
Make sure to check the sensor’s voltage requirements and ensure that your ESP8266 is capable of handling the necessary current, especially if you use additional peripherals.
Software Setup
Once your hardware is set up, it’s time to configure the software. The most common way to program the ESP8266 NodeMCU is using the Arduino IDE. Here’s a step-by-step guide:
Setting Up the Arduino IDE for ESP8266
- Install the ESP8266 board definitions in the Arduino IDE.
- Select the appropriate board model (NodeMCU) under Tools > Board.
- Choose the correct COM port.
Programming the ESP8266
Now, let’s write the code to read data from the flame sensor and send alerts or data. Here’s a simple example of reading from the digital output (DO):
cppCopyEditint flamePin = D2; // Digital Pin connected to the DO pin of the flame sensor

void setup() {
  pinMode(flamePin, INPUT);
  Serial.begin(9600);
}

void loop() {
  int flameState = digitalRead(flamePin);
  if (flameState == HIGH) {
    Serial.println("Flame detected!");
    // Add your notification or alert code here
  }
  delay(1000);
}
For analog detection, the code will read continuous analog values and compare them with a set threshold to detect fire.
Once your code is written, you can upload it to the ESP8266 through the Arduino IDE, and the flame sensor will begin detecting flames.
Fire Detection Logic: Digital vs. Analog
Digital Detection Method
The digital method provides a simple approach to detecting flames. The DO pin of the flame sensor sends a high signal when a flame is detected. You can set a threshold to decide when the flame sensor should trigger an alert.
Sample Code for Digital Detection:
cppCopyEditint flamePin = D2; // Digital Pin
if (digitalRead(flamePin) == HIGH) {
  // Flame detected: Trigger action
}
Analog Detection Method
The analog method reads a continuous range of values from the AO pin. This method provides more granular data, allowing you to adjust the sensitivity level to different fire sources. The analog sensor can provide values ranging from 0 to 1023, depending on the intensity of the detected flame.
Sample Code for Analog Detection:
cppCopyEditint flamePin = A0; // Analog Pin
int sensorValue = analogRead(flamePin);
if (sensorValue > threshold) {
  // Flame detected: Trigger action
}
Integrating IoT Features: Sending Alerts and Monitoring
Now, let’s add some IoT functionality. The ESP8266 NodeMCU can be connected to platforms like ThingSpeak or Blynk to send sensor data for analysis and display, and even trigger mobile notifications when a flame is detected.
Sending Data to Cloud Platforms
- ThingSpeak: This platform allows you to collect, visualize, and analyze sensor data. You can set up a ThingSpeak channel to store flame sensor readings and view real-time data on a web dashboard.
- Blynk: You can use the Blynk app to receive alerts when a flame is detected. It’s easy to create a custom mobile dashboard with notifications for flame detection events.
Check out the full setup guides for ThingSpeak and Blynk for more detailed instructions on how to integrate your flame sensor with these platforms.
Troubleshooting and Calibration
Sometimes, things don’t go as planned. If you’re facing issues with your flame sensor, here are some tips:
- Sensor Not Detecting Flames: Check your wiring and ensure the sensor is properly powered. If you’re using the analog sensor, verify that the sensor’s sensitivity is appropriately set.
- Unstable Readings: Ensure there is no interference from other light sources. Try testing the sensor in a darker environment to ensure accurate readings.
- Calibration: If you find that the sensor is either too sensitive or not sensitive enough, adjust the threshold values in your code. For analog sensors, you can fine-tune the sensitivity by experimenting with different ranges of analog values.
FAQs
- What is the detection range of the flame sensor?
- The typical detection range for most flame sensors is around 1-3 meters. This can vary depending on the sensor model.
- Can I use multiple flame sensors with the ESP8266 NodeMCU?
- Yes, the ESP8266 NodeMCU has several GPIO pins, so you can connect multiple flame sensors. However, you’ll need to manage the pin usage and ensure that your code handles multiple sensor inputs.
- How do I calibrate the flame sensor for different environments?
- You can adjust the threshold values in your code to change the sensor’s sensitivity. Test the sensor in various lighting conditions to find the best calibration.
- Is this system compatible with home automation?
- Yes, with platforms like Home Assistant, you can integrate this flame detection system with your home automation setup for automated responses like turning off devices when flames are detected.
- What is the power consumption of the ESP8266 NodeMCU and flame sensor?
- The ESP8266 NodeMCU typically consumes around 160-300mA, while the flame sensor uses very little power (around 50-100mA), making the system quite efficient.
Conclusion
Integrating the ESP8266 NodeMCU with a flame sensor provides a powerful foundation for creating advanced IoT-based fire detection systems. This combination allows for real-time monitoring, cloud integration, and remote alerts, which significantly enhance fire safety by enabling immediate responses to potential fire hazards. Whether you’re working on a basic prototype or developing a full-scale fire alarm system, this setup offers both affordability and reliability without compromising performance.
By incorporating platforms like ThingSpeak and Blynk, you can further enhance your system’s capabilities, such as sending mobile notifications and analyzing sensor data remotely. Additionally, the flexibility of the ESP8266 NodeMCU allows for easy expansion to include additional sensors and IoT features.
It’s important to fine-tune your flame sensor for accuracy and sensitivity, ensuring it performs optimally in various environments. With proper calibration and setup, your fire detection system will provide early warnings, giving you time to take action before a fire becomes uncontrollable.
As IoT continues to grow, implementing smart fire detection systems with the ESP8266 NodeMCU and flame sensors is a proactive step toward creating safer, more intelligent environments. Embrace the power of IoT, and stay ahead in ensuring fire safety with real-time monitoring and alerts.
Projects ESP8266 nodemcu :
1- ESP8266 NodeMCU: A Comprehensive Guide to IoT Development
2- Control LED with ESP8266 NodeMCU: A Beginner’s Guide
3- Integrating a Joystick with ESP8266 NodeMCU: A Comprehensive Guide

