
Table of Contents
Introduction
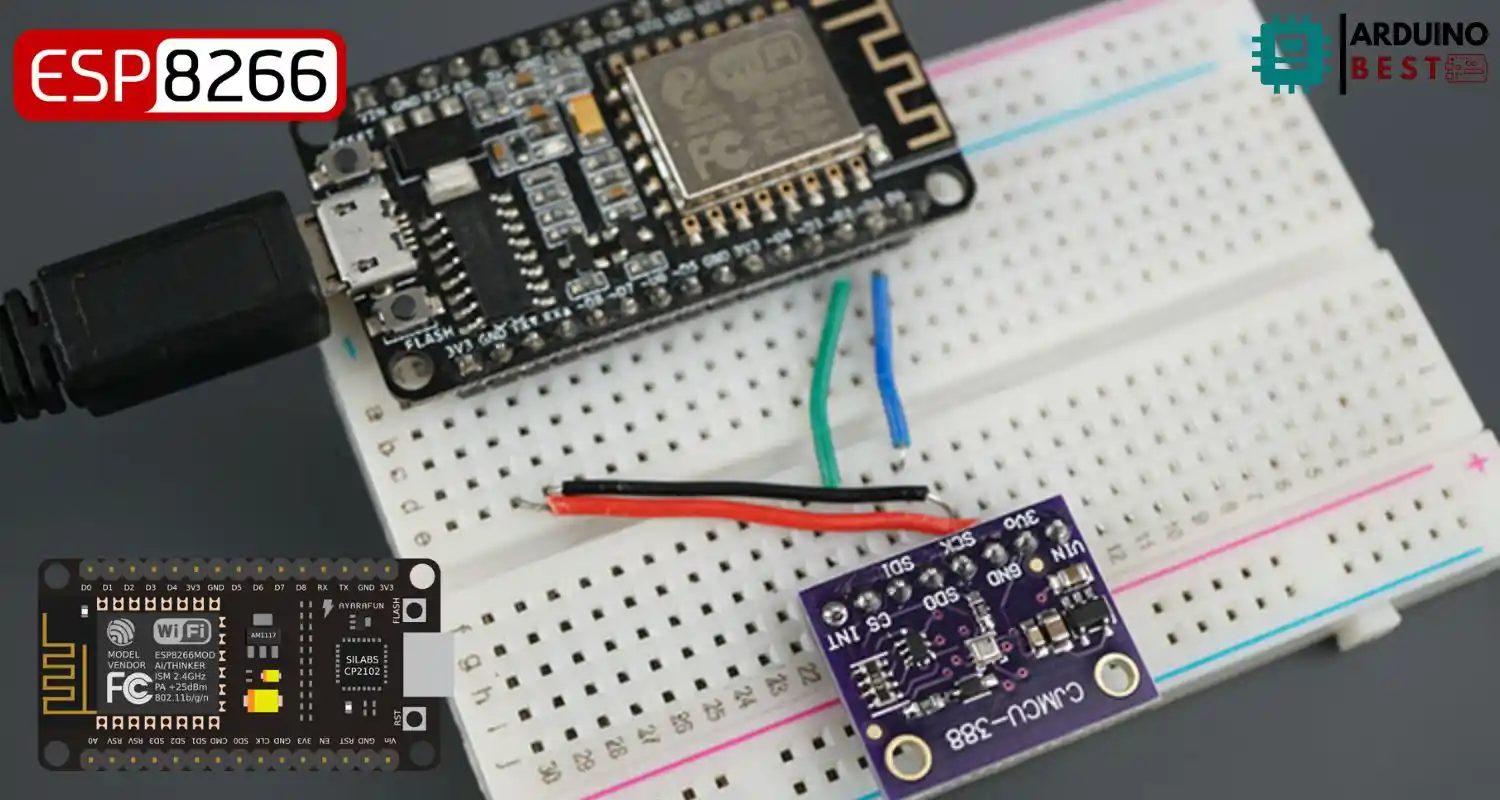
The ESP8266 NodeMCU with BMP388 Barometric/Altimeter Sensor is a powerful duo for building smart environmental sensing applications. This combo enables real-time altitude, pressure, and temperature measurements for various IoT projects, from weather stations to drone navigation systems.
In this guide, we’ll explore everything from wiring and programming to displaying sensor data on a web server. Whether you’re a hobbyist or a professional, this tutorial covers all you need to know to integrate the BMP388 sensor with the ESP8266 NodeMCU.
Understanding the BMP388 Sensor
The BMP388 is a high-precision, low-power sensor capable of measuring:
- Pressure (300 to 1250 hPa)
- Temperature (-40 to +85°C)
- Altitude with high relative accuracy (approx. ±0.5 m)
It communicates via I2C or SPI, making it flexible for different microcontroller setups. It is the successor to the BMP280, offering better accuracy and lower power consumption. Learn more about the specifications in Adafruit’s BMP388 Sensor Details.
ESP8266 NodeMCU Overview
The ESP8266 NodeMCU is a Wi-Fi-enabled development board with a powerful 32-bit processor. It’s widely used in IoT due to its ease of programming, rich GPIO support, and wireless capabilities.
Its compatibility with sensors like the BMP388 makes it ideal for projects requiring real-time data and remote monitoring. You can find a variety of use cases and guides in this ESP8266 tutorial collection.
Required Components and Tools
- ESP8266 NodeMCU board
- BMP388 sensor module
- Breadboard and jumper wires
- USB cable
- Optional: Soldering kit and multimeter
Wiring the BMP388 to ESP8266 NodeMCU
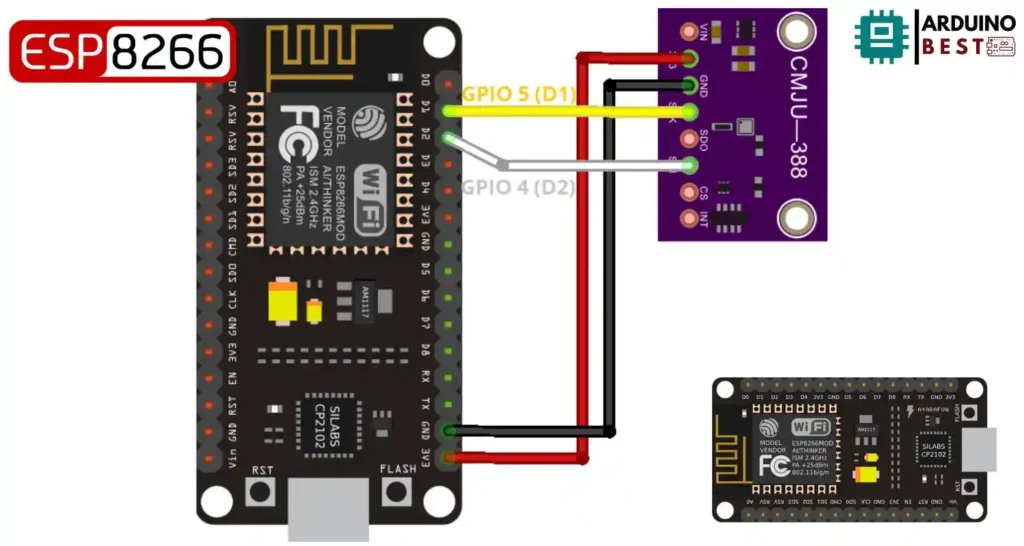
Use the I2C interface for simplicity. The wiring is as follows:
- BMP388 SDA → ESP8266 D2 (GPIO4)
- BMP388 SCL → ESP8266 D1 (GPIO5)
- VIN → 3.3V
- GND → GND
Ensure your connections are secure and consistent with the sensor’s voltage requirements.
Setting Up the Arduino IDE
To program the ESP8266, configure the Arduino IDE:
- Install the ESP8266 board via Boards Manager
- Add the board URL:
http://arduino.esp8266.com/stable/package_esp8266com_index.json - Install libraries:
- Adafruit BMP3XX Library
- Adafruit Unified Sensor Library
Select the right board (NodeMCU 1.0) and COM port before uploading any code.
Programming the ESP8266 for BMP388
#include <Wire.h>
#include <SPI.h>
#include <Adafruit_Sensor.h>
#include "Adafruit_BMP3XX.h"

#define BMP_SCK 14
#define BMP_MISO 12
#define BMP_MOSI 13
#define BMP_CS 15

#define SEALEVELPRESSURE_HPA (1013.25)

Adafruit_BMP3XX bmp;

void setup() {
  Serial.begin(115200);
  while (!Serial);
  Serial.println("Adafruit BMP388 / BMP390 test");

  if (!bmp.begin_I2C()) {   // hardware I2C mode, can pass in address & alt Wire
  //if (! bmp.begin_SPI(BMP_CS)) {  // hardware SPI mode
  //if (! bmp.begin_SPI(BMP_CS, BMP_SCK, BMP_MISO, BMP_MOSI)) {  // software SPI mode
    Serial.println("Could not find a valid BMP3 sensor, check wiring!");
    while (1);
  }

  // Set up oversampling and filter initialization
  bmp.setTemperatureOversampling(BMP3_OVERSAMPLING_8X);
  bmp.setPressureOversampling(BMP3_OVERSAMPLING_4X);
  bmp.setIIRFilterCoeff(BMP3_IIR_FILTER_COEFF_3);
  bmp.setOutputDataRate(BMP3_ODR_50_HZ);
}

void loop() {
  if (! bmp.performReading()) {
    Serial.println("Failed to perform reading :(");
    return;
  }
  Serial.print("Temperature = ");
  Serial.print(bmp.temperature);
  Serial.println(" *C");

  Serial.print("Pressure = ");
  Serial.print(bmp.pressure / 100.0);
  Serial.println(" hPa");

  Serial.print("Approx. Altitude = ");
  Serial.print(bmp.readAltitude(SEALEVELPRESSURE_HPA));
  Serial.println(" m");

  Serial.println();
  delay(2000);
}
Here’s how to read sensor values:
- Initialize the BMP388 sensor in your code
- Read pressure, temperature, and altitude data
- Output to the Serial Monitor
Example sketch functions:
bmp.begin()to initializebmp.readPressure(),bmp.readTemperature()for readings- Display using
Serial.print()
Handle errors by checking sensor responses before proceeding with data logging.
Creating a Web Server to Display Sensor Data
Turn your ESP8266 into a web server to visualize data remotely:
- Connect the ESP8266 to Wi-Fi
- Set up a basic web server
- Use HTML to create a page displaying:
- Pressure in hPa
- Temperature in °C
- Altitude in meters
Use AJAX to update readings without page reload. Style the page with CSS for a clean interface and make it responsive for mobile devices.
Troubleshooting Common Issues
- Sensor not detected
- Check I2C wiring and sensor address
- Inaccurate readings
- Ensure stable environment
- Apply calibration if necessary
- Wi-Fi connection fails
- Double-check SSID and password
- Ensure the power supply is adequate
Applications and Project Ideas
- DIY weather monitoring station
- Drone altitude tracking
- Indoor navigation systems
- Environmental data logging
- Smart farming or HVAC systems
FAQs
What is the precision of the BMP388 sensor?
The sensor offers a relative accuracy of ±0.08 hPa, translating to about ±0.5 meters in altitude.
Can I use SPI instead of I2C with BMP388?
Yes, it supports both SPI and I2C interfaces for flexibility.
How do I calibrate the BMP388 sensor?
Compare its readings with a known reference and adjust your code accordingly.
Is it possible to log data to an SD card?
Yes, by integrating an SD card module, you can log readings locally.
Can BMP388 be used for indoor applications?
Absolutely, it works well for indoor air pressure and environmental tracking.
Conclusion
Combining the ESP8266 NodeMCU with the BMP388 sensor opens up a wide array of real-time sensing applications. With simple wiring, a few libraries, and a bit of code, you can start building your own IoT solutions. Explore the endless possibilities and build smarter systems today.
Projects ESP8266 nodemcu
1- ESP8266 NodeMCU: A Comprehensive Guide to IoT Development
2- Control LED with ESP8266 NodeMCU: A Beginner’s Guide
3- Integrating a Joystick with ESP8266 NodeMCU: A Comprehensive Guide
4- esp8266 nodemcu with Flame Sensor
5- ESP8266 NodeMCU with Heartbeat Sensor
6- ESP8266 NodeMCU with KY-027 Magic Cup Light
7- ESP8266 NodeMCU with Hall Magnetic Sensor
8- ESP8266 NodeMCU with relay module 5v
9- ESP8266 NodeMCU with Linear Hall Sensor