
Table of Contents
In the world of IoT and smart devices, ambient light sensing plays a crucial role in automation, energy efficiency, and responsive design. If you’re working on an IoT project using the ESP8266 NodeMCU, integrating it with a BH1750 Ambient Light Sensor can be a powerful way to capture and act on real-time light data.
This guide walks you through everything from understanding the BH1750 sensor and wiring it to your ESP8266, to writing and uploading the code, interpreting lux readings, and building advanced applications.
Before jumping in, make sure to download the BH1750 Arduino Library and refer to the ESP8266 Arduino Core Documentation to set up your development environment properly.
Understanding the BH1750 Ambient Light Sensor
The BH1750 is a digital light sensor that measures the intensity of ambient light in lux. It communicates via the I2C protocol and offers high resolution and accuracy, making it ideal for light-based automation.
Key features include:
- 16-bit resolution with lux range from 1 to 65535
- Low power consumption
- I2C interface with selectable address (0x23 or 0x5C)
- Integrated ADC for precise measurement
- Suitable for indoor and outdoor light detection
You can explore the technical specs in the BH1750 datasheet to understand how the sensor functions in various conditions.
Overview of ESP8266 NodeMCU
The ESP8266 NodeMCU is a Wi-Fi-enabled microcontroller that has become a staple for IoT developers. It features a built-in TCP/IP stack and GPIO pins for easy hardware interfacing.
Notable specs include:
- 80/160 MHz CPU clock speed
- GPIO, I2C, UART, SPI support
- Compatible with Arduino IDE
- USB-powered with built-in voltage regulation
Learn more about pin configurations using this ESP8266 NodeMCU Pinout Reference.
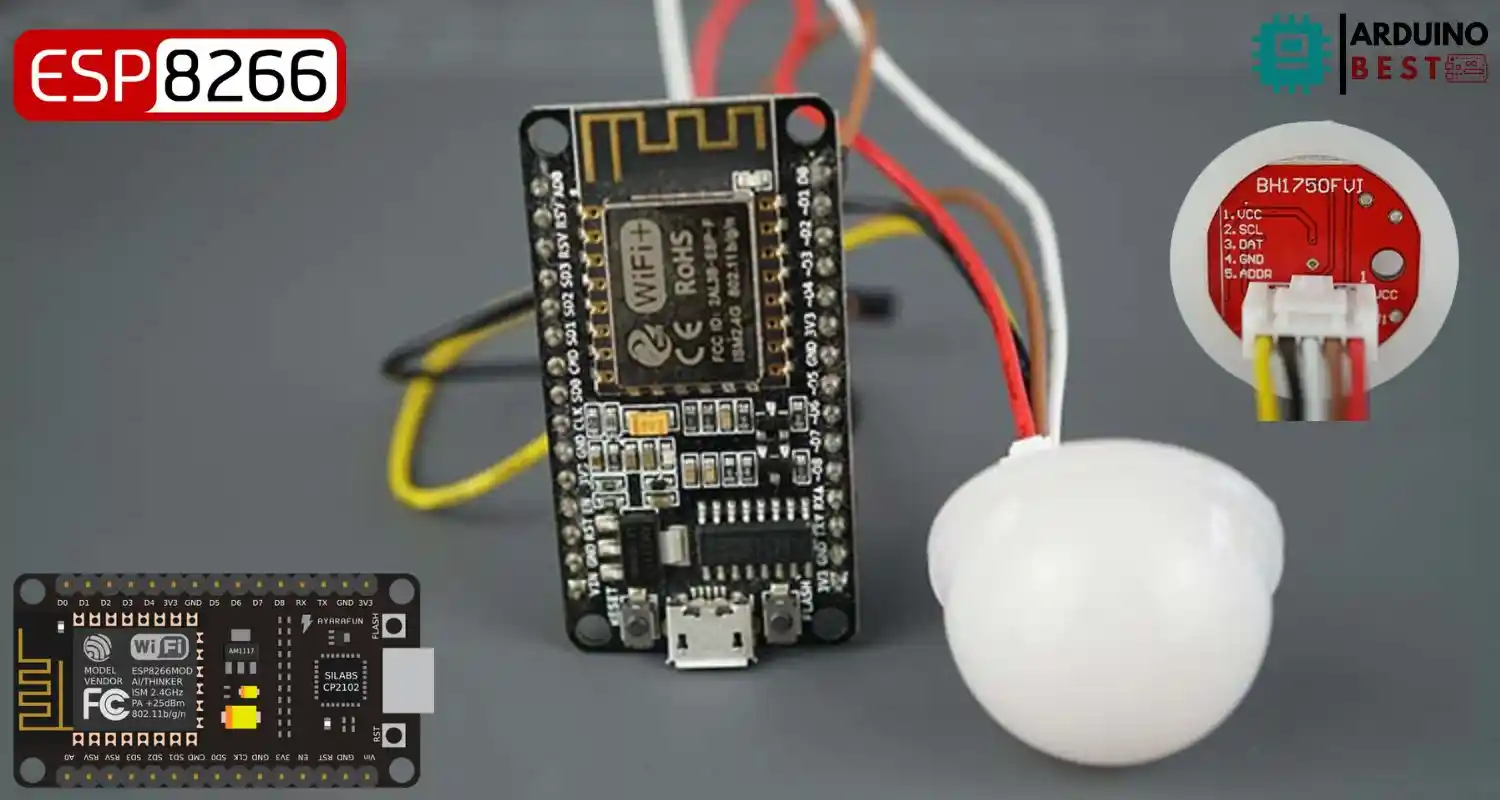
Wiring the BH1750 to ESP8266 NodeMCU
Connecting the BH1750 sensor to the ESP8266 NodeMCU is straightforward using the I2C interface.
Components Needed:
- ESP8266 NodeMCU board
- BH1750 light sensor module
- Jumper wires
- Breadboard (optional)
Wiring Instructions:
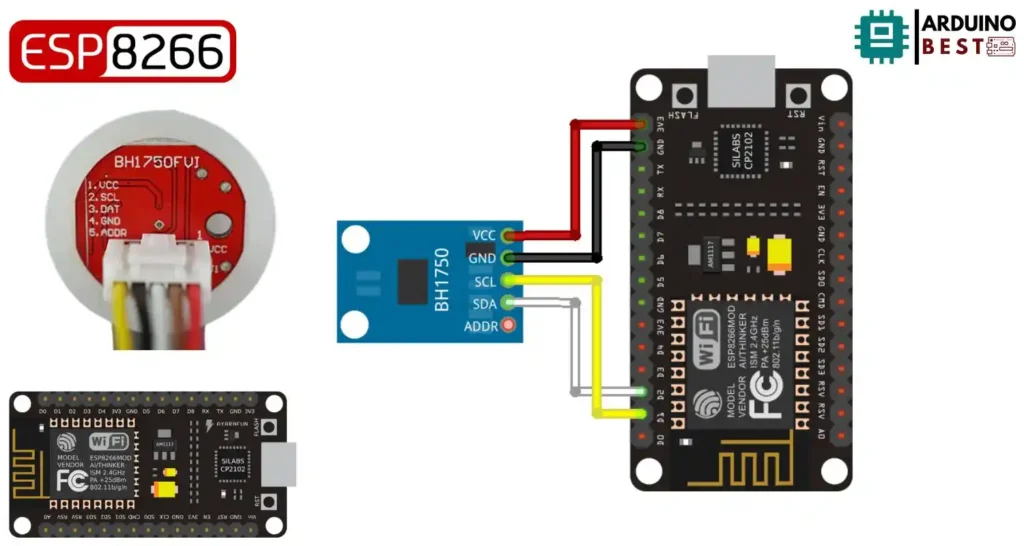
- VCC to 3.3V
- GND to GND
- SDA to D2 (GPIO4)
- SCL to D1 (GPIO5)
Make sure your sensor address matches the library setup—default is usually 0x23.
Setting Up the Arduino IDE
To start coding, install the necessary software and libraries:
- Open Arduino IDE
- Go to File > Preferences, and add ESP8266 board manager URL
- Install ESP8266 by ESP8266 Community from the Board Manager
- Install the BH1750 sensor library from Library Manager
Set the board to NodeMCU 1.0 (ESP-12E Module) and select the correct port before uploading.
Writing and Uploading the Code
Here’s a sample script to read lux values using the BH1750 sensor:
#include <Wire.h>
#include <BH1750.h>

BH1750 lightMeter;

void setup(){
  Serial.begin(9600);

  // Initialize the I2C bus (BH1750 library doesn't do this automatically)
  Wire.begin();
  // On esp8266 you can select SCL and SDA pins using Wire.begin(D4, D3);
  // For Wemos / Lolin D1 Mini Pro and the Ambient Light shield use Wire.begin(D2, D1);

  lightMeter.begin();

  Serial.println(F("BH1750 Test begin"));
}

void loop() {
  float lux = lightMeter.readLightLevel();
  Serial.print("Light: ");
  Serial.print(lux);
  Serial.println(" lx");
  delay(1000);
}
What the code does:
- Initializes I2C communication
- Starts the BH1750 sensor
- Reads lux levels every second
- Displays output on Serial Monitor
Interpreting Sensor Data
The lux reading represents the intensity of ambient light:
- 0–50 lux: Dim light (e.g., night or dark room)
- 300–500 lux: Office lighting
- 10,000+ lux: Daylight outdoors
Be aware that sunlight, shadows, or reflective surfaces can skew readings. You can implement basic calibration by averaging multiple readings.
Integrating with IoT Platforms
Once you’re reading light levels, you can extend the project into a smart system:
- Send data to Blynk or ThingSpeak for visualization
- Use MQTT to transmit readings to a home automation dashboard
- Host a mini web server on the ESP8266 to show real-time data
This opens the door to smart lighting control, data logging, or motion-triggered light response.
Troubleshooting Common Issues
If you’re having trouble getting the sensor to work, check the following:
- Confirm I2C wiring (SDA/SCL match)
- Check power supply voltage (must be 3.3V)
- Verify I2C address in the code (0x23 vs 0x5C)
- Use
Wire.begin()with correct pin assignments for ESP8266 - Try scanning I2C devices using an I2C scanner sketch
Advanced Applications and Projects
You can build more complex projects by combining the BH1750 sensor with other modules:
- Create a DIY Lux Meter using OLED or LCD display
- Automate curtains or lighting systems based on ambient light
- Pair with temperature and humidity sensors for full environmental monitoring
Use creative logic to drive actuators or smart home relays based on lux values.
FAQs
How do I connect the BH1750 to the ESP8266?
Use the I2C pins: connect SDA to D2 and SCL to D1. Supply 3.3V power.
What is the default I2C address of the BH1750?
The default address is 0x23. If ADDR pin is pulled high, it becomes 0x5C.
Can I use multiple BH1750 sensors with one ESP8266?
Yes, but you need to change the address of one or use an I2C multiplexer.
How do I calibrate the BH1750 sensor?
Use a reference lux meter to compare readings and apply offset in code.
What is the maximum I2C distance for the BH1750?
I2C is designed for short distances—keep wiring under 1 meter for best results.
Conclusion
Integrating the BH1750 Ambient Light Sensor with an ESP8266 NodeMCU is a practical way to monitor light levels in real-time and power intelligent automation. From simple monitoring setups to full IoT systems, this combination offers both flexibility and precision. Whether you’re building a home automation system or exploring sensor integration, the ESP8266 and BH1750 provide a great starting point.
Projects ESP8266 nodemcu
1- ESP8266 NodeMCU: A Comprehensive Guide to IoT Development
2- Control LED with ESP8266 NodeMCU: A Beginner’s Guide
3- Integrating a Joystick with ESP8266 NodeMCU: A Comprehensive Guide
4- esp8266 nodemcu with Flame Sensor
5- ESP8266 NodeMCU with Heartbeat Sensor
6- ESP8266 NodeMCU with KY-027 Magic Cup Light
7- ESP8266 NodeMCU with Hall Magnetic Sensor
8- ESP8266 NodeMCU with relay module 5v
9- ESP8266 NodeMCU with Linear Hall Sensor