
Table of Contents
Introduction
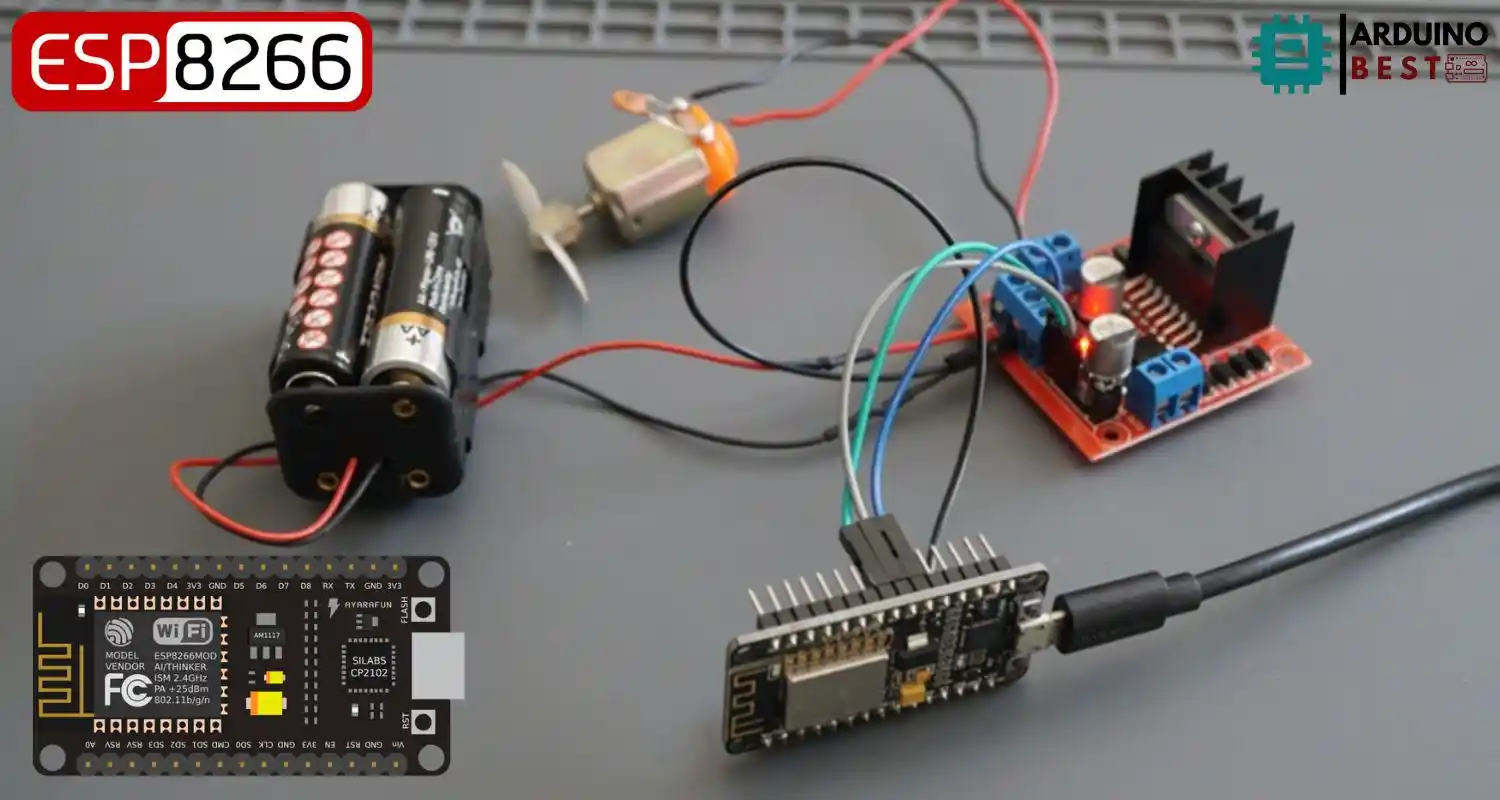
The ESP8266 NodeMCU is a popular Wi-Fi-enabled microcontroller, well-known for its low cost and versatility in Internet of Things (IoT) applications. One powerful application is building a web server to remotely control a DC motor. This capability opens the door for projects like home automation, robotics, and remote-controlled systems.
In this tutorial, you’ll learn how to set up a web interface using the ESP8266 NodeMCU to control a DC motor‘s direction and speed. We will use a motor driver, design a responsive web server, and explore real-world applications. For a comprehensive guide on this subject, refer to this ESP8266 motor control tutorial. Also, this resource explains PWM-based speed control.
Understanding the Components
ESP8266 NodeMCU
- Integrated Wi-Fi and TCP/IP stack
- Multiple GPIO pins for output control
- Supports PWM (Pulse Width Modulation) for speed control
DC Motors
- Converts electrical energy into mechanical motion
- Commonly used in robotics and automation
- Controlled through voltage polarity and power
L298N Motor Driver
- Dual H-Bridge driver for controlling direction
- Provides sufficient current to run motors safely
- Connects directly to the ESP8266 and motor
Setting Up the Development Environment
Installing Arduino IDE
- Download from the official Arduino website
- Install and open the IDE
Adding ESP8266 Board to Arduino IDE
- Go to File > Preferences > Additional Board Manager URLs
- Add:
http://arduino.esp8266.com/stable/package_esp8266com_index.json - Install the ESP8266 board via Board Manager
Required Libraries
- ESPAsyncWebServer
- ESPAsyncTCP
- Install through Library Manager or GitHub repositories
Circuit Diagram and Hardware Connections
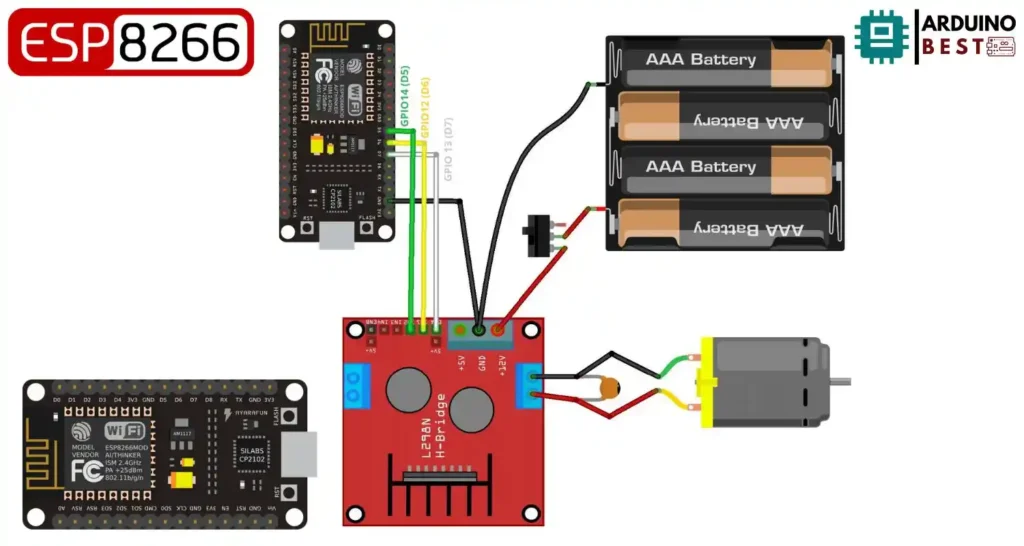
- Connect IN1 and IN2 of L298N to two GPIO pins on ESP8266
- Connect EN1 (Enable pin) to a PWM-capable GPIO
- Power L298N with external 9V battery or power adapter
- Ensure motor ground, L298N ground, and ESP8266 ground are connected
Pin Example:
- GPIO5 -> IN1
- GPIO4 -> IN2
- GPIO0 (PWM) -> ENA
Writing the Arduino Sketch
Initializing Libraries and Variables
#include <Arduino.h>
#include <ESP8266WiFi.h>
#include <ESPAsyncTCP.h>
#include <ESPAsyncWebServer.h>
#include <LittleFS.h>

// Motor A pins
int motor1Pin1 = 12;
int motor1Pin2 = 14;
int enable1Pin = 13;

// Replace with your network credentials
const char* ssid = "REPLACE_WITH_YOUR_SSID";
const char* password = "REPLACE_WITH_YOUR_PASSWORD";

// Create AsyncWebServer object on port 80
AsyncWebServer server(80);

// Initialize LittleFS
void initFS() {
  if (!LittleFS.begin()) {
    Serial.println("An error has occurred while mounting LittleFS");
  }
  else {
    Serial.println("LittleFS mounted successfully");
  }
}

void initWiFi() {
  WiFi.mode(WIFI_STA);
  WiFi.begin(ssid, password);
  Serial.println("Connecting to WiFi ..");
  while (WiFi.status() != WL_CONNECTED) {
    Serial.print('.');
    delay(1000);
  }
  Serial.println(WiFi.localIP());
}

void moveForward(){
  Serial.println("Moving Forward");
  digitalWrite(enable1Pin, HIGH);
  digitalWrite(motor1Pin1, LOW);
  digitalWrite(motor1Pin2, HIGH);
}

void moveBackward(){
  Serial.println("Moving Backward");
  digitalWrite(enable1Pin, HIGH);
  digitalWrite(motor1Pin1, HIGH);
  digitalWrite(motor1Pin2, LOW);
}

void stopMotor(){
  digitalWrite(enable1Pin, LOW);
  digitalWrite(motor1Pin1, LOW);
  digitalWrite(motor1Pin2, LOW);
}

void setup() {
  Serial.begin(115200);

  // Set motor pins as outputs
  pinMode(motor1Pin1, OUTPUT);
  pinMode(motor1Pin2, OUTPUT);
  pinMode(enable1Pin, OUTPUT);

  initWiFi();
  initFS();

  server.on("/", HTTP_GET, [](AsyncWebServerRequest *request){
    request->send(LittleFS, "/index.html", "text/html");
  });

  server.serveStatic("/", LittleFS, "/");

  server.on("/forward", HTTP_GET, [](AsyncWebServerRequest *request) {
    moveForward();
    request->send(LittleFS, "/index.html", "text/html", false);
  });

  server.on("/backward", HTTP_GET, [](AsyncWebServerRequest *request) {
    moveBackward();
    request->send(LittleFS, "/index.html", "text/html", false);
  });

  server.on("/stop", HTTP_GET, [](AsyncWebServerRequest *request) {
    stopMotor();
    request->send(LittleFS, "/index.html", "text/html", false);
  });

  server.begin();
}

void loop() {

}- Define SSID, password, and GPIO pins
Setting Up the Web Server
- Create server routes to control forward, reverse, and stop
- Use URL query parameters to pass commands
server.on("/motor", HTTP_GET, [](AsyncWebServerRequest *request){
  String command = request->getParam("state")->value();
  if (command == "forward") {
    // rotate forward
  }
});
Motor Control Functions
motorForward()motorBackward()motorStop()- Use analogWrite() to control speed via PWM
Uploading Code to ESP8266
- Select NodeMCU 1.0 (ESP-12E Module)
- Connect via USB and upload code
Designing the Web Interface
HTML Layout
- Create buttons for “Forward”, “Reverse”, and “Stop”
- Form links send commands via GET requests
<a href="/motor?state=forward">Forward</a>
CSS Styling
- Style buttons for usability
- Responsive layout for mobile control
JavaScript (Optional)
- Use AJAX for real-time control without page reloads
Hosting on ESP8266
- Store HTML, CSS, and JS in LittleFS
- Upload using ESP8266 LittleFS Uploader
Testing and Troubleshooting
- Access web server via IP (e.g., 192.168.1.120)
- Test all controls
- Check power connections if the motor does not respond
- Debug serial output for errors
Enhancements and Advanced Features
- Add a speed control slider using HTML input range
- Implement password protection for access
- Control multiple motors with more GPIOs
- Integrate with home automation systems like Home Assistant
FAQs
Can ESP8266 control multiple DC motors simultaneously? Yes, using additional GPIO pins and drivers.
How to control motor speed using ESP8266? Use PWM via analogWrite() on a motor driver enable pin.
What is the maximum current ESP8266 can handle? It is limited; always use external power for motors.
Why is my motor not responding to web commands? Check wiring, power supply, and ensure proper server routing.
How to secure the ESP8266 web server? Implement login authentication and consider using HTTPS with an ESP32.
Conclusion
Controlling a DC motor via a web server using the ESP8266 NodeMCU is not only a practical hands-on project, but a foundational skill for IoT development. With minimal components and an understanding of how web interfaces interact with microcontroller hardware, users can build scalable motor control systems that operate over Wi-Fi. The project can be extended to include multiple motors, sensor feedback, and integration with home automation platforms like Home Assistant. By expanding on this project, you open the door to automation systems that are efficient, reliable, and wirelessly accessible, making it ideal for smart home projects, robotics, and connected machinery.
Projects ESP8266 nodemcu :
1- ESP8266 NodeMCU: A Comprehensive Guide to IoT Development
2- Control LED with ESP8266 NodeMCU: A Beginner’s Guide
3- Integrating a Joystick with ESP8266 NodeMCU: A Comprehensive Guide
4- esp8266 nodemcu with Flame Sensor
5- ESP8266 NodeMCU with Heartbeat Sensor
6- ESP8266 NodeMCU with KY-027 Magic Cup Light
7- ESP8266 NodeMCU with Hall Magnetic Sensor
8- ESP8266 NodeMCU with relay module 5v
9- ESP8266 NodeMCU with Linear Hall Sensor