
Table of Contents
Introduction
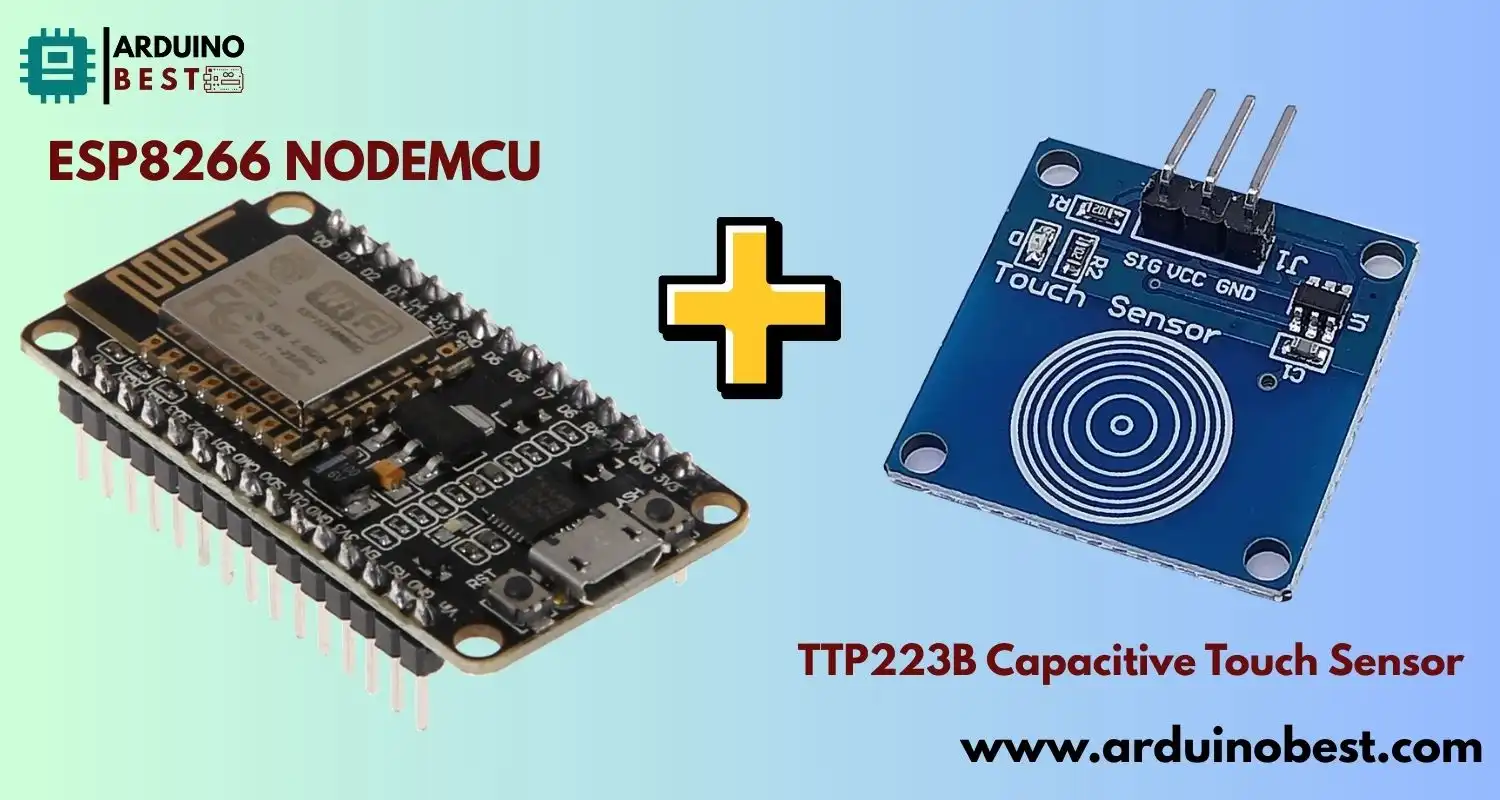
The ESP8266 NodeMCU is one of the most popular microcontrollers used in IoT projects due to its low cost, small size, and integrated Wi-Fi. When paired with the TTP223B Capacitive Touch Sensor, it opens up a world of possibilities for building touch-sensitive projects.
This guide will take you through the process of interfacing the ESP8266 Nodemcu with TTP223B Capacitive Touch Sensor. You’ll learn how to set up the hardware, program the microcontroller, and explore some practical applications such as touch-activated switches and home automation systems. If you’re interested in more details about interfacing the TTP223B sensor, you can check out this guide.
Understanding the Components
ESP8266 NodeMCU
The ESP8266 NodeMCU is a powerful, low-cost development board that allows you to add Wi-Fi capabilities to your projects. Here are some of its key features:
- Integrated Wi-Fi for wireless communication
- GPIO pins for interfacing with sensors and actuators
- Low power consumption, making it ideal for battery-powered projects
- Arduino IDE compatibility, simplifying the programming process
The ESP8266 is often used for IoT projects, allowing devices to communicate over the internet with minimal setup. For a deeper understanding of how to work with the ESP8266, check out this ESP8266 Touch Sensor Guide.
TTP223B Capacitive Touch Sensor
The TTP223B Capacitive Touch Sensor is a simple, easy-to-use sensor that allows you to detect touch input. It works by measuring the change in capacitance when a finger comes into contact with the sensor’s surface.
Key features of the TTP223B include:
- Single-touch sensitivity for detecting human touch
- Low power consumption, making it suitable for battery-powered applications
- Easy interfacing with microcontrollers like ESP8266 NodeMCU
- Touch sensitivity adjustable by changing the external resistor
This sensor is ideal for creating touch-activated switches and can be easily integrated into various projects. If you’re looking for a detailed tutorial on using the TTP223B sensor with a WeMos D1 Mini, you can follow this tutorial.
Interfacing TTP223B with ESP8266 NodeMCU
Hardware Setup
To interface the TTP223B sensor with the ESP8266 NodeMCU, you’ll need the following components:
- ESP8266 NodeMCU board
- TTP223B Capacitive Touch Sensor
- Jumper wires
- Breadboard (optional for easier connections)
Wiring diagram:
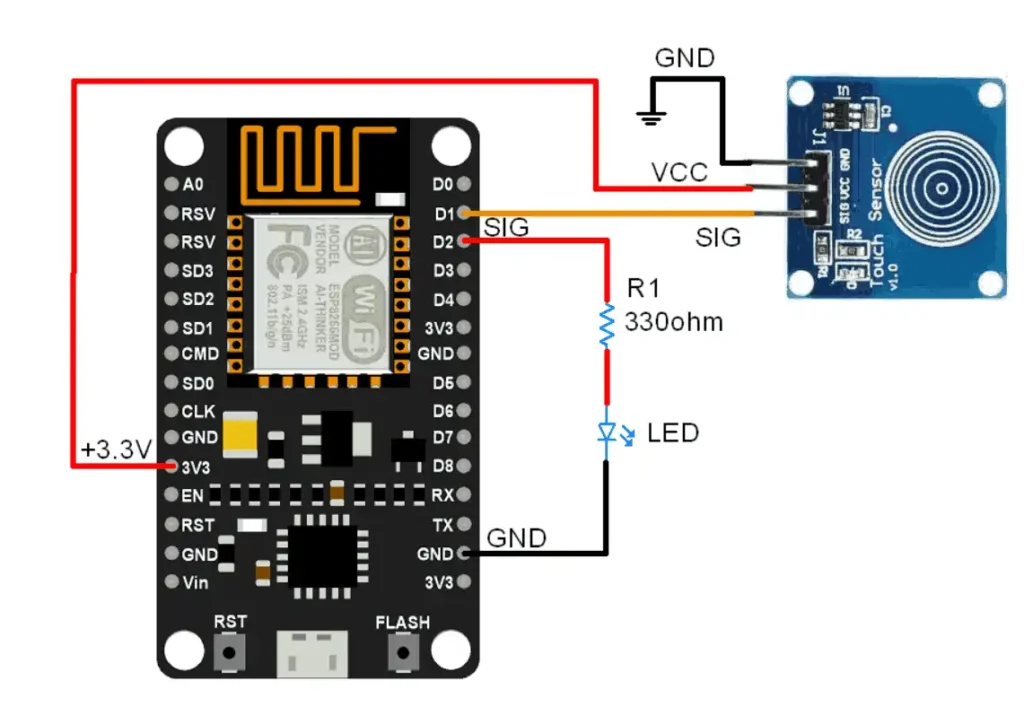
- VCC pin of the TTP223B connects to the 3V3 pin of the ESP8266 NodeMCU
- GND pin of the TTP223B connects to the GND pin of the ESP8266 NodeMCU
- SIG pin of the TTP223B connects to any available GPIO pin on the ESP8266 NodeMCU (e.g., GPIO 2)
Software Configuration
Before writing the code, make sure your Arduino IDE is set up for the ESP8266 NodeMCU:
- Open Arduino IDE and navigate to File > Preferences.
- Add the ESP8266 board manager URL:
http://arduino.esp8266.com/stable/package_esp8266com_index.json - Go to Tools > Board > Board Manager and install the ESP8266 board.
Now, install the necessary libraries for the ESP8266 and TTP223B sensor.
Programming the ESP8266
Here’s an example code that reads the touch input from the TTP223B sensor and turns an LED on or off:
#define sensor_pin D1
#define led_pin D2

int laststate = LOW;
int currentstate;
int ledstate = LOW;

void setup() {
  Serial.begin(115200);
  pinMode(sensor_pin,INPUT);
  pinMode(led_pin,OUTPUT);
}

void loop() {
  int currentstate = digitalRead(sensor_pin);
  if(laststate == LOW && currentstate == HIGH){
    if(ledstate == LOW){
      ledstate = HIGH;
    }
    else if(ledstate == HIGH){
      ledstate = LOW;
    }
    digitalWrite(led_pin, ledstate);
  }
  laststate = currentstate;
}
This code reads the touch input from the TTP223B sensor connected to GPIO 2 of the ESP8266 NodeMCU and controls the onboard LED. You can modify this code to suit your project needs.
Practical Applications and Projects
Touch-Activated LED Control
One of the simplest and most common projects with the TTP223B sensor and ESP8266 NodeMCU is a touch-activated LED control. This project involves turning an LED on or off based on touch input. Here’s how it works:
- When a user touches the sensor, the ESP8266 reads the input as HIGH and turns on the LED.
- If there is no touch, the input is LOW, and the LED is turned off.
Capacitive Touch-Based Home Automation
Another exciting project is integrating the TTP223B sensor into a home automation system. By using the ESP8266 NodeMCU, you can control various devices such as lights, fans, and smart appliances through touch. This can be achieved by:
- Using touch sensors as switches to control different appliances
- Integrating the ESP8266 with platforms like Blynk or Home Assistant to control devices remotely
Troubleshooting and Best Practices
Common Issues
- Sensor Not Responding:
- Check the wiring connections, especially the VCC and GND pins.
- Ensure the GPIO pin used for the SIG is correctly set in the code.
- Debouncing Problems:
- If you experience multiple triggers when touching the sensor, you might need to implement debouncing in your code to filter out false readings.
Solutions and Tips
- Ensure proper grounding between components to avoid erratic behavior.
- Adjust the sensor sensitivity by changing the external resistor.
- Always test the circuit with a simple code to verify the setup before moving on to more complex projects.
Frequently Asked Questions (FAQs)
How do I increase the sensitivity of the TTP223B sensor?
You can increase the sensitivity of the TTP223B sensor by changing the external resistor connected to the sensor’s sensitivity pin.
Can I use multiple TTP223B sensors with a single ESP8266?
Yes, you can use multiple TTP223B sensors with a single ESP8266, but you will need to assign a unique GPIO pin to each sensor and modify the code accordingly.
Is it possible to use the TTP223B sensor outdoors?
Yes, but make sure the TTP223B sensor is protected from moisture and extreme temperatures to ensure optimal performance.
What is the power consumption of the TTP223B sensor?
The TTP223B operates at very low power, typically consuming less than 1mA when idle and up to 10mA when active.
How do I implement a toggle function with the TTP223B sensor?
You can implement a toggle function by adding logic to flip the state of an output (like an LED or relay) each time the sensor is touched.
Conclusion
Integrating the TTP223B Capacitive Touch Sensor with the ESP8266 NodeMCU offers immense potential for creating interactive, touch-sensitive applications. This combination opens up a wide range of possibilities for makers and hobbyists, from simple touch-activated switches to more complex home automation and IoT systems. The low power consumption and ease of use make this setup ideal for various projects, including those where remote control and user interaction are crucial.
Following the steps in this guide, you can successfully interface the TTP223B sensor with the ESP8266, learning not only how to wire the components together but also how to program the device to respond to touch inputs. With this knowledge, you’ll be able to create customizable and flexible solutions, whether it’s for smart home devices, automated lighting, or other applications that require touch-based interaction.
There are numerous resources available online to further enhance your understanding and expand your projects. By experimenting with different setups, sensors, and configurations, you can push the limits of what’s possible with ESP8266 and capacitive touch technology, making your projects both functional and innovative.
Projects ESP8266 nodemcu :
1- ESP8266 NodeMCU: A Comprehensive Guide to IoT Development
2- Control LED with ESP8266 NodeMCU: A Beginner’s Guide
3- Integrating a Joystick with ESP8266 NodeMCU: A Comprehensive Guide
4- esp8266 nodemcu with Flame Sensor
5- ESP8266 NodeMCU with Heartbeat Sensor
6- ESP8266 NodeMCU with KY-027 Magic Cup Light
7- ESP8266 NodeMCU with Hall Magnetic Sensor
8- ESP8266 NodeMCU with relay module 5v
9- ESP8266 NodeMCU with Linear Hall Sensor