
Table of Contents
Introduction to Real-Time Clocks and ESP8266 NodeMCU
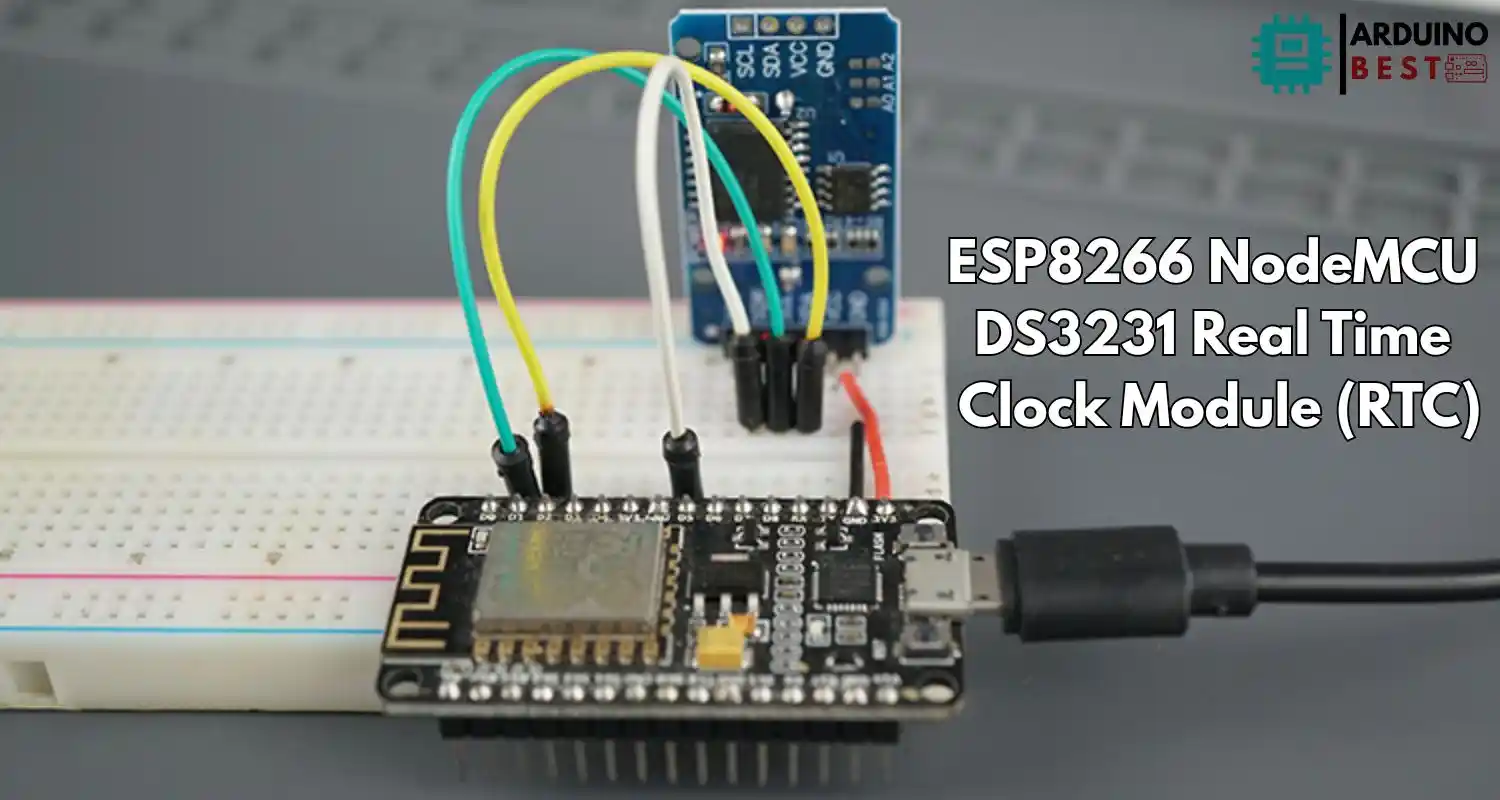
Accurate timekeeping is crucial in many embedded and IoT applications. Whether it’s data logging, scheduling tasks, or triggering alarms, having access to precise real-time information ensures your system functions reliably. This is where real-time clock (RTC) modules like the DS3231 come into play. ESP8266 NodeMCU: DS3231 Real Time Clock Module (RTC)
The ESP8266 NodeMCU is a popular Wi-Fi-enabled microcontroller used in DIY electronics and IoT projects. By integrating it with the DS3231 RTC module, developers can build low-power, network-aware systems that maintain accurate time — even without continuous internet access.
Understanding the DS3231 RTC Module
The DS3231 is a highly accurate RTC module with built-in temperature compensation and battery backup, making it superior to older modules like the DS1307. It uses the I2C protocol for communication and can maintain time even when the main power is off.
Key features of the DS3231 module:
- Temperature-compensated crystal oscillator (TCXO)
- ±2 ppm accuracy from 0°C to +40°C
- Built-in battery backup support
- Alarm and square wave output (SQW) functionality
You can explore the technical specifications of the DS3231 in the official DS3231 Datasheet.
This module is commonly used in:
- IoT clocks and scheduling devices
- Data loggers
- Automation systems
- Time-stamping sensor data
Pinout and Technical Specifications of DS3231
The DS3231 module has a simple pin configuration:
- VCC: 3.3V or 5V power supply
- GND: Ground
- SDA: Serial data (I2C)
- SCL: Serial clock (I2C)
- SQW: Square wave output (optional)
- 32K: 32kHz output (optional)
It operates over I2C with a fixed address of 0x68. Power consumption is low, and it can operate with a coin-cell battery (CR2032) for years without losing time.
Setting Up the Hardware: Connecting DS3231 to ESP8266 NodeMCU
To get started, you’ll need the following components:
- ESP8266 NodeMCU (any version)
- DS3231 RTC Module
- Jumper wires
- Breadboard (optional)
- CR2032 battery (for RTC backup)
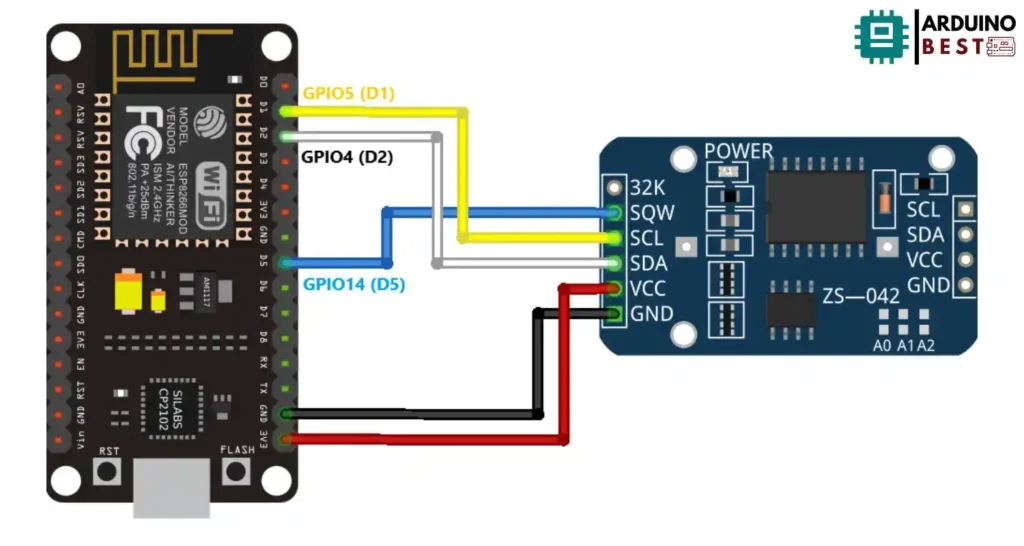
Wiring guide:
- DS3231 VCC → NodeMCU 3.3V
- DS3231 GND → NodeMCU GND
- DS3231 SDA → NodeMCU D2 (GPIO4)
- DS3231 SCL → NodeMCU D1 (GPIO5)
Ensure tight connections and avoid powering the DS3231 with 5V on a 3.3V logic board like the ESP8266.
Installing Necessary Libraries and Tools
To program your ESP8266, you’ll use the Arduino IDE. If you haven’t already, install the ESP8266 board support package through the Boards Manager. You’ll also need to install the RTClib library to interface with the DS3231.
Steps:
- Open Arduino IDE > Tools > Board > Boards Manager
- Search and install “esp8266 by ESP8266 Community”
- Install RTClib Library via Library Manager
This will enable your ESP8266 to communicate with the RTC and handle time-related functions with ease.
Programming the ESP8266 to Interface with DS3231
Here is a sample code to read time from the DS3231:
#include "RTClib.h"

RTC_DS3231 rtc;

char daysOfTheWeek[7][12] = {"Sunday", "Monday", "Tuesday", "Wednesday", "Thursday", "Friday", "Saturday"};

void setup () {
  Serial.begin(115200);

  if (! rtc.begin()) {
    Serial.println("Couldn't find RTC");
    Serial.flush();
    while (1) delay(10);
  }

  if (! rtc.lostPower()) {
    Serial.println("RTC lost power, let's set the time!");
    // When time needs to be set on a new device, or after a power loss, the
    // following line sets the RTC to the date & time this sketch was compiled
    rtc.adjust(DateTime(F(__DATE__), F(__TIME__)));
    // This line sets the RTC with an explicit date & time, for example to set
    // January 21, 2014 at 3am you would call:
    //rtc.adjust(DateTime(2014, 1, 21, 3, 0, 0));
  }

  // When time needs to be re-set on a previously configured device, the
  // following line sets the RTC to the date & time this sketch was compiled
  //rtc.adjust(DateTime(F(__DATE__), F(__TIME__)));
  // This line sets the RTC with an explicit date & time, for example to set
  // January 21, 2014 at 3am you would call:
  //rtc.adjust(DateTime(2014, 1, 21, 3, 0, 0));
}

void loop () {
  // Get the current time from the RTC
  DateTime now = rtc.now();

  // Getting each time field in individual variables
  // And adding a leading zero when needed;
  String yearStr = String(now.year(), DEC);
  String monthStr = (now.month() < 10 ? "0" : "") + String(now.month(), DEC);
  String dayStr = (now.day() < 10 ? "0" : "") + String(now.day(), DEC);
  String hourStr = (now.hour() < 10 ? "0" : "") + String(now.hour(), DEC);
  String minuteStr = (now.minute() < 10 ? "0" : "") + String(now.minute(), DEC);
  String secondStr = (now.second() < 10 ? "0" : "") + String(now.second(), DEC);
  String dayOfWeek = daysOfTheWeek[now.dayOfTheWeek()];

  // Complete time string
  String formattedTime = dayOfWeek + ", " + yearStr + "-" + monthStr + "-" + dayStr + " " + hourStr + ":" + minuteStr + ":" + secondStr;

  // Print the complete formatted time
  Serial.println(formattedTime);

  // Getting temperature
  Serial.print(rtc.getTemperature());
  Serial.println("ºC");

  Serial.println();
  delay(3000);
}
This code initializes the DS3231 and reads the current date and time, displaying it on the Serial Monitor.
Enhancing Functionality: Setting Alarms and Using SQW Pin
The DS3231 supports alarms, allowing the ESP8266 to perform tasks at specific times without needing continuous internet access.
You can:
- Set daily or one-time alarms
- Use the SQW pin to trigger events
- Configure interrupts on the ESP8266 for low-power waking
Alarm configuration is done through I2C commands using extended RTClib functions or manually via register manipulation.
Synchronizing DS3231 with NTP Servers
To ensure the RTC remains accurate over time, you can sync it with an NTP server. The ESP8266 connects to Wi-Fi and fetches the current time, which is then written to the DS3231.
You’ll need the NTP Client Library to do this. After retrieving time from the NTP server, simply call rtc.adjust() to set the DS3231.
Benefits:
- Automatic adjustment for time drift
- Maintains accuracy even after power loss
Displaying Time Data on OLED or TFT Screens
For user-facing projects, displaying the real-time data is essential. The ESP8266 can be connected to small OLED (0.96″) or TFT screens using I2C or SPI.
Steps:
- Connect screen using shared I2C pins (D1/D2)
- Install display libraries like Adafruit SSD1306
- Modify your loop to show formatted time on the screen
This adds a visual layer to your clock-based project and makes it suitable for desk clocks or weather stations.
Troubleshooting Common Issues
If you encounter problems:
- Double-check I2C wiring and power levels
- Use a logic analyzer or I2C scanner sketch to detect the DS3231
- Ensure the coin-cell battery is installed and charged
- Confirm correct libraries and board settings in Arduino IDE
Common errors include:
- RTC not detected
- Incorrect time readouts
- ESP8266 reset loop due to power issues
FAQs
How do I connect DS3231 to ESP8266?
Connect SDA to D2, SCL to D1, VCC to 3.3V, and GND to GND on the NodeMCU.
Can ESP8266 keep time without an RTC module?
It can use NTP, but without RTC, it will lose time on power-down or reboot.
How accurate is the DS3231 RTC module?
It’s highly accurate — within ±2ppm between 0–40°C, thanks to its temperature-compensated oscillator.
How to set alarms using DS3231 and ESP8266?
Use alarm functions in extended RTClib or write directly to alarm registers over I2C.
What battery should I use with DS3231?
Use a CR2032 3V coin cell for backup. Avoid rechargeable cells unless supported by your module.
Conclusion and Future Applications
Combining the ESP8266 NodeMCU with the DS3231 RTC module provides a reliable foundation for accurate timekeeping across a wide range of embedded and IoT applications. This combination ensures that devices maintain synchronized, precise timing — even in the absence of continuous internet access — making it an ideal choice for data logging, automation systems, time-based controls, and low-power applications that rely on consistent performance over time.
Beyond basic timekeeping, this setup opens the door to more advanced functionality. For example:
- Cloud synchronization using services like Firebase or Google Sheets
- Integrating sensor modules (e.g., temperature, humidity, motion) to create smart environmental monitors
- Developing alarm-based event systems for energy-efficient automation
- Building real-time dashboards using web servers hosted on the ESP8266
- Expanding to mesh or MQTT networks for distributed time-critical applications
Because both the ESP8266 and DS3231 are well-supported and easy to integrate, this pairing serves as a scalable solution for both hobbyist projects and production-ready systems. Whether you’re building a home automation platform or a remote data logger, this combination brings long-term reliability and versatility to your designs.
Projects ESP8266 nodemcu
1- ESP8266 NodeMCU: A Comprehensive Guide to IoT Development
2- Control LED with ESP8266 NodeMCU: A Beginner’s Guide
3- Integrating a Joystick with ESP8266 NodeMCU: A Comprehensive Guide
4- esp8266 nodemcu with Flame Sensor
5- ESP8266 NodeMCU with Heartbeat Sensor
6- ESP8266 NodeMCU with KY-027 Magic Cup Light
7- ESP8266 NodeMCU with Hall Magnetic Sensor
8- ESP8266 NodeMCU with relay module 5v
9- ESP8266 NodeMCU with Linear Hall Sensor