Introduction
The DHT11 sensor is a widely used electronic component that measures temperature and humidity with high accuracy and stability. It is popular among electronics enthusiasts, hobbyists, and professionals working on IoT (Internet of Things) and weather monitoring projects. In this article, we will explore the DHT11 sensor, its features, applications, and how to interface it with microcontrollers like Arduino.
What is the DHT11 Sensor?
The DHT11 is a low-cost digital sensor designed for measuring temperature and humidity. It consists of a capacitive humidity sensor and a thermistor to measure air temperature. The sensor converts analog readings into a digital signal, making it easy to integrate with microcontrollers.
DHT11 Sensor Specifications
- Humidity Range: 20% – 90% RH (Relative Humidity)
- Temperature Range: 0°C – 50°C (32°F – 122°F)
- Humidity Accuracy: ±5%
- Temperature Accuracy: ±2°C
- Operating Voltage: 3V – 5.5V
- Sampling Rate: 1 reading per second
- Output Signal: Digital (single-wire)
- Dimensions: 15mm x 12mm x 5mm
How Does DHT11 Work?
The DHT11 sensor consists of two main components:
- Capacitive Humidity Sensor – Measures humidity by detecting changes in capacitance due to water vapor in the air.
- NTC Thermistor – Measures temperature by detecting resistance changes caused by variations in heat.
The internal microcontroller processes the analog data and converts it into a digital output signal, which can be read by microcontrollers like Arduino, ESP8266, Raspberry Pi, and STM32.
Pinout and Wiring

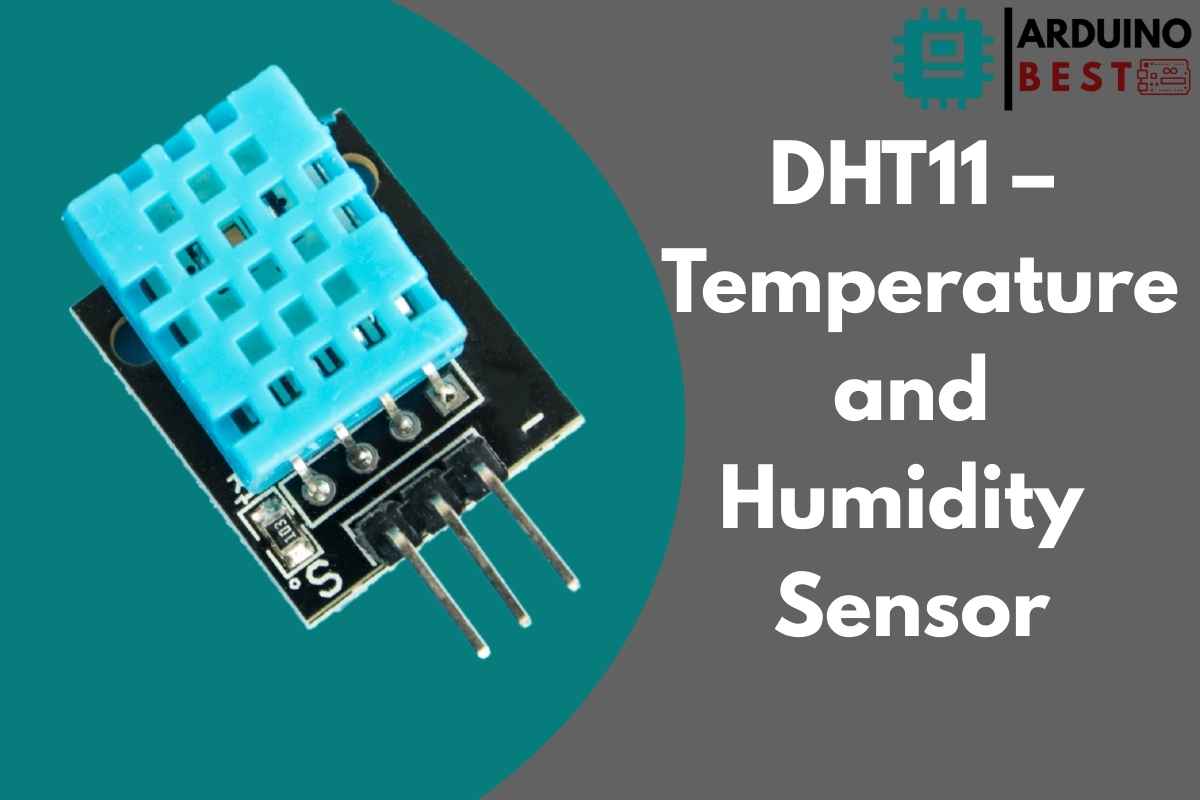
DHT11 – Temperature and Humidity Sensor
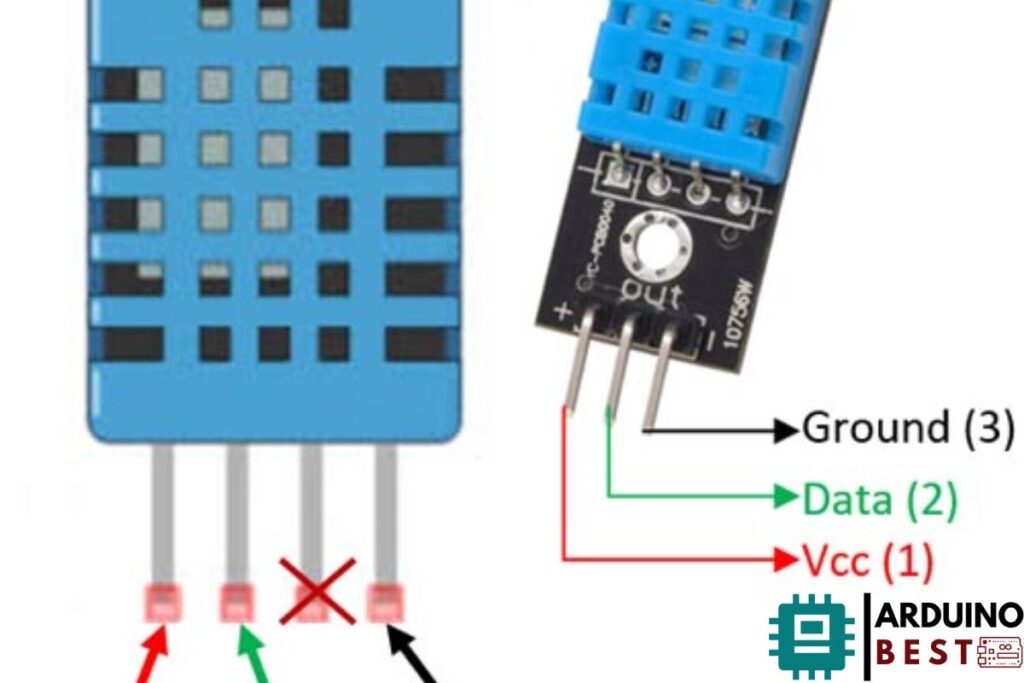
The DHT11 sensor comes in two versions: a 3-pin module and a 4-pin sensor. The pin configuration is as follows:
| Pin | Description |
|---|---|
| 1 (VCC) | Power Supply (3V – 5.5V) |
| 2 (DATA) | Data Output |
| 3 (NC) | Not Connected |
| 4 (GND) | Ground |
To connect the DHT11 to an Arduino, follow these steps:
- VCC to 5V on Arduino.
- GND to GND on Arduino.
- DATA to Digital Pin (e.g., Pin 2) on Arduino with a 10kΩ pull-up resistor.
How to Use DHT11 with Arduino
To interface the DHT11 sensor with Arduino, use the DHT sensor library. Below is a simple Arduino code to read temperature and humidity values.
Arduino Code for DHT11
#include <DHT.h>
#define DHTPIN 2   // Connect DATA pin to digital pin 2
#define DHTTYPE DHT11
DHT dht(DHTPIN, DHTTYPE);

void setup() {
    Serial.begin(9600);
    dht.begin();
}

void loop() {
    float humidity = dht.readHumidity();
    float temperature = dht.readTemperature();

    if (isnan(humidity) || isnan(temperature)) {
        Serial.println("Failed to read from DHT11 sensor!");
        return;
    }

    Serial.print("Humidity: ");
    Serial.print(humidity);
    Serial.print(" %	");
    Serial.print("Temperature: ");
    Serial.print(temperature);
    Serial.println(" °C");

    delay(2000);  // Wait for 2 seconds before next reading
}
Applications of DHT11 Sensor
The DHT11 sensor is widely used in various applications, including:
- Weather Monitoring Systems – Measures indoor and outdoor climate conditions.
- Home Automation – Used in smart homes for controlling HVAC systems.
- Agriculture and Greenhouses – Helps in monitoring soil humidity and temperature for optimal plant growth.
- Industrial Environments – Maintains ideal conditions in factories and warehouses.
- Medical Devices – Used in humidity-controlled environments like incubators.
Differences Between DHT11 and DHT22
| Feature | DHT11 | DHT22 |
| Temperature Range | 0°C to 50°C | -40°C to 80°C |
| Humidity Range | 20% – 90% | 0% – 100% |
| Accuracy | ±2°C, ±5% RH | ±0.5°C, ±2% RH |
| Resolution | 8-bit | 16-bit |
| Cost | Lower | Higher |
DHT22 is more precise and has a wider measurement range, but DHT11 is more affordable and sufficient for many basic projects.
Troubleshooting DHT11 Issues
If the DHT11 sensor is not working properly, check the following:
- Incorrect Wiring: Ensure proper connections to VCC, GND, and DATA.
- Faulty Sensor: Some DHT11 sensors may be defective; try replacing it.
- Code Issues: Use the correct DHT library and double-check the code.
- Pull-up Resistor: Ensure a 10kΩ resistor is connected between VCC and DATA.
Conclusion
The DHT11 sensor is a cost-effective and reliable option for measuring temperature and humidity. Whether you’re working on a weather station, a smart home project, or industrial monitoring, the DHT11 is a great choice for beginners and professionals alike. By following this guide, you can easily integrate the DHT11 sensor with Arduino or other microcontrollers to collect accurate environmental data.
People also ask
- What are the pins in DHT11?
- The DHT11 sensor typically has four pins:
- VCC – Power supply (3.3V to 5V)
- Data – Data output (connected to a microcontroller)
- NC (Not Connected) – No function (on some models)
- GND – Ground
- The DHT11 sensor typically has four pins:
- How to wire a DHT11 sensor?
- Connect VCC to 3.3V or 5V
- Connect GND to ground
- Connect Data to a digital pin of a microcontroller (like Arduino), and use a 10kΩ pull-up resistor between Data and VCC for stable communication.
- Is DHT11 one-wire?
- The DHT11 sensor uses a single-wire digital communication protocol, but it is not a standard 1-Wire protocol like Dallas/Maxim 1-Wire devices.
- What is the pinout voltage of DHT11?
- The DHT11 operates on 3.3V to 5V, and the data pin outputs a digital signal in the same voltage range.
- Does DHT11 need a resistor?
- Yes, a 10kΩ pull-up resistor is recommended on the data line to ensure reliable communication.
- What is RH in humidity?
- RH (Relative Humidity) is the percentage of moisture in the air relative to the maximum moisture the air can hold at a given temperature.
- Formula: RH=(Actual Water VaporMaximum Water Vapor)×100RH = \left( \frac{\text{Actual Water Vapor}}{\text{Maximum Water Vapor}} \right) \times 100RH=(Maximum Water VaporActual Water Vapor)×100
Would you like a circuit diagram for wiring the DHT11? 😊

