Table of Contents
Introduction
Integrating an Arduino with the NEO-M8N GPS module opens up a world of possibilities for DIY electronics and navigation projects. Whether you’re working on a real-time tracking system, geolocation services, or even an IoT application, this setup provides precise and reliable GPS data.
In this guide, you’ll learn everything about using the NEO-M8N GPS module with Arduino, including wiring, configuration, troubleshooting, and more. We’ll also reference the official u-blox NEO-M8N product page to explore its features and specifications.
Understanding the NEO-M8N GPS Module
The NEO-M8N is a high-performance GNSS module from u-blox, capable of receiving signals from multiple satellite constellations. It provides high accuracy, fast positioning, and superior reception, making it a preferred choice over older models like the NEO-6M.
Key Features:
- Multi-GNSS support (GPS, GLONASS, Galileo, BeiDou)
- 1.5-meter accuracy
- 10Hz update rate
- Configurable via u-center software for enhanced performance
Applications of Arduino with NEO-M8N GPS Module
This combination is widely used in various projects, such as:
- Real-time vehicle tracking
- Weather balloon telemetry
- Drones and UAV navigation
- IoT-based location tracking

Components and Tools Required
Before starting, ensure you have the following:
- Arduino Uno (or similar board)
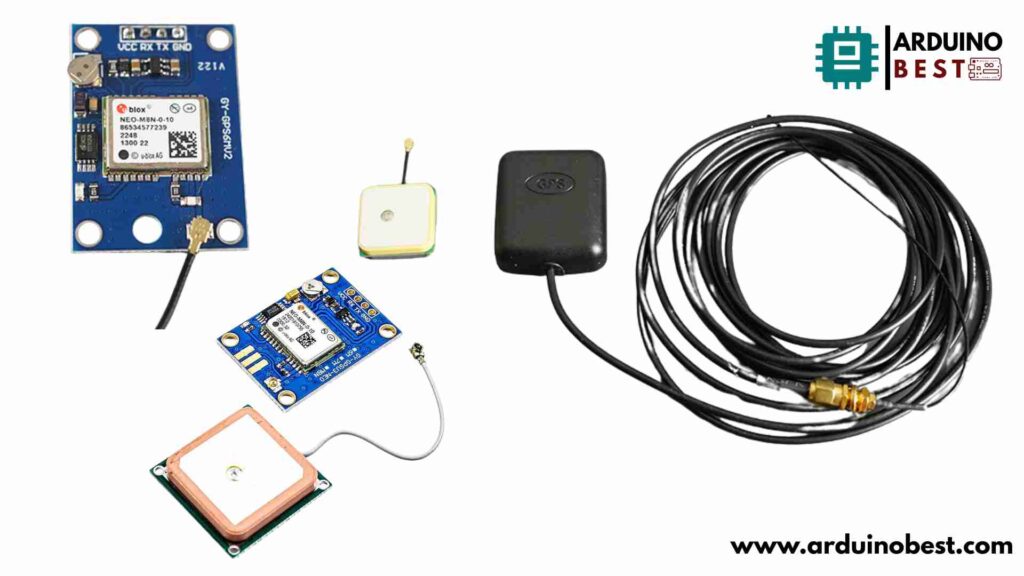
- NEO-M8N GPS module
- Jumper wires
- GPS Antenna (for better signal reception)
- Arduino IDE with the TinyGPSPlus library
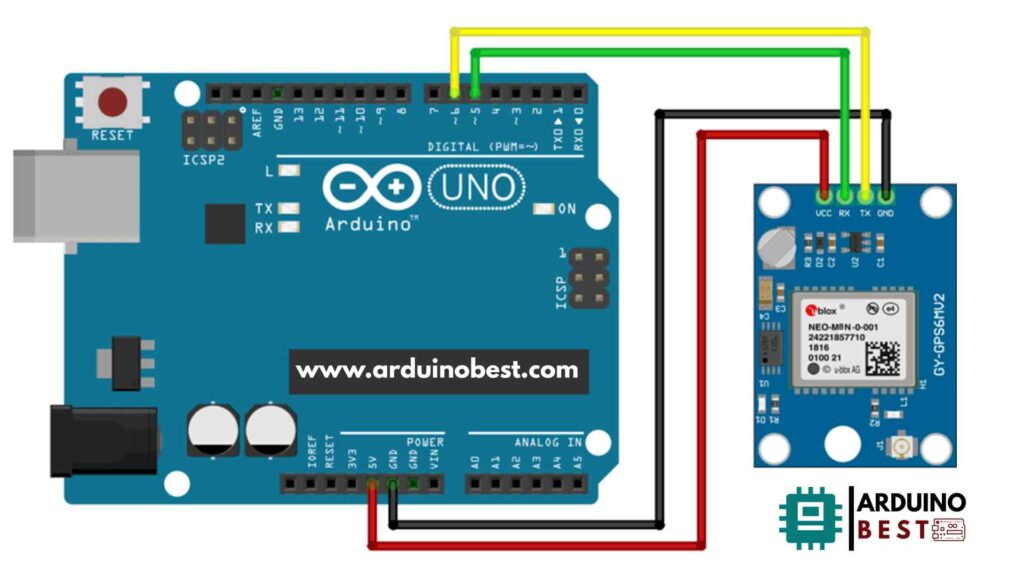
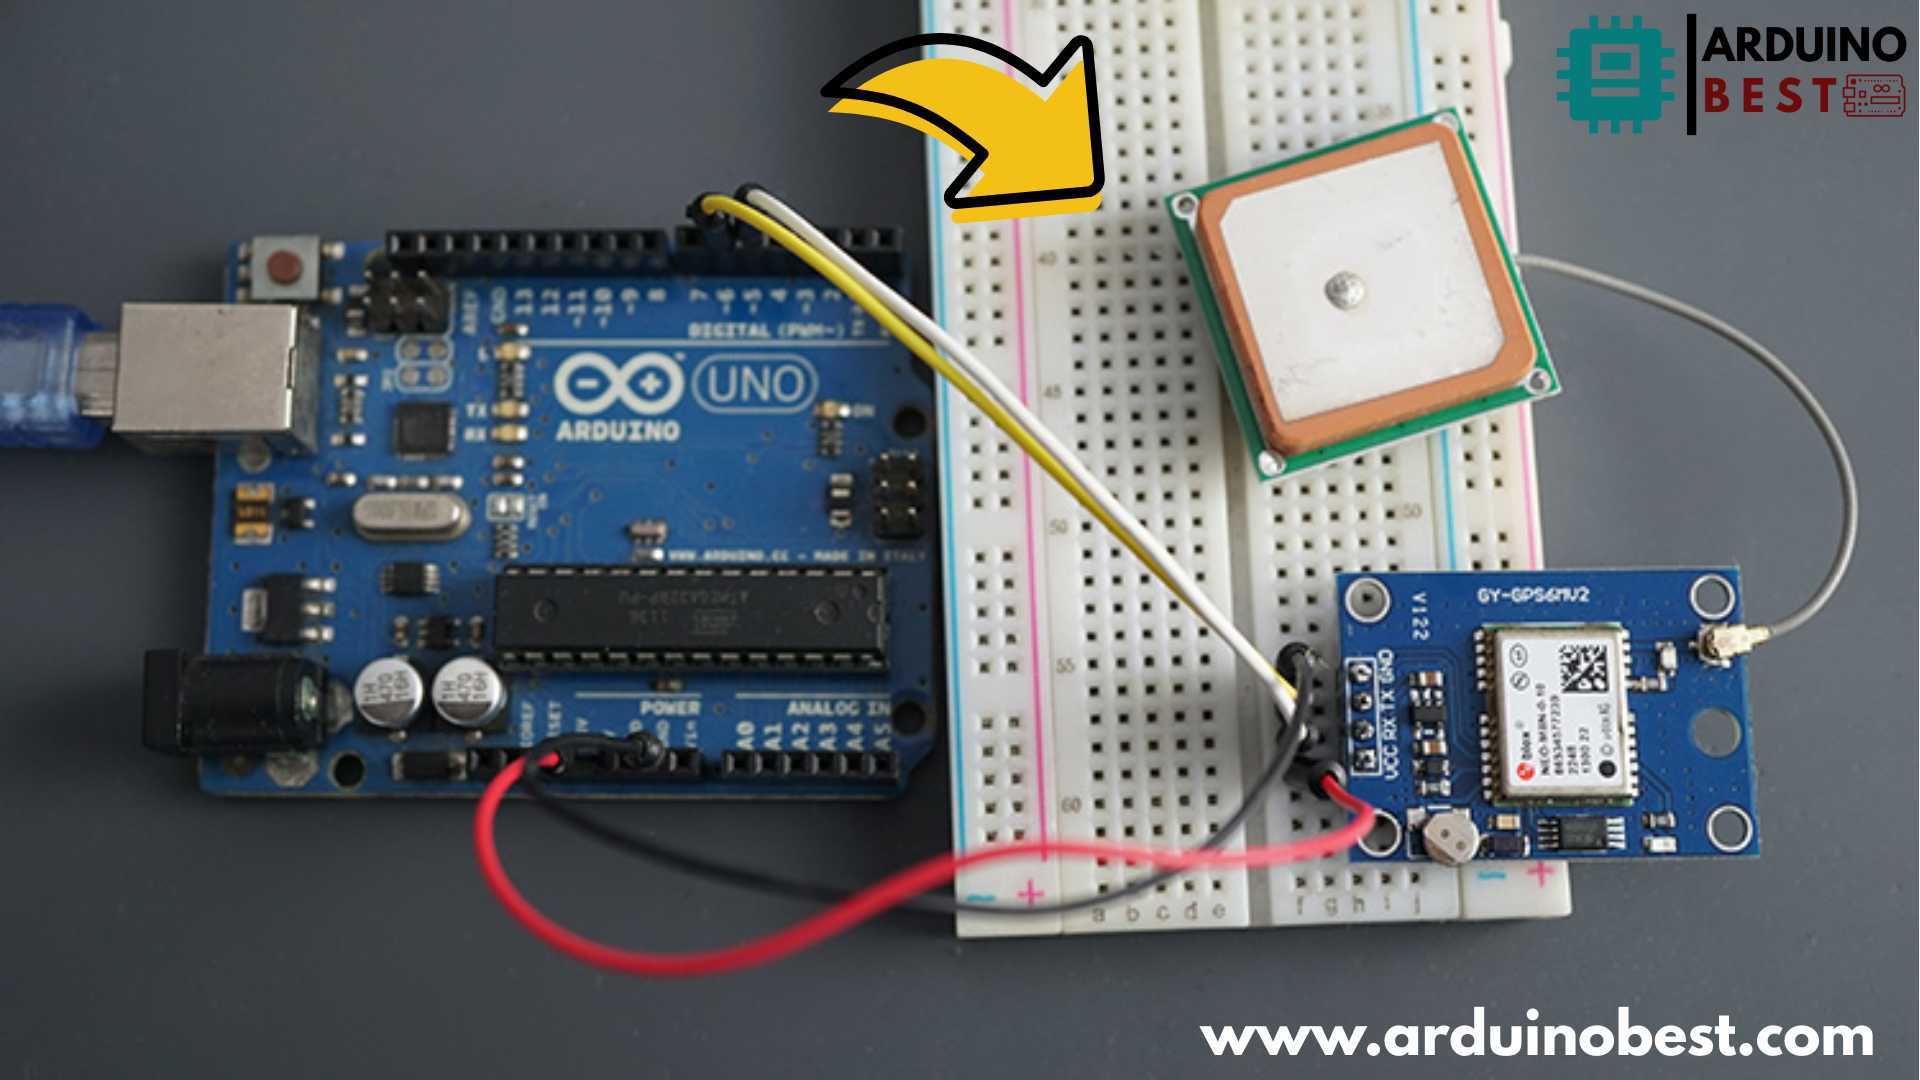
Wiring the NEO-M8N GPS Module to Arduino
Connect the module as follows:
- VCC → 3.3V (or 5V, depending on the module version)
- GND → GND
- TX → Arduino RX (Pin 4 if using SoftwareSerial)
- RX → Arduino TX (Pin 3 if using SoftwareSerial)

Configuring Arduino IDE and Installing Libraries
- Download and install the TinyGPSPlus library from TinyGPSPlus documentation.
- Open the Arduino IDE and install the SoftwareSerial library if not pre-installed.
- Set up the serial monitor at 9600 baud rate for correct data output.
Writing and Uploading the Arduino Sketch
#include <TinyGPS++.h>
#include <SoftwareSerial.h>

static const int RXPin = 6, TXPin = 5;
static const uint32_t GPSBaud = 9600;

// The TinyGPS++ object
TinyGPSPlus gps;

// The serial connection to the GPS device
SoftwareSerial gpsSerial(RXPin, TXPin);

void setup() {
  // Serial Monitor
  Serial.begin(9600);

  // Start Serial for the GPS module
  gpsSerial.begin(GPSBaud);
  Serial.println("Software Serial started at 9600 baud rate");
}

void loop() {
  // This sketch displays information every time a new sentence is correctly encoded.
  unsigned long start = millis();

  while (millis() - start < 2000) {
    while (gpsSerial.available() > 0) {
      gps.encode(gpsSerial.read());
    }
    if (gps.location.isUpdated()) {
      Serial.print("LAT: ");
      Serial.println(gps.location.lat(), 6);
      Serial.print("LONG: ");
      Serial.println(gps.location.lng(), 6);
      Serial.print("SPEED (km/h) = ");
      Serial.println(gps.speed.kmph());
      Serial.print("ALT (min)= ");
      Serial.println(gps.altitude.meters());
      Serial.print("HDOP = ");
      Serial.println(gps.hdop.value() / 100.0);
      Serial.print("Satellites = ");
      Serial.println(gps.satellites.value());
      Serial.print("Time in UTC: ");
      Serial.println(String(gps.date.year()) + "/" + String(gps.date.month()) + "/" + String(gps.date.day()) + "," + String(gps.time.hour()) + ":" + String(gps.time.minute()) + ":" + String(gps.time.second()));
      Serial.println("");
    }
  }
}
Parsing NMEA Sentences with TinyGPSPlus Library
- The NEO-M8N GPS module outputs data in NMEA format.
- The TinyGPSPlus library extracts useful information such as:
- Latitude and Longitude
- Altitude
- Speed and Course
- Time and Date
Displaying GPS Data
- Open the Serial Monitor in Arduino IDE.
- Ensure the correct baud rate (9600) is set.
- View the parsed latitude, longitude, and other details in real time.
Troubleshooting Common Issues
- No GPS fix? Try moving to an open area with a clear sky view.
- Incorrect data? Check wiring and ensure the baud rate matches.
- Weak signal? Use an external GPS antenna for better reception.
Advanced Configurations
- Use u-center GNSS software to fine-tune module settings.
- Enable or disable specific NMEA sentences for custom data filtering.
- Integrate additional sensors like altimeters or compasses for enhanced tracking.
FAQs
How do I connect the NEO-M8N GPS module to an Arduino board?
Use jumper wires to connect VCC, GND, TX, and RX as per the wiring guide above.
Why is my NEO-M8N module not obtaining a GPS fix?
- Ensure the antenna is properly connected.
- Move to an open area to get a better signal.
- Check the baud rate settings in the Arduino code.
Can I use the NEO-M8N module indoors?
- GPS signals are weak indoors; for better results, place the antenna near a window or use an external antenna.
How can I improve the accuracy of the GPS data?
- Enable multi-GNSS support (GLONASS, Galileo, BeiDou).
- Reduce interference from other electronic components.
Is it possible to use multiple GPS modules with a single Arduino?
- Yes, by using multiple SoftwareSerial ports, but it requires careful management of available memory and processing power.
Conclusion
Integrating an Arduino with a NEO-M8N GPS module unlocks numerous possibilities for tracking and navigation projects. With the right setup and troubleshooting techniques, you can achieve precise location tracking with high reliability. Experiment with advanced configurations to further enhance the module’s performance and explore creative applications!
Here we suggest other Arduino Projects:
1- Complete Guide for DHT11/DHT22 Humidity and Temperature Sensor With Arduino
2- DHT11 – Temperature and Humidity Sensor
3- DHT22 – Temperature and Humidity Sensor (more accurate than DHT11)
4- BMP180 – Barometric Pressure and Altitude Sensor
5- BMP280 – Barometric Pressure & Temperature Sensor
6- BME280 – Temperature, Humidity, and Pressure Sensor
7- Arduino Flex Sensor Controlled Robot Hand
8- Arduino ECG Heart Rate Monitor AD8232 Demo
9- Arduino NRF24L01 Wireless Joystick Robot Car
10- Arduino Force Sensor Anti-Theft Alarm System
11- Arduino NRF24L01 Transceiver Controlled Relay Light
12- Arduino Rotary Encoder Controlled LEDs: A Complete Guide

