
Table of Contents
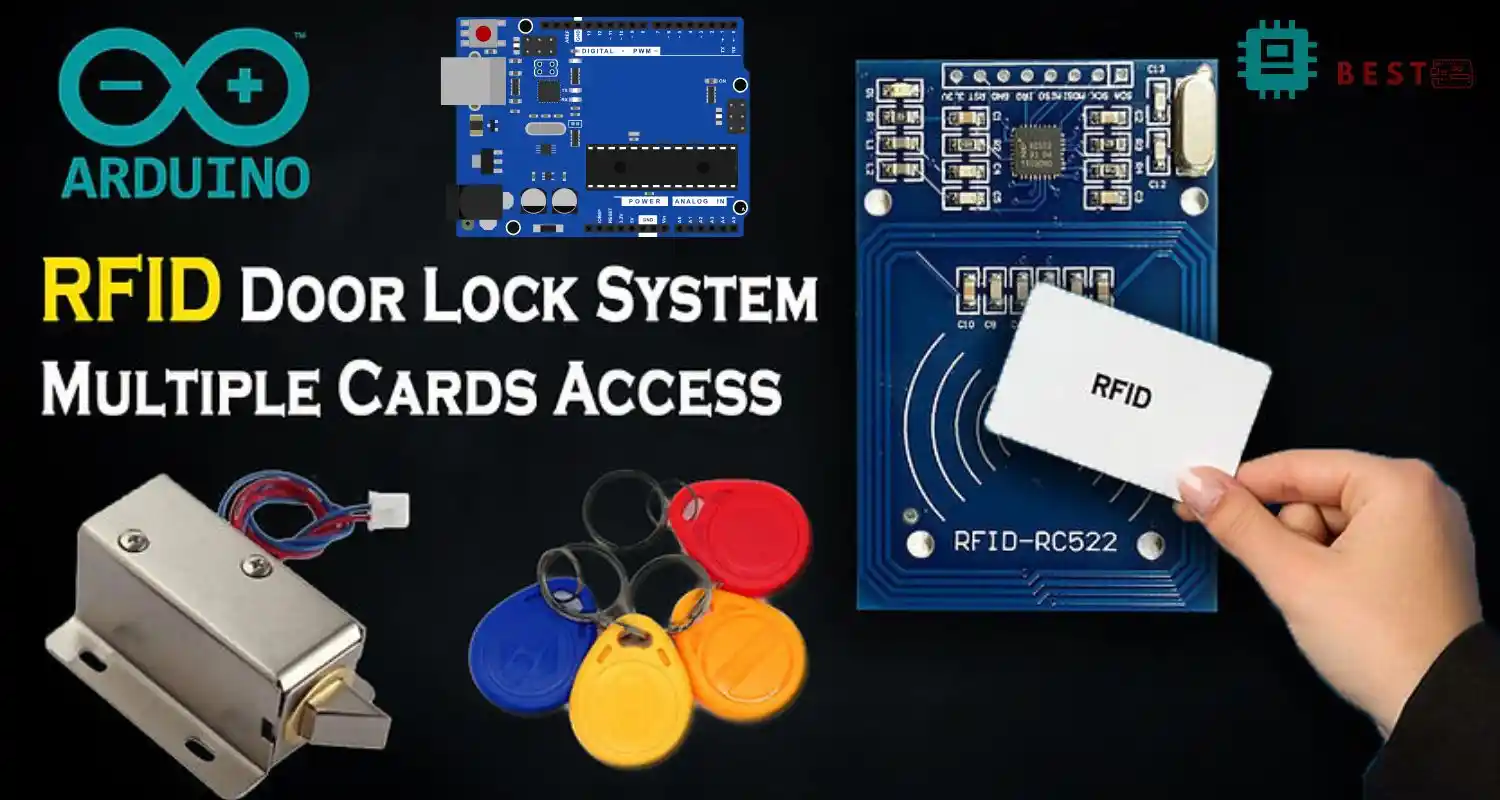
Creating an Arduino UNO RFID Master Card Door Lock System is a great way to combine security and automation in a DIY electronics project. Using RFID technology, you can restrict or grant access with simple, contactless cards. This project provides a practical example of how microcontrollers like the Arduino UNO can control physical systems like locks.
Understanding RFID Technology
RFID stands for Radio Frequency Identification, a technology that uses electromagnetic fields to identify and track tags attached to objects. The system includes:
- RFID Reader Module (e.g., MFRC522)
- RFID Tags or Cards
- Microcontroller (e.g., Arduino UNO)
RFID works by transmitting data from a card to a reader, which then communicates with a central processor. This makes it ideal for access control systems. According to Circuit Digest, RFID can be used to build reliable door lock mechanisms with minimal components.
Components Required
To build this project, you’ll need:
- Arduino UNO board
- MFRC522 RFID reader
- RFID key cards or tags
- Servo motor (for physical locking/unlocking)
- Buzzer (audio feedback)
- LEDs (for status indication)
- Breadboard and jumper wires
- Power supply (USB or 9V battery)
You can follow the component wiring closely as explained on HowToMechatronics for a reliable hardware setup.
Hardware Circuit Setup
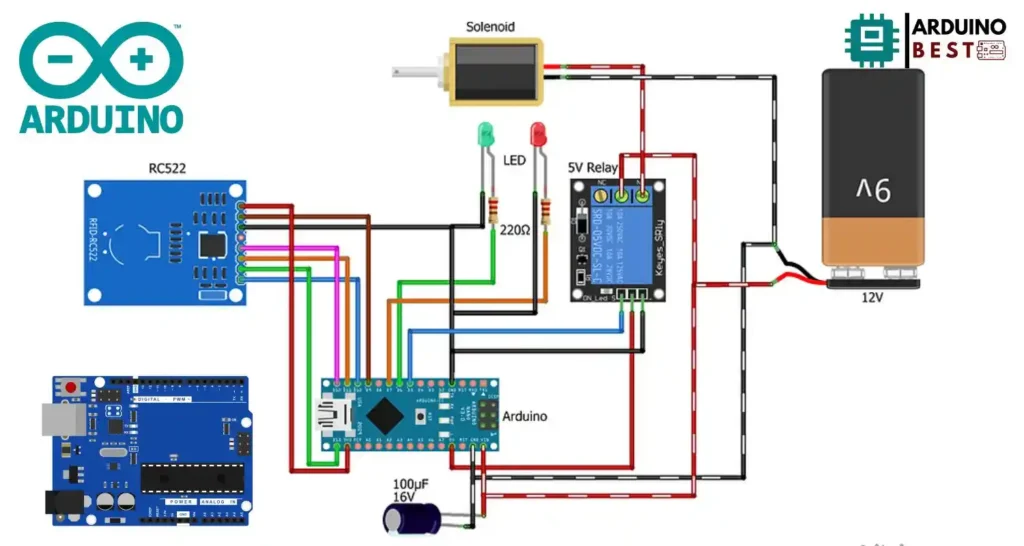
Properly connecting your components is critical for a fully functional system:
- Connect the RFID module to the Arduino via SPI pins (SDA, SCK, MOSI, MISO, RST).
- Attach the servo motor to a digital pin (usually pin 9).
- Connect LEDs and buzzer to digital pins with appropriate resistors.
- Use a breadboard to organize and power the components.
Make sure connections are secure and correct polarity is observed to avoid damage to components.
Programming the Arduino UNO
Once the hardware is set up, upload a sketch that includes:
- MFRC522 and Servo libraries
- Code to read RFID card UID
- Conditions to check if the UID is authorized
- Servo motor instructions to unlock/lock
- EEPROM usage to store authorized UIDs
- Feedback mechanisms with LEDs and buzzer
Code arduino
#include <SPI.h>
#include <Wire.h>
#include <MFRC522.h>

#define RST_PIN 9
#define SS_PIN  10

#define STATE_STARTUP       0
#define STATE_STARTING      1
#define STATE_WAITING       2
#define STATE_SCAN_INVALID  3
#define STATE_SCAN_VALID    4
#define STATE_SCAN_MASTER   5
#define STATE_ADDED_CARD    6
#define STATE_REMOVED_CARD  7

#define REDPIN 7
#define GREENPIN 6
#define Relay 5

const int cardArrSize = 10;
const int cardSize    = 4;
byte cardArr[cardArrSize][cardSize];
byte masterCard[cardSize] = {131,35,56,187};   //Change Master Card ID
byte readCard[cardSize];
byte cardsStored = 0;

// Create MFRC522 instance
MFRC522 mfrc522(SS_PIN, RST_PIN);
// Set the LCD I2C address

byte currentState = STATE_STARTUP;
unsigned long LastStateChangeTime;
unsigned long StateWaitTime;

//------------------------------------------------------------------------------------
int readCardState()
{
  int index;

  Serial.print("Card Data - ");
  for(index = 0; index < 4; index++)
  {
    readCard[index] = mfrc522.uid.uidByte[index];


    Serial.print(readCard[index]);
    if (index < 3)
    {
      Serial.print(",");
    }
  }
  Serial.println(" ");

  //Check Master Card
  if ((memcmp(readCard, masterCard, 4)) == 0)
  {
    return STATE_SCAN_MASTER;
  }

  if (cardsStored == 0)
  {
    return STATE_SCAN_INVALID;
  }

  for(index = 0; index < cardsStored; index++)
  {
    if ((memcmp(readCard, cardArr[index], 4)) == 0)
    {
      return STATE_SCAN_VALID;
    }
  }

 return STATE_SCAN_INVALID;
}

//------------------------------------------------------------------------------------
void addReadCard()
{
  int cardIndex;
  int index;

  if (cardsStored <= 20)
  {
    cardsStored++;
    cardIndex = cardsStored;
    cardIndex--;
  }

  for(index = 0; index < 4; index++)
  {
    cardArr[cardIndex][index] = readCard[index];
  }
}

//------------------------------------------------------------------------------------
void removeReadCard()
{
  int cardIndex;
  int index;
  boolean found = false;

  for(cardIndex = 0; cardIndex < cardsStored; cardIndex++)
  {
    if (found == true)
    {
      for(index = 0; index < 4; index++)
      {
        cardArr[cardIndex-1][index] = cardArr[cardIndex][index];
        cardArr[cardIndex][index] = 0;
      }
    }

    if ((memcmp(readCard, cardArr[cardIndex], 4)) == 0)
    {
      found = true;
    }
  }

  if (found == true)
  {
    cardsStored--;
  }
}

//------------------------------------------------------------------------------------
void updateState(byte aState)
{
  if (aState == currentState)
  {
    return;
  }

  // do state change
  switch (aState)
  {
    case STATE_STARTING:
      StateWaitTime = 1000;
      digitalWrite(REDPIN, HIGH);
      digitalWrite(GREENPIN, LOW);
      break;
    case STATE_WAITING:
      StateWaitTime = 0;
      digitalWrite(REDPIN, LOW);
      digitalWrite(GREENPIN, LOW);
      break;
    case STATE_SCAN_INVALID:
      if (currentState == STATE_SCAN_MASTER)
      {
        addReadCard();
        aState = STATE_ADDED_CARD;
        StateWaitTime = 2000;
        digitalWrite(REDPIN, LOW);
        digitalWrite(GREENPIN, HIGH);
      }
      else if (currentState == STATE_REMOVED_CARD)
      {
        return;
      }
      else
      {
        StateWaitTime = 2000;
        digitalWrite(REDPIN, HIGH);
        digitalWrite(GREENPIN, LOW);
      }
      break;
    case STATE_SCAN_VALID:
      if (currentState == STATE_SCAN_MASTER)
      {
        removeReadCard();
        aState = STATE_REMOVED_CARD;
        StateWaitTime = 2000;
        digitalWrite(REDPIN, LOW);
        digitalWrite(GREENPIN, HIGH);
      }
      else if (currentState == STATE_ADDED_CARD)
      {
        return;
      }
      else
      {
        StateWaitTime = 2000;
        digitalWrite(REDPIN, LOW);
        digitalWrite(GREENPIN, HIGH);
        digitalWrite(Relay,LOW);
        delay(3000);
        digitalWrite(Relay,HIGH);
      }
      break;
    case STATE_SCAN_MASTER:
      StateWaitTime = 5000;
      digitalWrite(REDPIN, LOW);
      digitalWrite(GREENPIN, HIGH);
      break;
  }

  currentState = aState;
  LastStateChangeTime = millis();
}

void setup()
{
  SPI.begin();         // Init SPI Bus
  mfrc522.PCD_Init();  // Init MFRC522

  LastStateChangeTime = millis();
  updateState(STATE_STARTING);

  pinMode(REDPIN, OUTPUT);
  pinMode(GREENPIN, OUTPUT);
  pinMode(Relay, OUTPUT);
  digitalWrite(Relay,HIGH);

  Serial.begin(9600);
}

void loop()
{
  byte cardState;

  if ((currentState != STATE_WAITING) &&
      (StateWaitTime > 0) &&
      (LastStateChangeTime + StateWaitTime < millis()))
  {
    updateState(STATE_WAITING);
  }

  // Look for new cards
  if ( ! mfrc522.PICC_IsNewCardPresent())
  {
    return;
  }

  // Select one of the cards
  if ( ! mfrc522.PICC_ReadCardSerial())
  {
    return;
  }

  cardState = readCardState();
  updateState(cardState);
}
The master card functionality should be embedded in this code, allowing you to add or remove cards dynamically.
Master Card Functionality
The master card is a special RFID tag designated to control access rights. Its main functions include:
- Entering programming mode: Tap the master card to initiate adding/removing other cards.
- Adding new cards: Present a new card after the master card to register it.
- Removing cards: Re-present a registered card in programming mode to delete it.
- Storing card data: Card UIDs are saved in EEPROM to retain data after power cycles.
Implement safeguards to prevent unauthorized entry into programming mode.
Enhancing Security and Features
Add-ons can improve both functionality and security:
- Keypad for PIN-based backup entry
- OLED display to show system status or UID feedback
- RTC module for time-restricted access control
- IoT module (e.g., ESP8266) to log access events online
- SD card module to store logs locally
Consider implementing encryption or scrambling UID values for added security.
Troubleshooting Common Issues
- RFID not reading cards: Check wiring, library compatibility, and card frequency.
- Servo not moving: Confirm pin assignments and power supply adequacy.
- Data not stored: Ensure correct EEPROM read/write functions.
- Master card not recognized: Verify the UID against saved data.
Use the Serial Monitor for real-time debugging during development.
Applications of This System
The Arduino RFID door lock can be used in:
- Residential doors
- Office cabins or meeting rooms
- School lockers
- Employee attendance systems
- Equipment access control in labs or factories
This system is scalable and can be customized for more complex security networks.
Conclusion
Building an Arduino UNO RFID Master Card Door Lock System is an excellent way to dive into the world of electronics, automation, and security. This project combines the simplicity of Arduino programming with the practical use of RFID technology, offering a real-world solution for secure access control. By using a master card, you can easily manage who has access to your system, adding or removing cards without needing to reprogram the board every time.
This system is not only cost-effective but also highly customizable. You can expand it by adding features like keypads, OLED displays, or even IoT connectivity for remote monitoring. It’s ideal for securing homes, offices, lockers, and more.
Most importantly, it helps you understand the core principles of microcontroller-based projects: hardware integration, software logic, data storage, and user interaction. Whether you’re a hobbyist, student, or developer, this project is a strong foundation for building smarter, more secure environments.
FAQs
What is the purpose of a master card in an RFID system?
It controls access to the system’s programming mode, allowing users to add or remove cards securely.
How secure is an Arduino-based RFID door lock?
Security is sufficient for basic needs but can be enhanced with encryption, logs, and multi-factor authentication.
Can multiple RFID readers be used with one Arduino?
Yes, but managing multiple readers over SPI can be complex and may require additional logic handling.
What if I lose the master card?
Include a reset button or secondary authentication method to regain control.
How many RFID cards can I store?
This depends on available EEPROM space in the Arduino, typically up to a few dozen.