
Table of Contents
1. Introduction
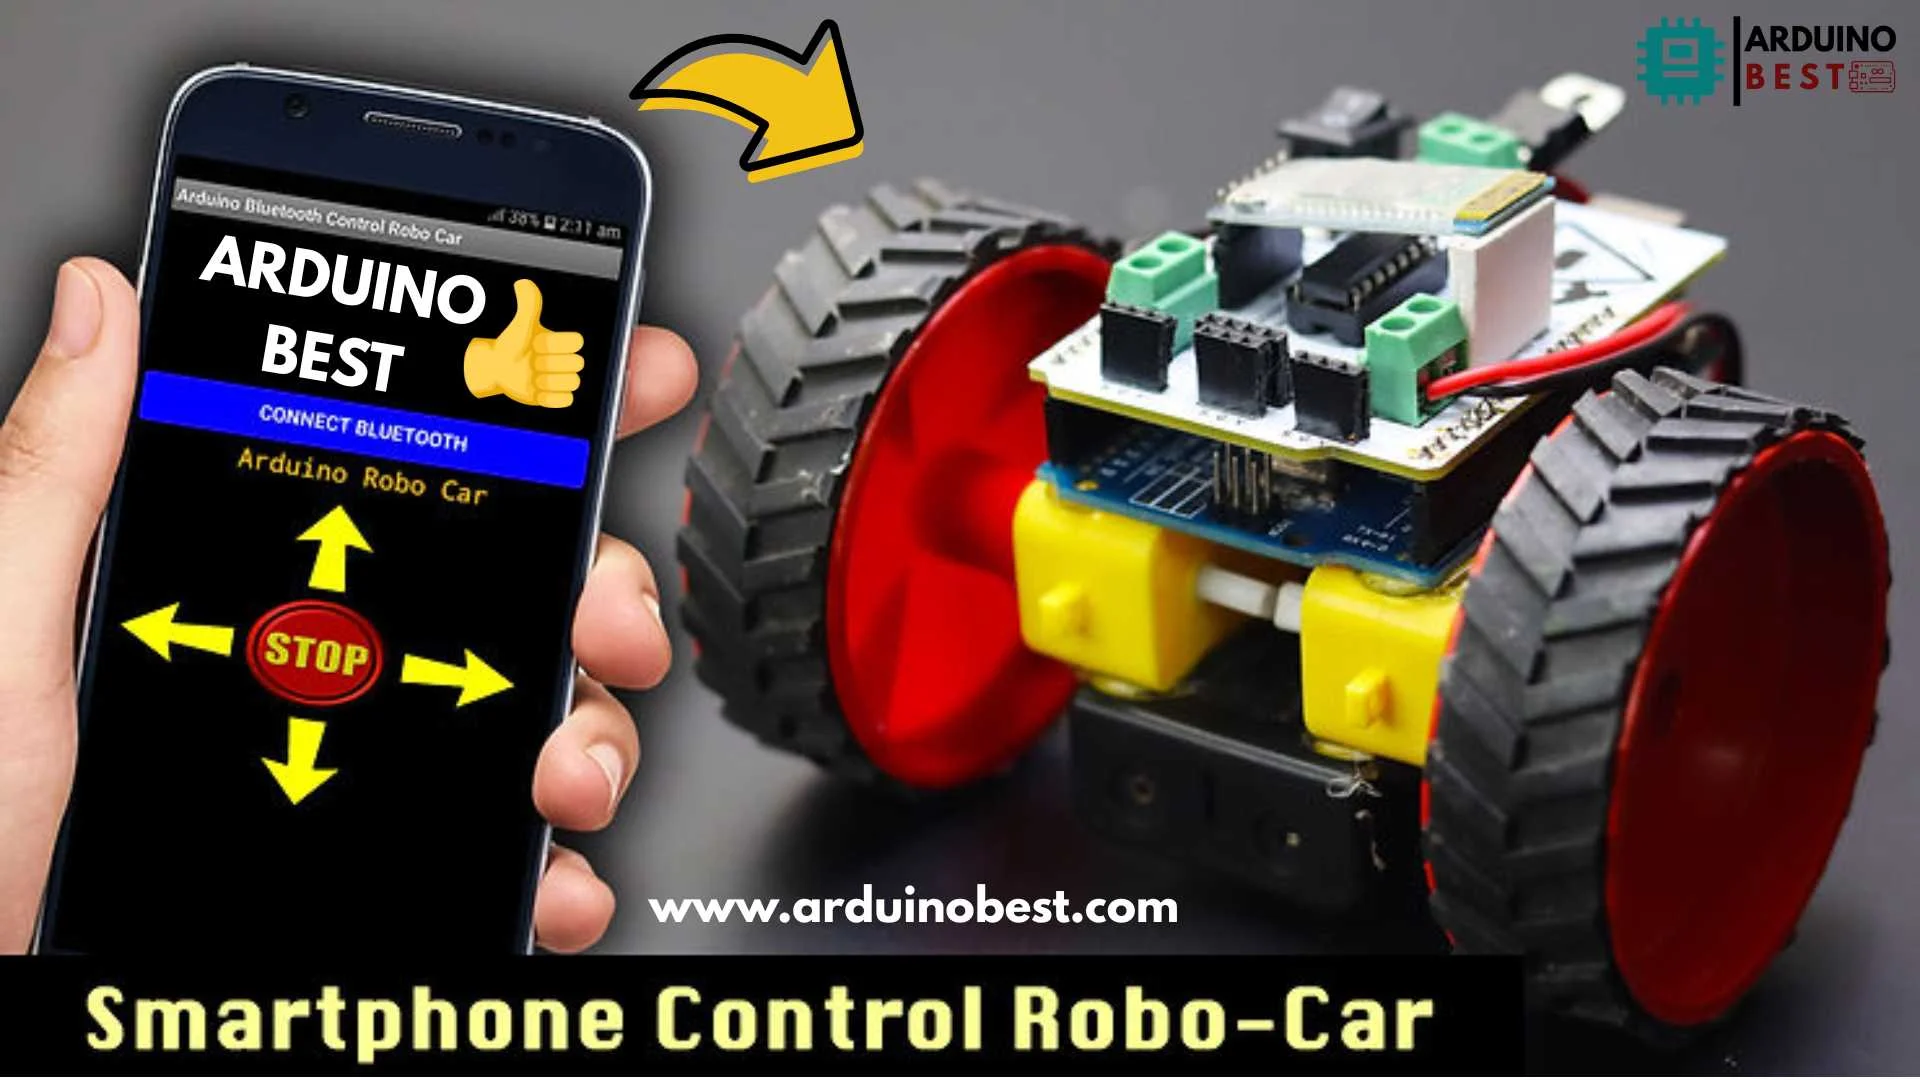
The ability to control robotic vehicles using a smartphone and Bluetooth has revolutionized DIY electronics projects. With an Arduino, HC-05 Bluetooth module, and a motor driver, you can build a Bluetooth-controlled robo car that responds to commands sent from an Android phone.
1.1 Overview of Bluetooth-Controlled Robo Cars
Traditional remote-controlled cars rely on RF signals, whereas modern Bluetooth-controlled robotic cars use smartphones for wireless communication. The use of an Arduino microcontroller makes it easy to program and customize the functionality of the car.
1.2 Why Use Arduino for Robotic Car Projects?
Arduino is an open-source microcontroller that simplifies the development of robotics and automation projects. It offers:
- Easy coding and prototyping
- Wide community support
- Compatibility with multiple sensors and modules
For an in-depth understanding of how Arduino works, check out this guide on Arduino programming.
2. Components Required
To build an Arduino Smartphone Bluetooth Control Robo Car, you will need the following components:
2.1 Arduino Board
- Arduino Uno (Recommended for beginners)
- Arduino Mega (For complex projects)
2.2 Bluetooth Module (HC-05 or HC-06)
- HC-05 supports both master and slave modes.
- HC-06 operates in slave mode only.
2.3 Motor Driver Module
- L298N Motor Driver (Recommended)
- L293D Motor Driver (Alternative)
2.4 Motors & Chassis
- Two DC motors
- Wheels and a motor mount chassis
2.5 Power Supply
- 9V or 12V battery pack
- Rechargeable Li-ion battery (for longer usage)
For more details on Bluetooth modules and motor drivers, check out this Bluetooth module guide.
3. Circuit Diagram & Connections
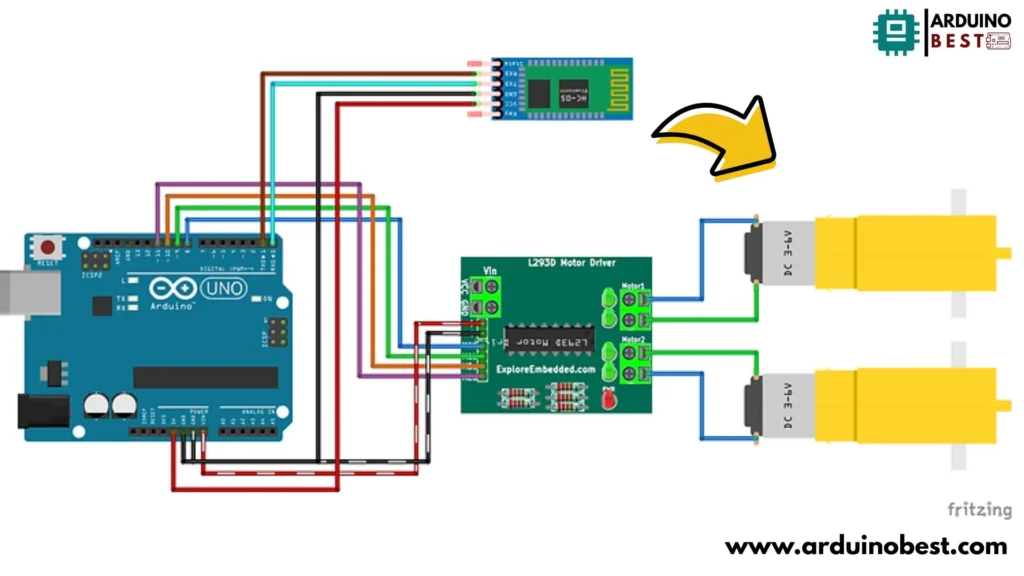
3.1 Connecting the HC-05 Bluetooth Module to Arduino
| HC-05 Pins | Arduino Pins |
|---|---|
| VCC | 5V |
| GND | GND |
| TX | RX (Pin 10) |
| RX | TX (Pin 11) |
3.2 Connecting the L298N Motor Driver to Arduino
| L298N Pins | Arduino Pins |
|---|---|
| IN1 | Digital Pin 7 |
| IN2 | Digital Pin 6 |
| IN3 | Digital Pin 5 |
| IN4 | Digital Pin 4 |
| ENA | PWM Pin 9 |
| ENB | PWM Pin 3 |
3.3 Powering the Motors and Arduino
- Connect the motor driver VCC to the battery pack
- Use a separate power source for the Arduino
- Common ground between all components
4. Arduino Code for Bluetooth Control
4.1 Installing Required Libraries
Before writing the program, ensure you have the SoftwareSerial library installed.
#include <SoftwareSerial.h>
SoftwareSerial BT(10, 11); // RX, TX
4.2 Writing the Bluetooth-Controlled Car Code
const int in1=9;
const int in2=10;
const int in3=11;
const int in4=8;

String readString;
void setup()

{
  Serial.begin(9600);
pinMode( in1 ,OUTPUT);
pinMode( in2 ,OUTPUT);
pinMode( in3 ,OUTPUT);
pinMode( in4 ,OUTPUT);
}


void loop() {

while(Serial.available()){
    delay(50);
    char c=Serial.read();
    readString+=c;
}

if(readString.length()>0){
    Serial.println(readString);
    if (readString =="LEFT"){
            digitalWrite(in1,1);
            digitalWrite(in2,0);
            digitalWrite(in3,0);
            digitalWrite(in4,1);
            delay(10);
    }
    if (readString =="RIGHT"){
            digitalWrite(in1,0);
            digitalWrite(in2,1);
            digitalWrite(in3,1);
            digitalWrite(in4,0);
            delay(10);
    }
    if (readString =="FORWARD"){
            digitalWrite(in1,1);
            digitalWrite(in2,0);
            digitalWrite(in3,1);
            digitalWrite(in4,0);
            delay(10);
    }
    if (readString =="BACKWARD"){
            digitalWrite(in1,0);
            digitalWrite(in2,1);
            digitalWrite(in3,0);
            digitalWrite(in4,1);
            delay(10);
    }
    if (readString =="STOP"){
            digitalWrite(in1,0);
            digitalWrite(in2,0);
            digitalWrite(in3,0);
            digitalWrite(in4,0);
            delay(10);
    }

    readString="";
  }
}
5. Creating the Smartphone Application
5.1 Using MIT App Inventor to Build a Bluetooth Control App
- Create buttons for forward, backward, left, and right movement.
- Establish Bluetooth connectivity using the HC-05 module.
- Send commands (F, B, L, R) based on button presses.
5.2 Connecting the App to the Robo Car
- Turn on Bluetooth and pair with HC-05.
- Open the app and select the paired device.
- Send movement commands and observe the car’s response.
For a step-by-step app development tutorial, check this MIT App Inventor guide.
6. Testing and Troubleshooting
6.1 Initial Testing
- Check Bluetooth connectivity.
- Ensure motor wiring is correct.
- Verify Arduino serial communication.
6.2 Common Issues and Fixes
- Car not responding? Ensure the HC-05 is paired.
- Motors not moving? Check motor driver connections.
- Bluetooth delay? Reduce unnecessary delays in the code.
7. Advanced Features
7.1 Implementing Voice Control
- Use Google Voice Recognition in MIT App Inventor.
- Convert speech commands into Bluetooth signals.
7.2 Adding Obstacle Avoidance
- Use ultrasonic sensors to detect objects.
- Implement automatic stopping when an obstacle is detected.
7.3 Speed Control
- Adjust PWM values for smooth speed transitions.
8. Applications of Bluetooth-Controlled Robo Cars
- Educational Projects – Used in STEM learning.
- Home Automation – Controlled surveillance robots.
- Competitions and DIY Projects – Popular in robotics contests.
9. FAQs
9.1 How do I pair my smartphone with the HC-05 module?
- Enable Bluetooth on your phone.
- Search for HC-05 and enter 1234 or 0000 as the PIN.
9.2 Can I use an iPhone to control the Robo Car?
- iPhones do not support HC-05 Bluetooth modules. Use Wi-Fi modules like ESP8266 instead.
9.3 How can I extend the Bluetooth range?
- Use HC-05 with an external antenna for better range.
10. Conclusion
Building an Arduino Smartphone Bluetooth Control Robo Car is an exciting project that enhances robotics, programming, and automation skills. With proper Bluetooth communication, motor control, and app integration, you can create a fully functional and customizable robotic vehicle.
11. Arduino Projects:
1- Complete Guide for DHT11/DHT22 Humidity and Temperature Sensor With Arduino
2- DHT11 – Temperature and Humidity Sensor
3- DHT22 – Temperature and Humidity Sensor (more accurate than DHT11)
4- BMP180 – Barometric Pressure and Altitude Sensor
5- BMP280 – Barometric Pressure & Temperature Sensor
6- BME280 – Temperature, Humidity, and Pressure Sensor
7- Arduino Flex Sensor Controlled Robot Hand
8- Arduino ECG Heart Rate Monitor AD8232 Demo
9- Arduino NRF24L01 Wireless Joystick Robot Car
10- Arduino Force Sensor Anti-Theft Alarm System
11- Arduino NRF24L01 Transceiver Controlled Relay Light
12- Arduino Rotary Encoder Controlled LEDs: A Complete Guide