Table of Contents
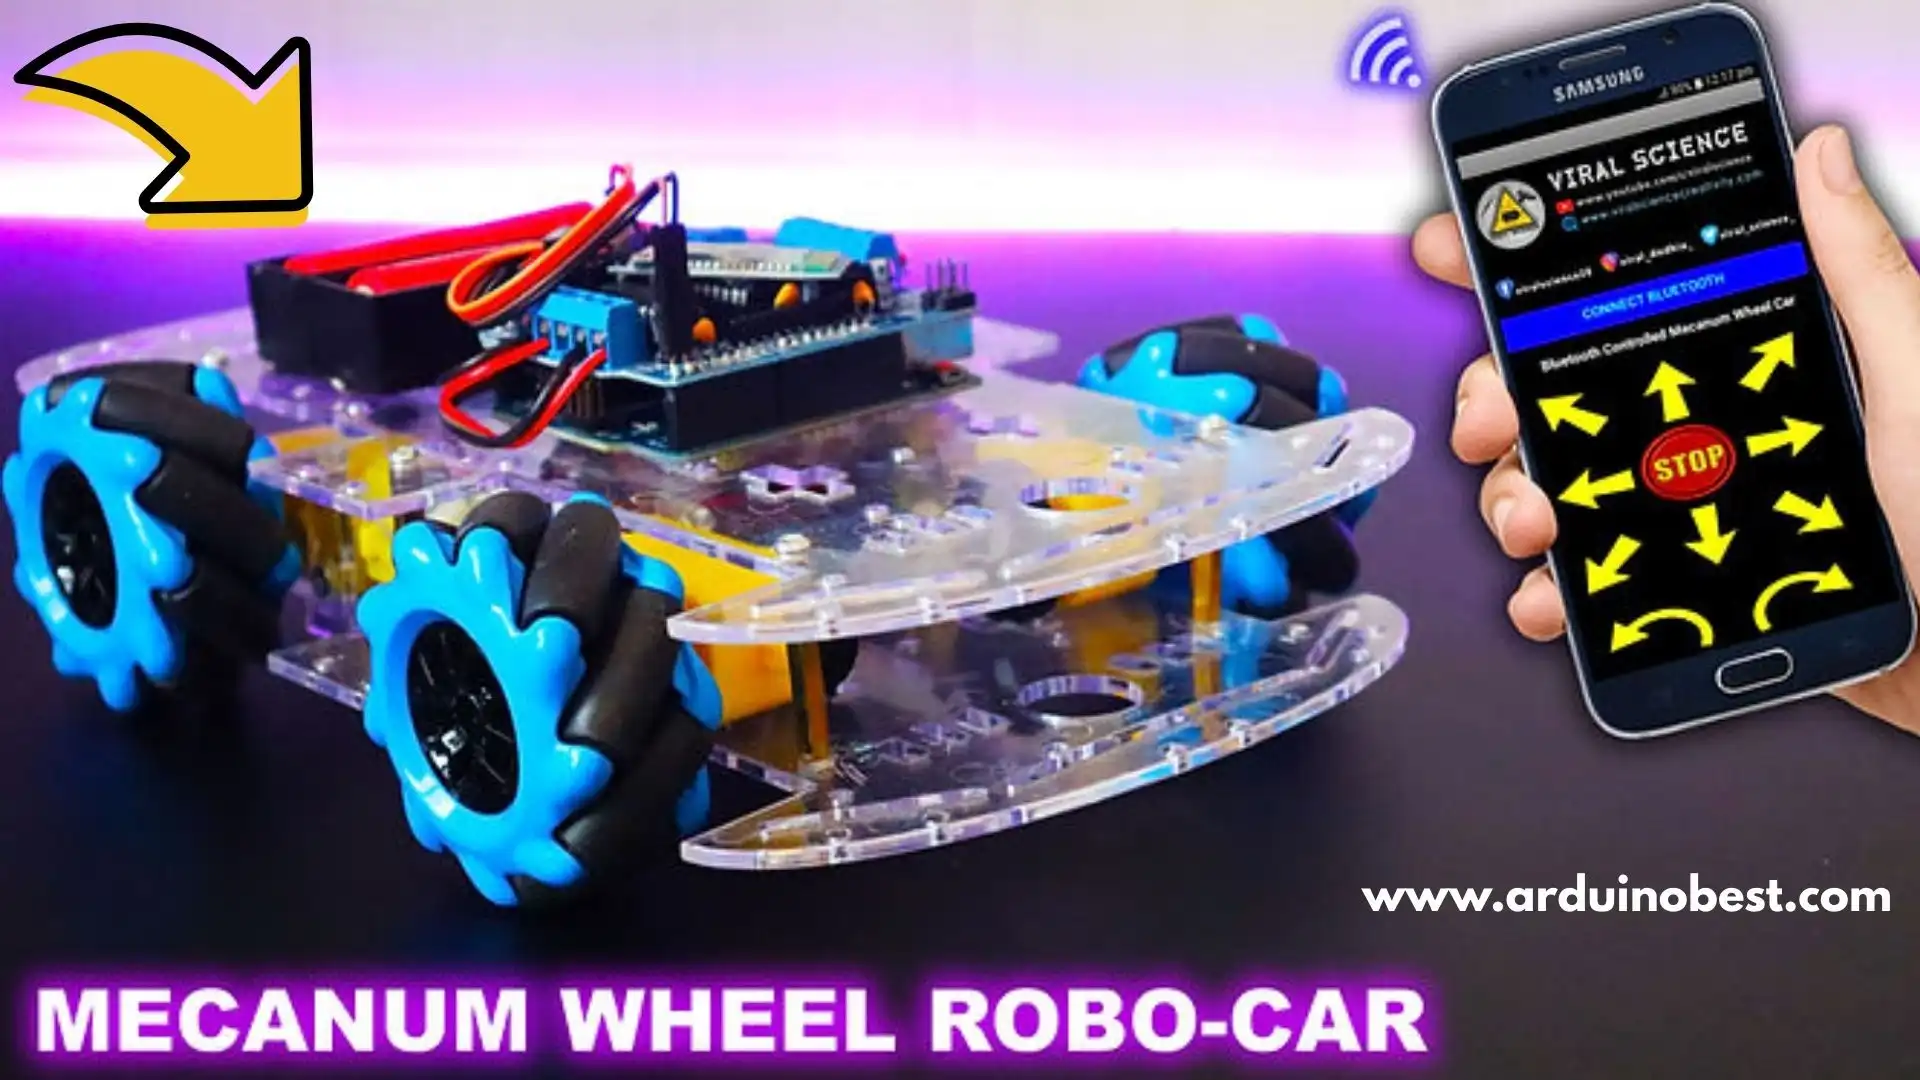
Building an Arduino Mecanum Wheel Robot Car offers an exciting opportunity to delve into the realms of robotics, electronics, and programming. This guide will walk you through the process of constructing a robot capable of omnidirectional movement, thanks to the unique capabilities of Mecanum wheels.
Understanding Mecanum Wheels
Mecanum wheels are specialized wheels with rollers positioned at a 45-degree angle to the wheel’s axis. This design allows vehicles to move in any direction without changing the wheel’s orientation. By varying the speed and direction of each wheel, the robot can achieve forward, backward, lateral, and diagonal movements. This omnidirectional capability is particularly beneficial in robotics, enabling precise maneuverability in constrained spaces.How To Mechatronics+1Instructables+1Instructables
Components Required
To build your Arduino Mecanum Wheel Robot Car, you’ll need the following components:
- Arduino Board: Serves as the brain of the robot, processing inputs and controlling outputs.Instructables+1How To Mechatronics+1
- Mecanum Wheels: A set of four wheels designed for omnidirectional movement.
- DC Motors: Four motors compatible with your chosen wheels.Arduino Forum+1Arduino Forum+1
- Motor Drivers: Modules like the L298N or TB6612FNG to interface between the Arduino and the motors.
- Power Supply: Batteries that meet the voltage and current requirements of your motors and electronics.
- Chassis: A frame to mount all components securely.How To Mechatronics
- Control Modules: Optional modules like Bluetooth (e.g., HC-06) for wireless control.Instructables
Tools Needed
Ensure you have the following tools on hand:
- Soldering iron and accessories
- Screwdrivers and wrenches
- Multimeter for testing connections
- Computer with Arduino IDE installed
Assembling the Robot Car

- Chassis Preparation: Mount the DC motors onto the chassis, ensuring they are securely attached and properly aligned.
- Attaching Mecanum Wheels: Fix the Mecanum wheels onto the motor shafts, paying close attention to their orientation. Each wheel’s rollers should be positioned to enable the desired omnidirectional movement.How To Mechatronics
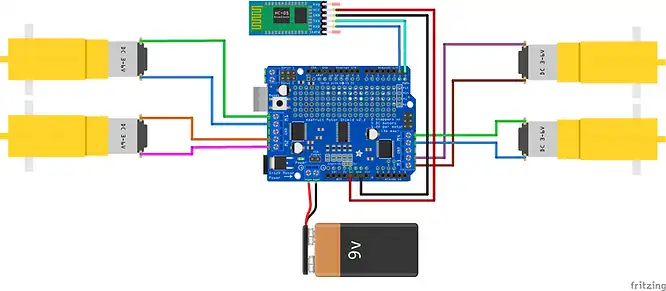
- Wiring the Electronics:
- Connect the motors to the motor drivers.
- Interface the motor drivers with the Arduino board.
- Integrate the power supply, ensuring proper voltage levels and secure connections.
- Installing Control Modules: If using wireless control, set up the Bluetooth module by connecting it to the appropriate pins on the Arduino.
Programming the Arduino
#include <AFMotor.h>   //Download and Install AFMotor.h Library

AF_DCMotor motor1(1); //Front Left Wheel
AF_DCMotor motor2(2); //Back Left Wheel
AF_DCMotor motor3(3); //Front Right Wheel
AF_DCMotor motor4(4); //Back Right Wheel

String readString;

void setup() {
  Serial.begin(9600);
  motor1.setSpeed(250);   //Set Motor Speed
  motor2.setSpeed(250);
  motor3.setSpeed(250);
  motor4.setSpeed(250);
}

void loop() {
  while(Serial.available()){
    delay(50);
    char c=Serial.read();
    readString+=c;
  }
  if(readString.length()>0){
    Serial.println(readString);
    if (readString =="FORWARD"){      // MOVE FORWARD
      motor1.run (FORWARD);
      motor2.run (FORWARD);
      motor3.run (FORWARD);
      motor4.run (FORWARD);
    }
    if (readString =="BACKWARD"){     // MOVE BACKWARD
      motor1.run (BACKWARD);
      motor2.run (BACKWARD);
      motor3.run (BACKWARD);
      motor4.run (BACKWARD);
    }
    if (readString =="LEFT"){     // MOVE LEFT SIDE
      motor1.run (BACKWARD);
      motor2.run (FORWARD);
      motor3.run (FORWARD);
      motor4.run (BACKWARD);
    }
    if (readString =="RIGHT"){     // MOVE RIGHT SIDE
      motor1.run (FORWARD);
      motor2.run (BACKWARD);
      motor3.run (BACKWARD);
      motor4.run (FORWARD);
    }
    if (readString =="FORWARDLEFT"){     // MOVE FORWARD LEFT
      motor1.run (RELEASE);
      motor2.run (FORWARD);
      motor3.run (FORWARD);
      motor4.run (RELEASE);
    }
    if (readString =="FORWARDRIGHT"){     // MOVE FORWARD RIGHT
      motor1.run (FORWARD);
      motor2.run (RELEASE);
      motor3.run (RELEASE);
      motor4.run (FORWARD);
    }
    if (readString =="BACKWARDLEFT"){     // MOVE BACKWARD LEFT
      motor1.run (BACKWARD);
      motor2.run (RELEASE);
      motor3.run (RELEASE);
      motor4.run (BACKWARD);
    }
    if (readString =="BACKWARDRIGHT"){     // MOVE BACKWARD RIGHT
      motor1.run (RELEASE);
      motor2.run (BACKWARD);
      motor3.run (BACKWARD);
      motor4.run (RELEASE);
    }
    if (readString =="ROTATELEFT"){     // ROTATE LEFT SIDE
      motor1.run (BACKWARD);
      motor2.run (BACKWARD);
      motor3.run (FORWARD);
      motor4.run (FORWARD);
    }
    if (readString =="ROTATERIGHT"){     // ROTATE RIGHT SIDE
      motor1.run (FORWARD);
      motor2.run (FORWARD);
      motor3.run (BACKWARD);
      motor4.run (BACKWARD);
    }
    if (readString =="STOP"){     // STOP
      motor1.run (RELEASE);
      motor2.run (RELEASE);
      motor3.run (RELEASE);
      motor4.run (RELEASE);
    }

    readString="";
  }
}- Motor Control Basics: Understand how to control DC motors using the Arduino through PWM signals and motor driver interfacing.
- Implementing Mecanum Wheel Algorithms: Develop algorithms to calculate wheel speeds for omnidirectional movement. This involves translating desired movement directions into specific motor commands.
- Integrating Wireless Control: Program the Arduino to receive commands via Bluetooth. This typically involves setting up serial communication between the Bluetooth module and the Arduino.
- Testing and Debugging: Upload the code to the Arduino and conduct initial tests. Troubleshoot any issues related to motor movement or connectivity.
Controlling the Robot Car
- Smartphone Application: Utilize apps like Arduino Bluetooth Controller to send movement commands from your smartphone to the robot via Bluetooth.
- Autonomous Features: Incorporate sensors such as ultrasonic or infrared to enable the robot to detect obstacles and navigate autonomously.
Troubleshooting Common Issues
- Motor Malfunctions: Ensure all connections are secure and that the motors receive the appropriate voltage and current.
- Connectivity Problems: Verify that the Bluetooth module is properly paired with your control device and that it’s within range.
- Power Supply Concerns: Confirm that the batteries are adequately charged and meet the power requirements of the motors and electronics.
Enhancements and Future Developments
- Additional Sensors: Incorporate sensors like gyroscopes or accelerometers for enhanced navigation capabilities.
- Advanced Control Algorithms: Implement more sophisticated algorithms for smoother and more precise movement.
- Integration with Other Communication Modules: Consider adding Wi-Fi modules for extended control range and capabilities.
Conclusion
Building an Arduino Mecanum Wheel Robot Car is more than just a fun DIY project—it’s a deep dive into the world of robotics, electronics, and mechanical engineering. This innovative design allows your robot to move in any direction—forward, backward, sideways, and diagonally—unlocking a whole new level of maneuverability and control. By using Mecanum wheels, DC motors, and Arduino programming, you learn the foundations of motion algorithms, component integration, and system troubleshooting.
This project is perfect for anyone looking to enhance their robot-building skills, from beginners experimenting with basic Arduino controls to advanced hobbyists exploring omnidirectional movement and automation. The flexibility of the system allows you to scale up, adding features like Bluetooth control, autonomous sensors, or even machine vision.
More importantly, it fosters problem-solving, creative thinking, and technical proficiency. Whether you’re building for a school competition, a personal challenge, or to explore robotics as a career, the knowledge you gain here is practical and forward-thinking.
So, get your components, fire up the Arduino IDE, and start building. Your Mecanum robot awaits—ready to roll, slide, and turn in any direction you command. The world of robotics is in your hands—start exploring! 🤖🔧
Arduino Projects:
1- Complete Guide for DHT11/DHT22 Humidity and Temperature Sensor With Arduino
2- DHT11 – Temperature and Humidity Sensor
3- DHT22 – Temperature and Humidity Sensor (more accurate than DHT11)
4- BMP180 – Barometric Pressure and Altitude Sensor
5- BMP280 – Barometric Pressure & Temperature Sensor
6- BME280 – Temperature, Humidity, and Pressure Sensor
7- Arduino Flex Sensor Controlled Robot Hand
8- Arduino ECG Heart Rate Monitor AD8232 Demo
9- Arduino NRF24L01 Wireless Joystick Robot Car
10- Arduino Force Sensor Anti-Theft Alarm System
11- Arduino NRF24L01 Transceiver Controlled Relay Light
12- Arduino Rotary Encoder Controlled LEDs: A Complete Guide

