Table of Contents
Introduction
Security is a growing concern in both personal and commercial spaces. Traditional security systems can be expensive and complex to install. However, with DIY electronics, you can create a cost-effective, efficient, and customizable anti-theft alarm system using Arduino and a force sensor.
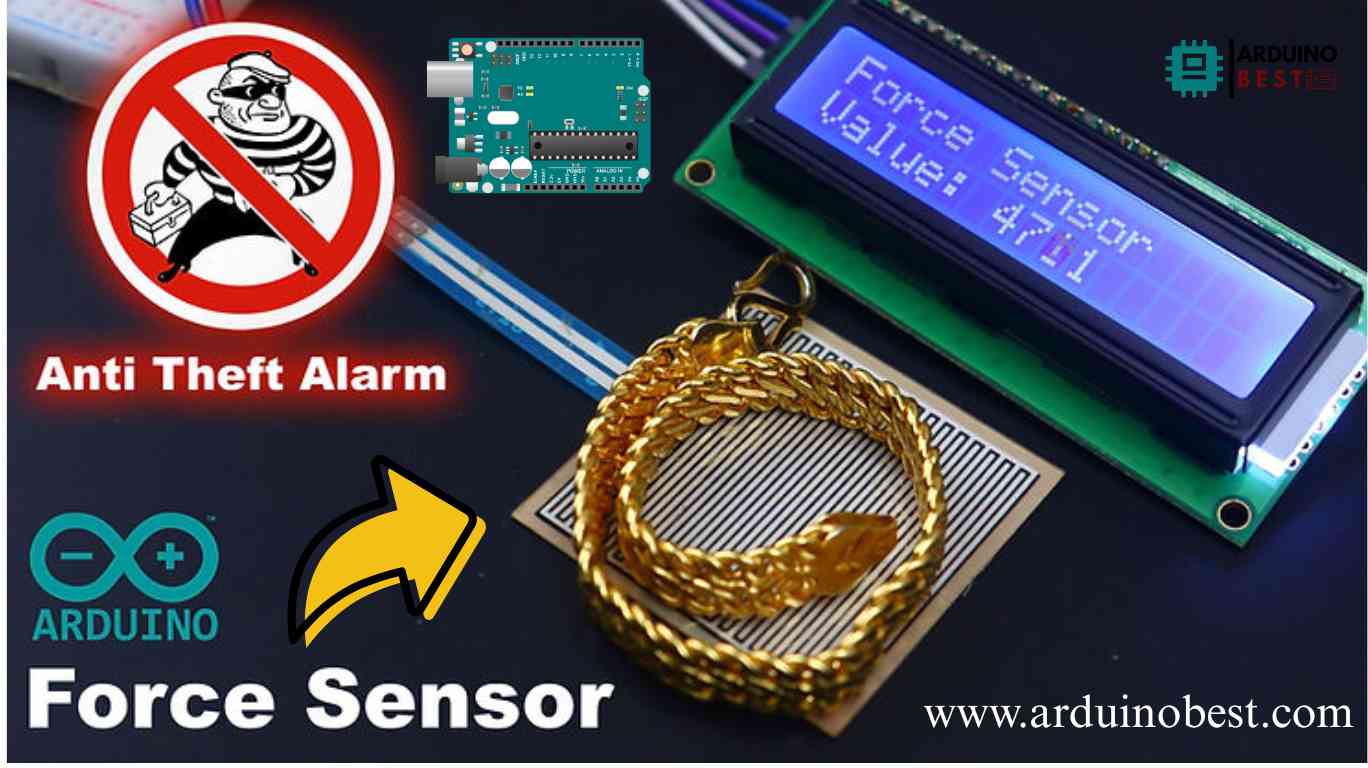
In this guide, we will walk you through creating an Arduino-based anti-theft alarm system using a force-sensitive resistor (FSR). This project is perfect for securing valuable items, safes, or even doors.
Understanding Force Sensors
What is a Force Sensor?
A force sensor, also known as a force-sensitive resistor (FSR), is a component that changes its resistance based on applied pressure. When pressure is exerted, the resistance decreases, allowing us to measure force levels.
Types of Force Sensors
There are various force sensors used in different applications:
- FSR Sensors – Used in touch-sensitive applications and security systems.
- Load Cells – Used in industrial applications to measure weight.
- Strain Gauges – Used in engineering and aerospace applications.
How Does an FSR Work?
A force-sensitive resistor operates on the principle that resistance decreases as force increases. It is commonly used in pressure-sensitive applications such as touch interfaces, medical devices, and security systems.
Components Required
To build this project, you will need:
- Arduino Uno/Nano – Microcontroller to process sensor data
- Force Sensor (FSR) – Detects force applied to an object
- Buzzer – Sounds the alarm upon unauthorized access
- LEDs (Red & Green) – Indicator lights for system status
- 16×2 LCD Display (I2C) – Displays system messages
- Push Button – Used to reset the alarm
- Resistors (100Ω, 10kΩ) – Required for circuit stability
- Breadboard & Jumper Wires – For making secure connections
- 9V Battery & Clip – Power supply for the system
Circuit Design & Connections
Conceptual Design
The system works by monitoring force applied to an object. When the pressure exceeds a defined threshold, the alarm is triggered. The buzzer will sound, and an LED will light up to indicate unauthorized access.

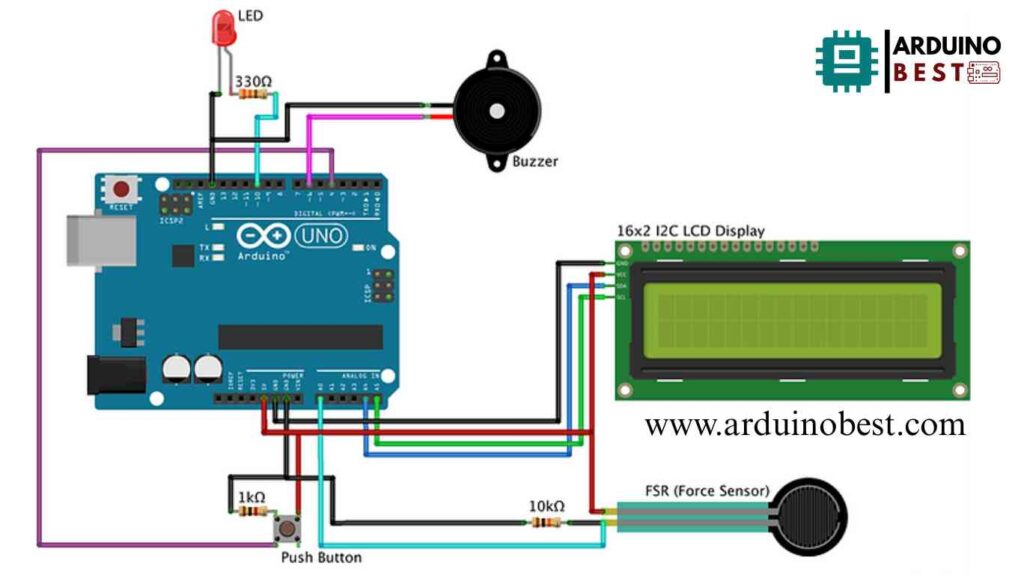
Circuit Diagram & Setup
- Connecting the Force Sensor
- Connect one terminal of the FSR to 5V and the other to an analog pin.
- Buzzer & LEDs
- Connect the buzzer to a digital pin for activation.
- Use a red LED to indicate an alert and a green LED for normal status.
- LCD Display
- Connect the LCD via I2C to display messages such as “System Armed” and “Intrusion Detected.”
Programming the Arduino
Required Libraries
Before coding, install the following libraries in the Arduino IDE:
#include <Wire.h>
#include <LiquidCrystal_I2C.h>
Code Overview
- Read force sensor values.
- If force exceeds a certain threshold, activate the buzzer.
- Display status messages on the LCD.
- Reset system using a button press.
Sample Code
#include <LiquidCrystal_I2C.h>
LiquidCrystal_I2C lcd(0x3F, 16, 2); // LCD HEX address 0x3F -- change according to yours

int Force_VAL = 0;
int temp = 0;
int btn = 0;
int buzz = 6;
void setup()
{
  pinMode(A0, INPUT);
  pinMode(4, INPUT);
  pinMode(buzz, OUTPUT);
  Serial.begin(9600);
  lcd.begin();

  lcd.setCursor(0,0);
  lcd.print("Force Sensor");
  pinMode(10, OUTPUT);
  digitalWrite(10, LOW);
  digitalWrite(buzz, LOW);


}

void loop()
{
  Force_VAL = analogRead(A0);
  btn = digitalRead(4);
  Serial.println(btn);
  lcd.setCursor(0,1);
  lcd.print("Value:");
  lcd.setCursor(7,1);
  lcd.print(Force_VAL);

 if ((Force_VAL < 550) || (Force_VAL > 650))  //Enter Force Value Range
 {
    temp=1;
  }

 if (btn == 1)
 {
    temp=0;
  }

 if (temp == 1)
 {
    digitalWrite(10, HIGH);
    digitalWrite(buzz, HIGH);
  }

 if (temp == 0)
 {
    digitalWrite(10, LOW);
    digitalWrite(buzz, LOW);
  }

  delay(10);
}
Testing & Calibration
Calibrating the Force Sensor
- Adjust the threshold value based on your application.
- Test the system by applying different force levels.
Common Issues & Solutions
- False Alarms – Adjust sensitivity by modifying resistance values.
- Buzzer Not Activating – Check circuit connections and code logic.
- LCD Not Displaying Data – Ensure correct I2C address is used.
Enhancements & Features
- Adding GSM Module – Send SMS alerts when intrusion is detected.
- Wi-Fi Connectivity – Integrate with IoT platforms for remote monitoring.
- Multiple Sensors – Use multiple FSRs for enhanced coverage.
Safety & Security Considerations
- Ensure the system is well-enclosed to prevent tampering.
- Regularly test components to avoid failures.
- Follow local security regulations when implementing alarm systems.
FAQs
How sensitive is the force sensor?
The sensitivity varies depending on the model. You can adjust it by modifying the resistance values in the circuit.
Can I use a different Arduino board?
Yes, Arduino Uno, Nano, and Mega all work with this project.
How do I prevent false alarms?
Ensure the force sensor is properly calibrated and positioned correctly.
Can I add a wireless module?
Yes, you can integrate an ESP8266 or Bluetooth module for remote access.
Conclusion
Building an Arduino-based anti-theft alarm system with a force sensor is an excellent DIY security project. This system is simple to implement, highly customizable, and cost-effective. By fine-tuning the settings, integrating additional modules, and expanding functionality, you can create a highly robust security solution.
Here we suggest other Arduino Projects:
1- Complete Guide for DHT11/DHT22 Humidity and Temperature Sensor With Arduino
2- DHT11 – Temperature and Humidity Sensor
3- DHT22 – Temperature and Humidity Sensor (more accurate than DHT11)
4- BMP180 – Barometric Pressure and Altitude Sensor
5- BMP280 – Barometric Pressure & Temperature Sensor
6- BME280 – Temperature, Humidity, and Pressure Sensor
7- Arduino Flex Sensor Controlled Robot Hand

