
Table of Contents
Introduction
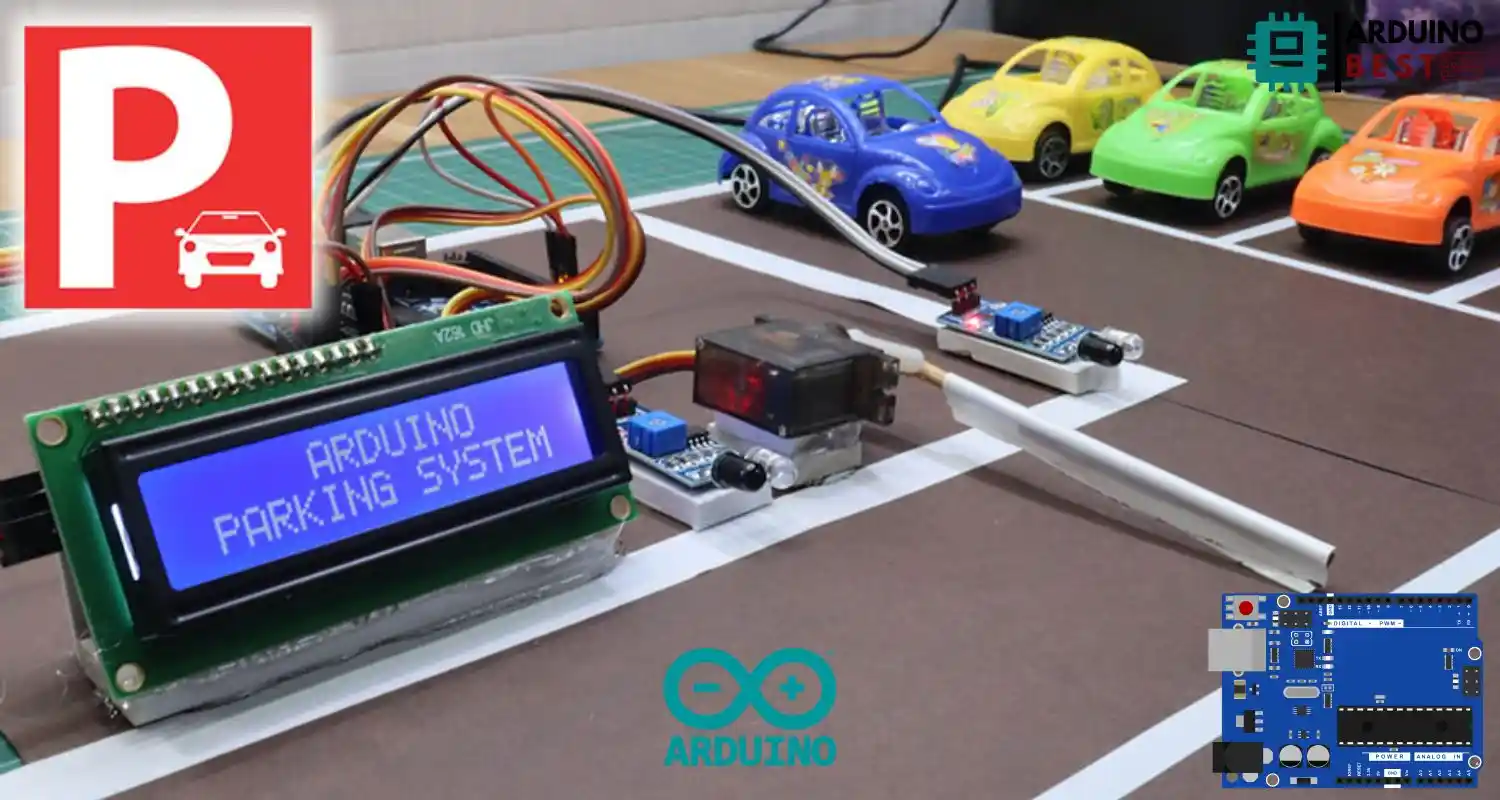
As urban spaces grow more congested, the demand for automated parking solutions has never been higher. A smart and cost-effective way to meet this challenge is through an Arduino car parking system. This DIY project not only reduces human effort but also enhances vehicle monitoring and space optimization.
In this guide, you will learn how to build a fully functional Arduino-based parking system using basic electronics components. We will explore its working principle, components, wiring, coding, and potential enhancements. For technical specifics about the core board, refer to the Arduino Uno Board Specifications.
Understanding the Arduino Car Parking System
An Arduino car parking system is a microcontroller-based project designed to detect, monitor, and control vehicle parking using sensors and actuators. It’s ideal for small lots, residential garages, and prototype smart cities.
Benefits of the System
- Real-time vehicle detection
- Automated gate control
- Reduced manpower and operational costs
- Scalable design for multiple parking spots
The system uses a combination of IR sensors, ultrasonic sensors, LCD display, and servo motors to automate entry and exit. To see how these sensors work with Arduino, you can reference this comprehensive guide on Ultrasonic Sensor Interfacing.
Components Required
To build a functional parking system, you will need:
- Arduino Uno or Mega
- IR sensors for vehicle presence detection
- Ultrasonic sensors for distance measurement
- Servo motor to control gate/barrier
- 16×2 LCD display with I2C module
- LEDs and buzzers for alerts
- Breadboard and jumper wires
- 5V power supply or USB
Each component plays a vital role in executing parking operations accurately.
System Architecture and Working Principle
The system operates on a straightforward logic:
- An IR sensor detects an incoming car
- The ultrasonic sensor confirms space availability
- If space is available, a servo motor lifts the barrier
- The LCD display updates the user with parking availability status
Sensor Placement
- IR sensors at entrance and exit
- Ultrasonic sensors placed overhead or side-facing the parking slot
This setup ensures optimal detection accuracy and smooth gate control.
Circuit Diagram and Wiring
The wiring process is simple if you follow the circuit schematic:
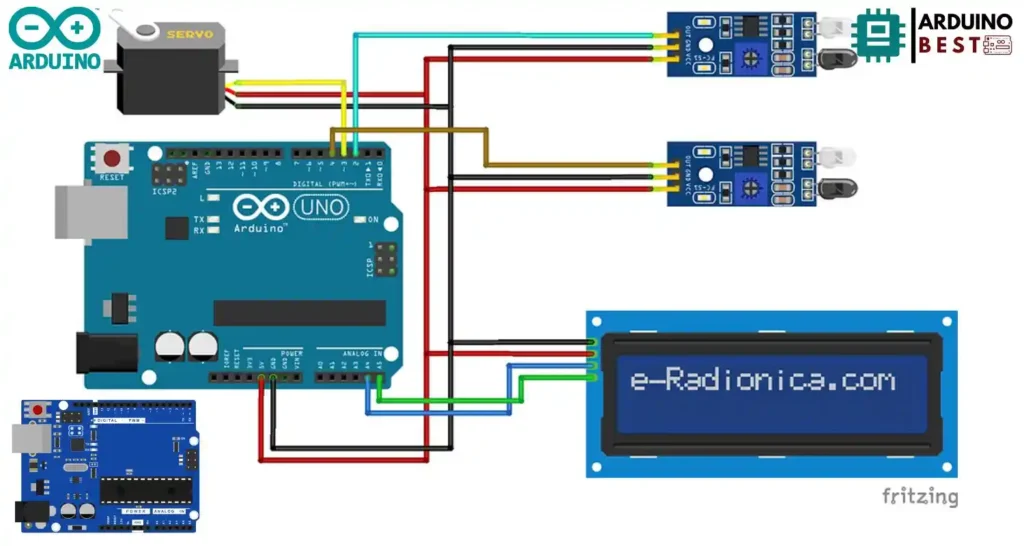
- Connect IR sensors to Arduino digital pins
- Ultrasonic sensors to trigger and echo pins
- Servo motor to PWM-enabled pin (e.g., D9)
- LCD to I2C interface on A4 and A5
- Power via USB or 9V adapter
Ensure all grounds are connected for proper current flow and stability.
Programming the Arduino
The code should:
- Initialize all connected components
- Monitor IR and ultrasonic sensor input
- Open/close the gate using servo
- Display messages on the LCD
Libraries to Include
LiquidCrystal_I2C.hServo.h
Sample Function Snippet
#include <Wire.h>
void setup()
{
Wire.begin();
Serial.begin(9600);
Serial.println("\nI2C Scanner");
}
void loop()
{
byte error, address;
int Devices;
Serial.println("Scanning...");
Devices = 0;
for(address = 1; address < 127; address++ )
{

Wire.beginTransmission(address);
error = Wire.endTransmission();
if (error == 0)
{
Serial.print("I2C device found at address 0x");
if (address<16)
Serial.print("0");
Serial.print(address,HEX);
Serial.println("  !");
Devices++;
}
else if (error==4)
{
Serial.print("Unknown error at address 0x");
if (address<16)
Serial.print("0");
Serial.println(address,HEX);
}
}
if (Devices == 0)
Serial.println("No I2C devices found\n");
else
Serial.println("done\n");
delay(5000);
}
Upload the code using Arduino IDE after checking connections.
Testing and Calibration
Once wired and coded:
- Test each sensor individually
- Adjust ultrasonic sensor range for accuracy
- Calibrate servo motor angle for full gate movement
Troubleshooting
- Sensor not responding: Check power and wiring
- LCD not displaying: Recheck I2C address
- Servo stuttering: Use a stable power source
Enhancements and Advanced Features
You can add more functionality like:
- IoT integration using ESP8266 or ESP32
- Mobile app to monitor space remotely
- Data logging via SD card module
- RFID module for authorized access control
These features transform a simple setup into a smart parking system.
Real-world Applications and Case Studies
- Smart cities use this setup for efficient traffic control
- Commercial parking lots improve throughput
- Universities and tech colleges implement them as part of research and coursework
These projects demonstrate practical and scalable use cases for Arduino in real-life scenarios.
FAQs
How does the Arduino detect a parked car?
By using IR or ultrasonic sensors placed at strategic points to sense vehicle presence.
Can this system manage multiple slots?
Yes, by scaling the number of sensors and assigning IDs in the code, multiple spaces can be monitored.
What is the total cost of this project?
Generally, it ranges from $20 to $50, depending on the components used.
Which sensor is more reliable?
Ultrasonic sensors offer better accuracy for distance-based detection.
Can a payment system be integrated?
Yes, by using RFID or keypad modules linked to Arduino or a connected payment gateway.
Conclusion
An Arduino car parking system offers an affordable, educational, and functional solution to modern parking challenges. It can be expanded and integrated into more advanced technologies, making it a strong foundation for learning and development in embedded systems and IoT.