Table of Contents
The ESP8266 NodeMCU has become one of the most popular solutions for Internet of Things (IoT) applications. With its ability to connect devices to the internet via Wi-Fi, the ESP8266 offers an affordable and reliable way to bring your projects to life. Whether you’re a beginner or an experienced developer, understanding the full potential of the ESP8266 NodeMCU can take your IoT projects to the next level.
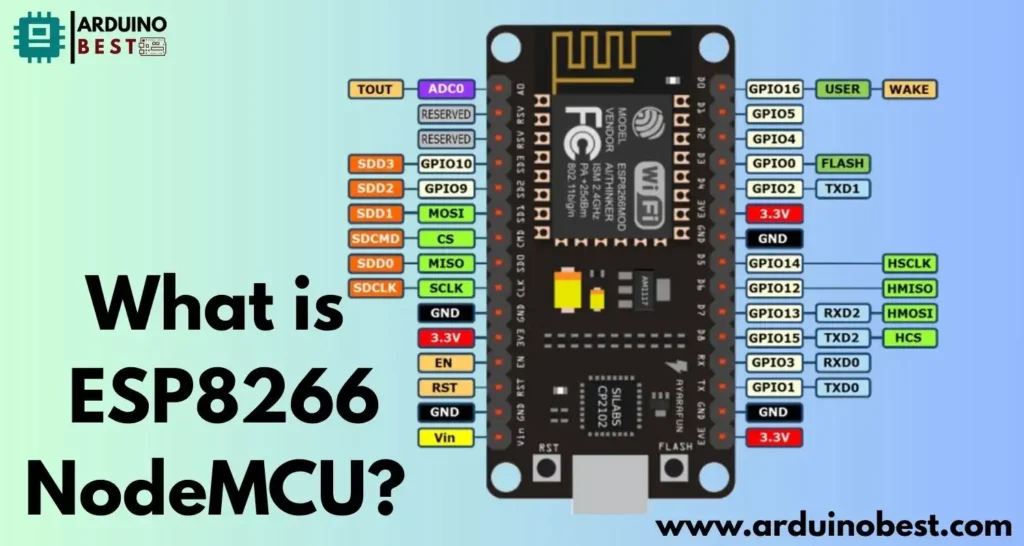
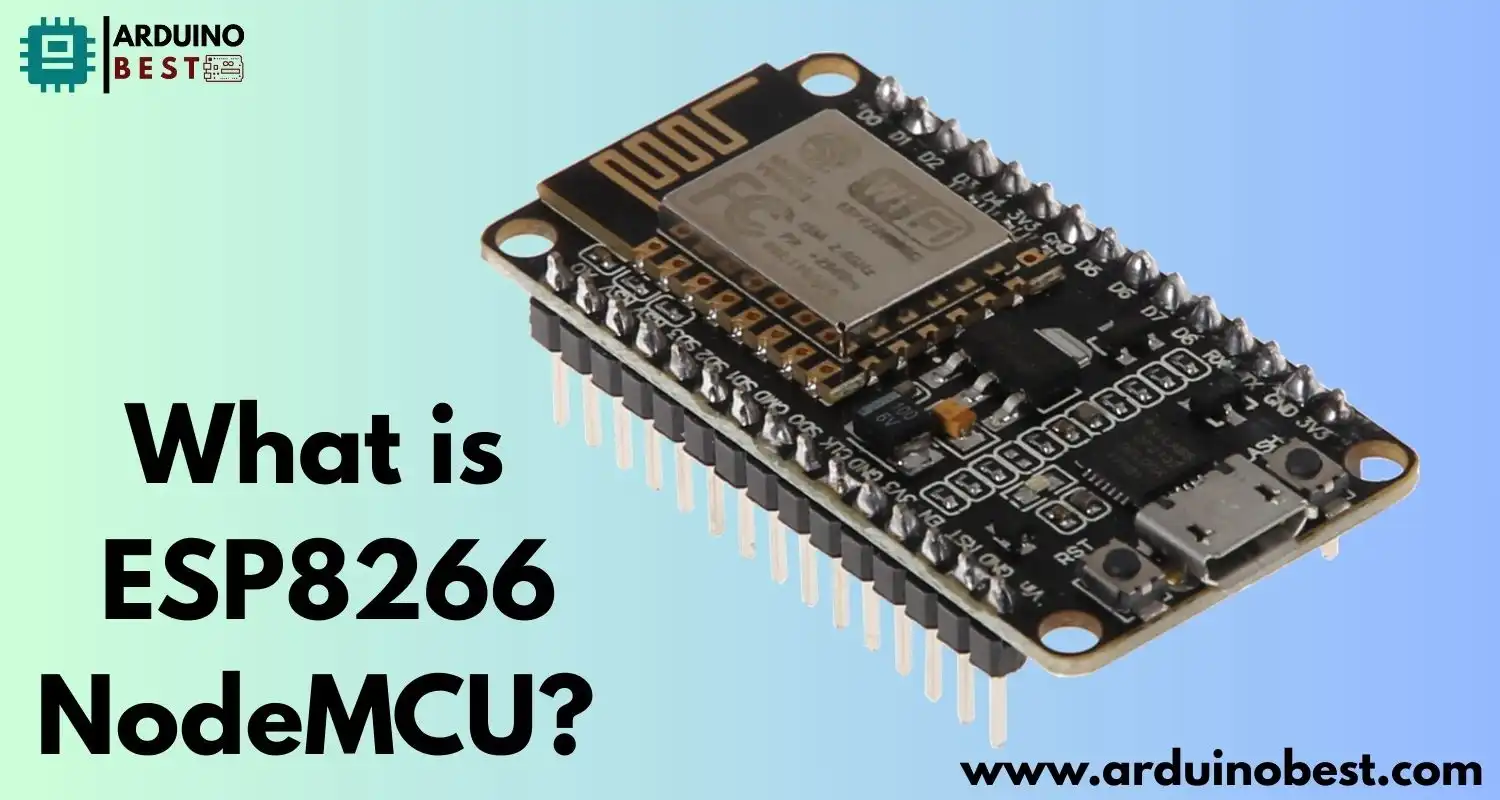
What is ESP8266 NodeMCU?
The ESP8266 is a Wi-Fi System on Chip (SoC) developed by Espressif Systems. It provides a low-cost and efficient way to integrate Wi-Fi connectivity into your projects. The NodeMCU board is based on the ESP8266 chip and is popular due to its open-source nature and compatibility with both Arduino IDE and Lua scripting.

Key Features of the ESP8266 NodeMCU
- Microcontroller Specifications:
- The ESP8266 is powered by a Tensilica LX106 core, running at 80 MHz.
- It comes with 64 KB of RAM and up to 4 MB of flash memory, providing ample space for most projects.
- Connectivity:
- Built-in Wi-Fi support for 802.11 b/g/n standards, which is ideal for connecting devices over the internet.
- General Purpose I/O (GPIO):
- Multiple GPIO pins support PWM, I2C, SPI, and ADC, giving you flexibility to interact with external components.
To dive deeper into this versatile microcontroller, you can explore Espressif’s official resources for more technical details.
NodeMCU: Open-Source and Flexible
NodeMCU refers to the open-source firmware and hardware development board based on the ESP8266. It’s designed to be highly adaptable, enabling programming in both Lua scripts and Arduino IDE, making it accessible for developers of all skill levels.
For those starting with NodeMCU, a great place to begin is the NodeMCU wiki, where you’ll find installation guides and detailed instructions.
Setting Up the Development Environment
Before starting with NodeMCU, you need to set up your development environment, which includes installing the Arduino IDE and configuring it to support the ESP8266.
Steps to Set Up Your Development Environment:
- Download and Install Arduino IDE:
- Go to the Arduino website and download the latest version of the Arduino IDE.
- Install ESP8266 Board Definitions:
- In the Arduino IDE, open the preferences menu and add the ESP8266 board manager URL in the “Additional Boards Manager URLs” field. This will allow you to select ESP8266 as a target device for your projects.
- Connecting NodeMCU to Your Computer:
- Connect your NodeMCU board to the computer using a micro-USB cable and ensure you’ve installed the correct drivers for your system.
Once your environment is set up, you’re ready to start programming. The next section explores how to create your first simple project.
Programming the ESP8266 NodeMCU
One of the great advantages of NodeMCU is its compatibility with Arduino IDE, allowing you to use simple C++ code to program the board. You can start by writing a basic “Hello World” program to test the board’s functionality.
Writing Your First Program:
- Basic Code to Blink an LED:
- Open the Arduino IDE, select the ESP8266 board, and write the following code to blink an LED:
cppCopyEditvoid setup() {
  pinMode(LED_BUILTIN, OUTPUT);
}

void loop() {
  digitalWrite(LED_BUILTIN, HIGH);
  delay(1000);
  digitalWrite(LED_BUILTIN, LOW);
  delay(1000);
}
- Uploading the Code:
- Once you’ve written the code, select the correct board and port in the Arduino IDE and click Upload. The board will begin blinking an LED, indicating that your code was successfully uploaded.
NodeMCU also supports Lua scripting, which can be used to control GPIO pins and perform various tasks on the board.
Practical Projects with ESP8266 NodeMCU
Let’s look at some interesting projects you can create with the ESP8266 NodeMCU. These projects will help you get hands-on experience with the board and see its full potential.
1. Wi-Fi Controlled LED (Arduino IDE)
One of the simplest and most popular projects is controlling an LED via Wi-Fi. You can create a simple web server that allows you to control the state of the LED using a browser.
2. Web Server with NodeMCU (Arduino IDE)
Creating a web server with NodeMCU enables you to control devices over the internet. You can easily set up a server that hosts a webpage, allowing you to toggle pins or sensors.
3. Temperature Monitoring System (Lua Script)
By integrating a temperature sensor with NodeMCU, you can create a simple temperature monitoring system that sends data over Wi-Fi. The NodeMCU can be programmed to send this data to a server or display it on a web page.
4. MQTT Communication (Arduino IDE)
Using the MQTT protocol, you can set up NodeMCU as an MQTT client, enabling lightweight messaging between devices. This is particularly useful for remote monitoring and control in IoT projects.
5. Home Automation System (Arduino IDE)
With NodeMCU, you can control home appliances via the internet. By integrating it with a web interface or smartphone app, you can create a robust home automation system.
Advanced Topics with ESP8266 NodeMCU
For developers looking to explore more advanced features of ESP8266 NodeMCU, here are some topics to explore:
- Deep Sleep Mode:
- NodeMCU offers power-saving features, allowing the board to enter deep sleep mode and significantly reduce power consumption. This is particularly useful for battery-powered projects.
- Over-the-Air (OTA) Updates:
- You can update the firmware of your NodeMCU wirelessly without needing to reconnect it to your computer, which is great for remote projects.
- Integrating with Cloud Services:
- NodeMCU can be integrated with cloud platforms like ThingSpeak and Blynk, enabling you to monitor and control your projects remotely.
Troubleshooting and Common Issues
While NodeMCU is generally easy to use, you may encounter some common issues during development. Here’s how to address them:
- Wi-Fi Connectivity Issues:
- If your NodeMCU is having trouble connecting to your network, check your Wi-Fi credentials and ensure the network is in range.
- Programming Errors:
- Errors during upload can occur due to incorrect board settings or a faulty USB connection. Always double-check the board and port selections in the Arduino IDE.
- Hardware Limitations:
- The NodeMCU board has limited memory and processing power, so it might not be suitable for very complex applications. Be mindful of these limitations when developing projects.
FAQs about ESP8266 NodeMCU
What is the difference between ESP8266 and ESP32?
- The ESP32 is a more powerful chip compared to ESP8266, offering Bluetooth capabilities and more GPIO pins, making it ideal for more advanced projects.
Can I use NodeMCU without a computer?
- NodeMCU can be used for standalone applications once the code is uploaded, but a computer is required for initial programming.
How do I reset my NodeMCU board?
- You can reset the NodeMCU board by pressing the reset button or by connecting the RST pin to GND.
Is NodeMCU compatible with other programming languages?
- Yes, aside from Lua scripts and Arduino IDE, NodeMCU also supports MicroPython, allowing for even more flexibility in programming.
Conclusion
In conclusion, the ESP8266 NodeMCU stands out as an exceptional and cost-effective solution for anyone interested in exploring the world of Internet of Things (IoT) development. Its Wi-Fi connectivity, coupled with the ability to be programmed through Arduino IDE or Lua scripts, makes it highly versatile and accessible for developers of all skill levels. Whether you are a beginner testing your first project or an experienced developer working on advanced IoT systems, the NodeMCU offers the flexibility and power needed to bring ideas to life.
By delving into the features and capabilities of the ESP8266 NodeMCU, you can create a wide range of practical applications—from home automation to remote sensors. The ease with which it integrates with cloud platforms and the ability to use various communication protocols like MQTT or HTTP further extends its potential. Experimenting with NodeMCU enables you to unlock endless possibilities for innovation in smart devices and connected systems. Whether you’re building simple projects or developing complex IoT solutions, NodeMCU provides a reliable and scalable platform to fuel your creativity and bring your IoT visions to reality.
Arduino Projects:
1- Complete Guide for DHT11/DHT22 Humidity and Temperature Sensor With Arduino
2- DHT11 – Temperature and Humidity Sensor
3- DHT22 – Temperature and Humidity Sensor (more accurate than DHT11)
4- BMP180 – Barometric Pressure and Altitude Sensor
5- BMP280 – Barometric Pressure & Temperature Sensor
6- BME280 – Temperature, Humidity, and Pressure Sensor
7- Arduino Flex Sensor Controlled Robot Hand
8- Arduino ECG Heart Rate Monitor AD8232 Demo
9- Arduino NRF24L01 Wireless Joystick Robot Car
10- Arduino Force Sensor Anti-Theft Alarm System
11- Arduino NRF24L01 Transceiver Controlled Relay Light
12- Arduino Rotary Encoder Controlled LEDs: A Complete Guide

